background image

WILLMOP 50 

OPERATING MANUAL 

V01


11  AUFLÖSUNG DER HÄUFIGSTEN BETRIEBSANOMALIEN 

11.1  Willmop startet nicht 

·

  Prüfen Sie anhand der Ladeanzeige an der Batterie, ob die Batterie voll aufgeladen ist. 

·

  Vergewissern Sie sich, dass die Batterie richtig eingelegt ist.

·

  Entfernen Sie die Batterie und setzen Sie ihn wieder ein.

·

  Entfernen Sie den Frischwassertank und prüfen Sie, ob der Wärmeschutz richtig gedrückt ist.

11.2   Willmop hat die Bürsten blockiert 

·

  Die Bürstenmotoren sind überhitzt und der interne Wärmeschutz hat ausgelöst. Um die Bürsten zurückzusetzen, muss Willmop 

durch Drehen des Programmwählers an der Konsole aus- und wieder eingeschaltet werden. 

11.3  Willmop gibt nicht genug Wasser ab 

·

  Stellen Sie sicher, dass der Frischwassertank voll ist.

·

  Stellen Sie sicher, dass Sie das richtige Betriebsprogramm ausgewählt haben.

·

  Überprüfen Sie, ob der Saugschlauch für sauberes Wasser richtig im Tank eingesetzt ist.

·

  Stellen Sie sicher, dass der Saugschlauch für sauberes Wasser nicht verstopft ist.

·

  Stellen Sie sicher, dass der Frischwassertank keine Schmutzpartikel enthält und die Wasserpumpe nicht verstopft ist.

11.4   Willmop putzt nicht gut 

·


•Stellen Sie sicher, dass beide Bürsten korrekt installiert wurden.

·


•Prüfen Sie den Verschleißzustand der Bürsten und tauschen Sie sie gegebenenfalls aus.

·

  Verwenden  Sie  eine  andere  als  die  standardmäßig  angebrachte  Bürste.  Für  die  Reinigung  von  Böden,  auf  denen  Schmutz 

besonders widerstandsfähig ist, empfiehlt es sich, bei Bedarf spezielle Bürsten oder Pads zu verwenden, die auf Anfrage geliefert 
werden. Wenden Sie sich an Ihren Händler. 

11.5  Willmop trocknet nicht perfekt 

·

  Stellen Sie sicher, dass Sie das richtige Betriebsprogramm ausgewählt haben.

·

  Stellen Sie sicher, dass die Verschlüsse des Schmutzwassertanks fest verschlossen sind.

·

  Vergewissern Sie sich, dass sich der Schmutzwassertank in der richtigen Position am Rahmen befindet.

·

  Entfernen Sie den Schmutzwassertank und überprüfen Sie das Saugrohr des Saugfußes auf Gegenstände, die den Luftstrom 

behindern. 

·

  Stellen Sie sicher, dass den Saugfußöffnung nicht blockiert ist. 

·

  Überprüfen Sie den Filter und reinigen Sie ihn gegebenenfalls.

·

  Stellen Sie sicher, dass den Saugfußblätter sauber und nicht abgenutzt sind.

·

  Überprüfen Sie, ob der Schmutzwassertank voll ist. Wenn ja, leeren Sie es. 

11.6 Willmop erzeugt übermäßigen Schaum 

·


• Vergewissern Sie sich, dass der gebremste Schaumreiniger verwendet wurde. Geben Sie gegebenenfalls eine Mindestmenge 

Antischaummittel in den Schmutzwassertank. 

11.6  Willmop erzeugt übermäßigen Schaum 

·

  Vergewissern Sie sich, dass der gebremste Schaumreiniger verwendet wurde. Geben Sie gegebenenfalls eine Mindestmenge 

Antischaummittel in den Schmutzwassertank. 

ACHTUNG - Die übermäßige Schaummenge, die durch falsche Verwendung des Reinigungsmittels verursacht wird, kann 

den Saugmotor beschädigen.


WILLMOP 50 

OPERATING MANUAL 

V01


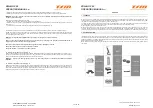
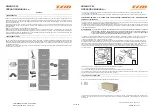
Willmop  is  packed  with  the  squeegee  removed.  Keeping  the  handle  locked  through  the  locking  system  (Fig.  1),  it  is  therefore 
necessary to tilt Willmop until the handle touches the ground and Willmop is completely lying down. Position the squeegee behind 
the  brushes,  making  sure  that  the  two  pins  on  the  frame  fit  into  the  two  holes  on  the  squeegee.  The  presence  of  the  magnet 
ensures attachment to the frame. 

8  GENERAL SAFETY REGULATIONS 

Follow these regulations carefully to avoid harm to the operator and damage to the machine. 

The machine must be used exclusively by authorized and trained personnel. 

Read the labels on the machine with attention. Never cover them for any reason and always replace them if damaged. 

Before using the machine check all the controls, the indicators and any instruments in order to employ it properly. 

Before you use the machine make sure that all doors and covers are positioned as shown in this operating manual. 

Make sure the surface you clean can afford the machine weight. 

When operating the machine be careful of other persons and of children in particular. 

Never mix different types of detergents: this could generate noxious gases. 

Machine storage temperature must be between -25°C and +55°C. 

10 

Operating conditions: room temperature between 0'C and 40"C with relative humidity between 30 and 95%. 

11 

Never set containers of liquid on the machine. 

12 

Never use the machine to transport goods. 

13 

Never use acid solutions which could damage the machine and/or persons. 

14 

Avoid running the brushes with the machine stopped: this could damage the floor. 

15 

Never aspirate flammable, deflagrate, explosive, corrosive, toxic liquids or powders. 

16 

Never use the machine in an explosive environment. 

17 

Use a powder fire extinguisher in case of fire. Do not use water. 

18 

Do not use the machine in the rain. 

19 

Do not open covers and protections while the machine is working. 

20 

Do not hit against shelving or scaffolding. 

21 

Suit operating speed to traction conditions. 

22 

The  machine  must  perform  washing  and  drying  operations  simultaneously.  Any  other  operations  must  be  done  in  zones 
where the presence of unauthorized persons is prohibited. Signal wet floors with suitable signs. 

23 

Whenever the machine has operating troubles, check to make sure these are not due to insufficient ordinary maintenance. If 
this is not the case then enquire with your nearest TSM SRL service center. 

24 

When replacing machine parts always ask for ORIGINAL spare parts from your Authorized TSM SRL Agent and/or Retailer. 

25 

Use only original TSM SRL brushes. 

26 

Avoid clogging the solution tank filter: do not fill with detergent solution a long time before starting to use the machine  

27 

Removing your hands from the handle of the machine while in operation, it will stop for safety. 

28 

Always cut out the electric power supply to the machine whenever maintenance is performed. 

29 

Restore all electrical connections after terminating any maintenance procedures. 

30 

Never remove guards that require tools for removal. 

31 

Never wash the machine with direct or pressurized jets of water or with corrosive substances. 

32 

Have your nearest TSM SRL service center check the machine every 200 operating hours. 

33 

Parking. Fix the handle in the vertical position, sliding the two side lever downwards all the way down. 

34 

Check the connector wear and tear; if the connector is damaged, replace it before using the machine; the replacement must 
be done by authorized personal only. 

35 

Dispose of consumables in accordance with currently applicable laws and codes. 

36 

In the case of  demolition,  it  is important  to divide all the materials and give them to qualified and authorized operators,  in 
accordance with currently applicable laws and codes. 

37 

Batteries  contain  hazardous  and  dangerous  materials  that  must  be  disposed  in  accordance  to  currently  laws  concerning 
hazardous and noxious substances and given to qualified operators. 

38 

Do not leave the working machine unmanned. Make sure that children or not qualified staff do not use it. 

39 

Do not use the machine in dangerous areas. 

40 

Do not use too loose garments or accessories that may get entangled in the moving parts. 

41 

Only one operator at a time can use the machine. 

42 

Apart from the safety instructions included in the present manual, respect and observe the general safety rules for the sector 
and the currently regulations concerning the environment protection. 

43 

If the operator do not have the necessary skills to use the machine or he is in a psychophysical condition altered by chemical 
substances (ex. alcol, drugs, medicines) must be suitably stopped. 

REINIGUNGSTECHNIK 4 YOU GMBH 
Brünnerstraße 192 A, 1210 Wien 


24 von 36

+43 1 925 24 81 www.r4you.at 

Office@r4you.at 

Summary of Contents for WILLMOP 50

Page 1: ...ANDSTAUBSAUGER FREGADORA VERTICAL BRUKER OG VEDLIKEHOLDSVEILEDNING Istruzioni originali Original instructions Instructions originales Originalbetriebsanleitung Instrucciones originales Originale instr...

Page 2: ...ont pas contraignantes TSM SRL par cons quent se r serve le droit tout moment toute modification des organes des d tails la fourniture des accessoires dont elle juge opportun d am lioration ou pour to...

Page 3: ...lemento el stico Overgang skaft b rstebro 9 Batteria Battery Batterie Batterie Bater a Batteri 10 Blocco timone Steering blocking system Syst me de blocage direction Lenkerverriegelung Bloqueo tim n L...

Page 4: ...SIMBOLOGIA USATA SYMBOLS USED SYMBOLES UTILIS S VERWENDETE SYMBOLE S MBOLOS UTILIZADOS SYMBOLER BRUKT Simbolo spazzole Brush symbol Symbole brosses B rstensymbol S mbolo cepillos B rste symbol Indica...

Page 5: ...eriet p nytt Fjern rentvannstanken og kontroller at termisk beskyttelse er riktig trykket 11 2 B rstene g r ikke rundt B rstemotoren er overopphetet og intern sikringen har sl tt ut For sette maskinen...

Page 6: ...enfor Bytt b rstene hvis den hvite slitasjeindikatoren har samme h yde som resten av busten Kontroller at nalen er ren og intakt Rengj r nalen med rentvann og rengj r den med en ren fuktig klut som fo...

Page 7: ...strerer brukerens tilstedev relse gjennom kontakten med hendene p selve h ndtaket For aktivere rengj ringsprogrammet som er valgt p konsollen bare ta tak i h ndtaket med en eller to hender og operasjo...

Page 8: ...det mulig bruke vaskemiddel i konsentrasjonen og p den m ten som er foreskrevet av produsenten For unng dannelse av en for stor mengde skum som kan skade vakuummotoren bruk minsteprocent vaskemiddel...

Page 9: ...ndtaket ber rer bakken og Willmop ligger helt nede Plasser nalen bak b rstene og pass p at de to pinnene p rammen passer inn i de to hullene p nalen Magneten sikrer feste til rammen 8 GENERELLE SIKKE...

Page 10: ...ningen til batteriladeren til batteriet fig 4 ong med dimensjonene WILLMOP 50 OPERATING MANUAL V01 CARATTERISTICHE TECNICHE WILLMOP 50 50 Ecoray Durata emettitore UV h 9000 Potenza sistema Ecoray micr...

Page 11: ...to di scarica utilizzare solo se originale TSM WILLMOP 50 OPERATING MANUAL V01 F r du utf rer Willmop vedlikehold er det n dvendig koble fra batteriet Ikke bruk metallringer eller armb ndsur under ved...

Page 12: ...teria si verifica solo se questa viene utilizzata in modo improprio o se viene danneggiata Evitare il contatto dell elettrolito e del litio con la pelle e gli occhi Se la batteria perde smaltirla in m...

Page 13: ...che il timone tocchi terra e Willmop risulti completamente disteso Inserire le spazzole o il porta pad sui perni appropriati e premere fino in fondo ATTENZIONE Al porta pad deve essere aggiunto il pad...

Page 14: ...enitori di liquidi sulla macchina 12 Non usare la macchina come mezzo di trasporto 13 Non utilizzare soluzioni acide che potrebbero danneggiare la macchina e o le persone 14 Evitare che le spazzole la...

Page 15: ...5 Indicatore dello stato di carica della batteria 2 SPAZZOLE ASPIRATORE 3 SPAZZOLE H2O ASPIRATORE 4 SPAZZOLE H2O 5 SPAZZOLE 6 ENERGY SAVING 7 ECORAY solo nella versione Ecoray WILLMOP 50 OPERATING MA...

Page 16: ...G MANUAL V01 Il livello di carica di Willmop viene indicato all interno dello schermo posizionato in alto sulla batteria stessa Fig 10 Tale schermo risulta sempre in stand by e per la sua lettura nece...

Page 17: ...blemi WILLMOP 50 OPERATING MANUAL V01 9 TRABAJO 9 1 Preparaci n al trabajo Realizar las operaciones descritas en el cap tulo de apertura del paquete Cap tulo 7 9 2 Llenado del tanque del agua limpia S...

Page 18: ...En el caso de desmantelar la maquina es de suma importancia separar los elementos que la componen y suministrarlos a personal calificado y autorizado segun las normas en vigor 37 Las baterias usadas c...

Page 19: ...uando se complete la carga Para extraer la bater a de Willmop se necesita apagar Willmop girando el selector de programa a la posici n OFF bloquear el tim n en posici n vertical deslizando las dos per...

Page 20: ...rio puede decidir si mantenerla incorporada en Willmop durante la fase de recarga o de quitarla si desea continuar trabajando con un segundo juego de bater a Para posicionar la bater a en Willmop es n...

Page 21: ...01 desconectar la bater a No usar anillos de metal o relojes de pulsera durante el mantenimiento ya que pueden causar un cortocircuito el ctrico que puede causar quemaduras graves CUIDADO En el caso d...

Page 22: ...posure of the battery only occurs if it is used improperly or if it is damaged Avoid contact of electrolyte and lithium with skin and eyes If the battery leaks dispose of it properly The battery must...

Page 23: ...ischarge of the battery providing for recharging within a few minutes of its exhaustion Never leave the batteries completely discharged even if the machine is not used Danger of gas exhalation and lea...

Page 24: ...machine make sure that all doors and covers are positioned as shown in this operating manual 6 Make sure the surface you clean can afford the machine weight 7 When operating the machine be careful of...

Page 25: ...S H2O 5 BRUSHES 6 ENERGY SAVING MODE 7 ECORAY MODE available on the only Ecoray version WILLMOP 50 OPERATING MANUAL V01 ACHTUNG Beachten Sie das Gewicht von Willmop beim Transport und beim Heben um Ve...

Page 26: ...rechenden Griff des Rahmens Abb 16 WILLMOP 50 OPERATING MANUAL V01 It is necessary to press the button a third time to turn off the screen alternative the screen will switched off automatically after...

Page 27: ...n zu setzen muss der oben erl uterte urspr ngliche Zustand wiederhergestellt werden ACHTUNG F llen Sie den Tank immer mit sauberem Wasser mit einer Temperatur von nicht mehr als 50 C Im Innern des Fri...

Page 28: ...Austausch muss von qualifiziertem und qualifiziertem Personal durchgef hrt werden 35 F r die Entsorgung von Verbrauchsmaterialien sorgen die den geltenden Gesetzen genauestens entsprechen 36 Teilen S...

Page 29: ...n Batteriesatz weiterarbeiten m chte Um den Batterie in das daf r vorgesehene Fach am Willmop Lenker zu legen ist Folgendes erforderlich Abb 2 Stellen Sie den Programmw hler an der Konsole auf die Pos...

Page 30: ...pulieren Reparaturen d rfen nur von autorisiertem TSM Personal durchgef hrt werden Nicht verwenden wenn ich nass bin Lassen Sie den Batterie w hrend des Betriebs nicht angeschlossen Ziehen Sie den Net...

Page 31: ...nd en tant qu appareil commercial pour adultes form s et autoris s et que ce n est pas un jouet pour enfant WILLMOP 50 OPERATING MANUAL V01 Vor der Durchf hrung der Willmop Wartung ist Folgendes erfor...

Page 32: ...tection thermique lectronique Reportez vous au tableau des plages de temp ratures ci dessous pour les conditions de fonctionnement recommand es La batterie doit tre charg e exclusivement avec le charg...

Page 33: ...h la broche de mise la terre uniquement Les rallonges connect es cette machine doivent tre des cordons trois fils de calibre 12 avec des fiches et des prises trois broches N utilisez pas de rallonge d...

Page 34: ...male Il est n cessaire de recharger la batterie pendant au moins 5 heures avant d utiliser Willmop pour la premi re fois Pour recharger la batterie l utilisateur peut d cider de la conserver incorpor...

Page 35: ...ualifi 39 Ne pas utiliser la machine en lieux dangereuses 40 Ne pas porter des v tements amples ou des accessoires qui peuvent tre pris dans les parties en mouvement 41 Pendant le nettoyage des sols l...

Page 36: ...essort r tractable pour lib rer la roue pivotante au sol Fig 15 De cette fa on Willmop peut tre d plac sur roues en poussant la poign e dans la direction souhait e comme un chariot ordinaire AVERTISSE...

Reviews: