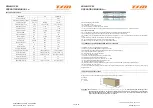
background image

WILLMOP 50 

OPERATING MANUAL 

V01


9  OPERATION 

9.1  Start operations 

Perform the operations described in the Opening the packaging chapter (Chapter 7). 

9.2  Filling the fresh water tank 

Always fill Willmop tank with clean water taken from the tap. 

The maximum allowed filling of the tank is 5 liters (1.32 gallons).


The tank can be filled by  using the flexible hose located inside the fresh tank (Fig. 7) or by removing the clean water tank from 
Willmop and placing it under the tap. To remove the Willmop fresh tank from the chassis you need to: 

·

 remove the clean water intake hose from the fresh tank (Fig. 8);

·

 lifting the sides of the tank up.

To re-insert the Willmop fresh tank on the chassis it is necessary to restore the original condition, explained above. 

WARNING - Always fill the tank with clean water, at a temperature not exceeding 50 °C. 

Inside the fresh tank it is possible to use detergent in the concentration and in the manner prescribed by the 
manufacturer.  To  avoid  the  formation  of  an  excessive  quantity  of  foam  which  would  damage  the  vacuum 
motor, use the minimum percentage of detergent. 

Always use a low foam detergent. To safely avoid the  production of foam, before starting work introduce a 
minimum quantity of anti-foaming liquid into the recovery tank. Do not use pure acids.  

9.3  The recovery tank 

Always make sure you have discharged the dirty water before each new use. Once the dirty water tank is full, turn off Willmop and 
empty  the  tank,  where  this  activity  has  been  arranged. 

Never  exceed  the  limit  load  of  7  liters  (1.85  gallons)  of  dirty  water


provided. 
To remove the Willmop recovery tank from the chassis it is necessary to lift the sides of the tank up (Fig. 9). 
To re-insert the Willmop recovery tank on the chassis it is necessary to replace it in its original position. 

WARNING - Willmop is equipped with a system that detects when the recovery tank is full. When the system detects the 

full  recovery  tank,  the  vacuum  motor  switchs  off  automatically  and  the  frontal  lights  blinks  for  5  seconds, 
after that the Willmop swtches off completely.  It  is necessary that the user  drains the  recovery  tank before 
continuing with the normal cleaning activity. 

When the recovery tank is full, it must be transported in a horizontal position. If the tank when full, was tilted 
during transport, it could cause water spill from the bottom of the tank (Fig. 9.1). 

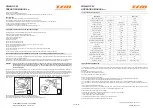
9.4  Selecting the operating mode 

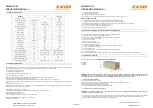
Willmop's  operating  mode  is  chosen  on  the  console  by  using  the  program  selector  knob.  Looking  frontally  at  the  console,  and 
going clockwise, the operating modes are: 

The following functions can be activated during any operating mode: 

If the ENERGY SAVING MODE is switched on, during operating modes 3 and 4, Willmop will save 40% water and 40% suction 
power (in operating mode 3), reducing also the noise during use, until the ENERGY SAVING mode button is switched off. 

If the ECORAY MODE (available on the only Ecoray version) is switched on, Willmop will use the UV ray system to sanitize the 
floor, without the need for more detergent products. The ECORAY MODE will be active until the button is switched off. 

9.5  Battery status indicator 

The Willmop charge level is indicated in the digital screen located at the top of the battery itself (Fig. 10). The screen is always in 
stand-by and to read it, press the button provided. 
By pressing the button several times, the information shown are: 

·

 the remaining battery charge 

·

 the battery voltage 

B VACUUM 

B  H2O +  VACUUM 

B  H2O  

BRUSHES 

ENERGY SAVING MODE  

ECORAY MODE (available on the only Ecoray version) 

WILLMOP 50 

OPERATING MANUAL 

V01


ACHTUNG  -  Beachten  Sie  das  Gewicht  von  Willmop  beim  Transport  und  beim  Heben,  um  Verletzungen  und 

Beschädigungen zu vermeiden. 

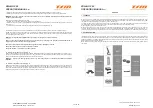
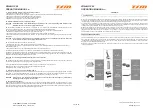
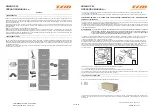
9.12  Parken von Willmop 

Den Lenker in senkrechter Position arretieren (Abb. 1). Stellen Sie sicher, dass Sie die Tanks vollständig entleert haben. Stellen 
Sie sicher, dass die Batterie nicht vollständig entladen ist und laden Sie ihn gegebenenfalls auf. 
Stellen Sie sich vor Willmop und heben Sie mit einer Hand die Bürsteneinheit leicht an und lassen Sie mit der anderen Hand das 
schwenkbare  Rad  zum  Boden  los  (führen  Sie  die  in  Kapitel  9.10  beschriebenen  Schritte  aus).  Auf  diese  Weise  belastet  das 
Gewicht von Willmop die Bürsten während der Parkphase nicht. 

ACHTUNG - Stellen Sie sicher, dass Willmop auf einem glatten Untergrund ohne Gefälle geparkt ist. 

Wenn Willmop nicht regelmäßig verwendet wird, lagern Sie den aufgeladenen Batterie an einem trockenen und sauberen 
Ort. Stellen Sie sicher, dass die Batterie monatlich aufgeladen wird. 

10  WARTUNG 

ACHTUNG  -  Diese  Vorgänge  müssen  bei  ausgeschalteter  Maschine  und  ausgeschaltetem  Programmwähler  in  der 

Konsole mit Handschuhen ausgeführt werden, um Ihre Hände zu schützen und um sicherzustellen, dass sich 
keine Gegenstände oder Personen in der Nähe befinden. 

NACH JEDEM GEBRAUCH 

·

  Entleeren Sie die Tanks und spülen Sie sie mit frischem Wasser aus.

·

  Reinigen Sie die Tanks mit einem sauberen, feuchten Tuch.

·

  Laden Sie die Batterie bei Bedarf auf. 

·

  Überprüfen Sie den Verschleiß und die Sauberkeit beider Bürsten. Reinigen Sie die Bürsten mit frischem Wasser (siehe unten).

·

  Ersetzen Sie die Bürsten, wenn die weiße Verschleißanzeige die gleiche Höhe wie die anderen Borsten hat.

·

  Überprüfen  Sie,  ob  der  Saugfuß  sauber  und  intakt  ist.  Reinigen  Sie  den  Saugfuß  mit  einem  Strahl  frischem  Wasser  und 

reinigen Sie ihn mit einem sauberen, feuchten Tuch (wie unten beschrieben). 

·

  Tauschen Sie die Wischgummis aus, wenn sie vollständig abgenutzt sind, nachdem Sie sie auf beiden Seiten verwendet haben 

(wie unten erläutert). 

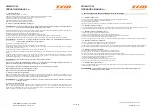
Entfernen Sie die Bürsten 

Wenn  der  Lenker  durch  das  Verriegelungssystem  verriegelt  bleibt  (Abb.  1),  muss Willmop  gekippt  werden,  bis  der  Lenker  den 
Boden berührt und Willmop vollständig entspannt ist. Ziehen Sie die Bürsten von der Scheibe in Ihre Richtung (Abb. 17). 
Überprüfen  Sie  die  Bürstenscheiben  visuell  und  reinigen  Sie  sie  mit  einem  sauberen,  trockenen  Tuch,  bevor  Sie  sie  wieder 
einsetzen. 

Entfernen Sie den Saugfuß 

Wenn  der  Lenker  durch  das  Verriegelungssystem  verriegelt  bleibt  (Abb.  1),  muss Willmop  gekippt  werden,  bis  der  Lenker  den 
Boden berührt und Willmop vollständig entspannt ist. Ziehen Sie den Saugfuß in Ihre Richtung (Abb. 18). 

Überprüfen  Sie  den  Saugfuß  visuell  und  reinigen  Sie  ihn  mit  einem  sauberen,  feuchten  Tuch,  bevor  Sie  ihn  wieder  in  seiner 
Position einsetzen. 

Entfernen / ersetzen Sie die Dichtungen des Saugfußes 

Lösen  Sie  nach  dem  Entfernen  der  Saugfuß  von  Willmop  die  Knöpfe,  mit  denen  die  Klingen  an  dem  Saugfuß  befestigt  sind. 
Sobald der Stopper entfernt wurde, kann das vordere Gummiblatt leicht entfernt werden. Wiederholen Sie den Vorgang für beide 
Dichtungen des Saugfußes. Um den Saugfuß wieder zusammenzubauen, gehen Sie in umgekehrter Reihenfolge vor. 

WÖCHENTLICH 

Reinigen Sie Willmop vollständig mit einem sauberen, feuchten Tuch. 

Zubehör / Ersatzteile 

Verwenden Sie nur von TSM zugelassenes Zubehör und Ersatzteile. Die ausschließliche Verwendung von Originalzubehör und  -
ersatzteilen gewährleistet, dass Willmop sicher und problemlos verwendet werden kann. 

REINIGUNGSTECHNIK 4 YOU GMBH 
Brünnerstraße 192 A, 1210 Wien 


25 von 36

+43 1 925 24 81 www.r4you.at 

Office@r4you.at 

Summary of Contents for WILLMOP 50

Page 1: ...ANDSTAUBSAUGER FREGADORA VERTICAL BRUKER OG VEDLIKEHOLDSVEILEDNING Istruzioni originali Original instructions Instructions originales Originalbetriebsanleitung Instrucciones originales Originale instr...

Page 2: ...ont pas contraignantes TSM SRL par cons quent se r serve le droit tout moment toute modification des organes des d tails la fourniture des accessoires dont elle juge opportun d am lioration ou pour to...

Page 3: ...lemento el stico Overgang skaft b rstebro 9 Batteria Battery Batterie Batterie Bater a Batteri 10 Blocco timone Steering blocking system Syst me de blocage direction Lenkerverriegelung Bloqueo tim n L...

Page 4: ...SIMBOLOGIA USATA SYMBOLS USED SYMBOLES UTILIS S VERWENDETE SYMBOLE S MBOLOS UTILIZADOS SYMBOLER BRUKT Simbolo spazzole Brush symbol Symbole brosses B rstensymbol S mbolo cepillos B rste symbol Indica...

Page 5: ...eriet p nytt Fjern rentvannstanken og kontroller at termisk beskyttelse er riktig trykket 11 2 B rstene g r ikke rundt B rstemotoren er overopphetet og intern sikringen har sl tt ut For sette maskinen...

Page 6: ...enfor Bytt b rstene hvis den hvite slitasjeindikatoren har samme h yde som resten av busten Kontroller at nalen er ren og intakt Rengj r nalen med rentvann og rengj r den med en ren fuktig klut som fo...

Page 7: ...strerer brukerens tilstedev relse gjennom kontakten med hendene p selve h ndtaket For aktivere rengj ringsprogrammet som er valgt p konsollen bare ta tak i h ndtaket med en eller to hender og operasjo...

Page 8: ...det mulig bruke vaskemiddel i konsentrasjonen og p den m ten som er foreskrevet av produsenten For unng dannelse av en for stor mengde skum som kan skade vakuummotoren bruk minsteprocent vaskemiddel...

Page 9: ...ndtaket ber rer bakken og Willmop ligger helt nede Plasser nalen bak b rstene og pass p at de to pinnene p rammen passer inn i de to hullene p nalen Magneten sikrer feste til rammen 8 GENERELLE SIKKE...

Page 10: ...ningen til batteriladeren til batteriet fig 4 ong med dimensjonene WILLMOP 50 OPERATING MANUAL V01 CARATTERISTICHE TECNICHE WILLMOP 50 50 Ecoray Durata emettitore UV h 9000 Potenza sistema Ecoray micr...

Page 11: ...to di scarica utilizzare solo se originale TSM WILLMOP 50 OPERATING MANUAL V01 F r du utf rer Willmop vedlikehold er det n dvendig koble fra batteriet Ikke bruk metallringer eller armb ndsur under ved...

Page 12: ...teria si verifica solo se questa viene utilizzata in modo improprio o se viene danneggiata Evitare il contatto dell elettrolito e del litio con la pelle e gli occhi Se la batteria perde smaltirla in m...

Page 13: ...che il timone tocchi terra e Willmop risulti completamente disteso Inserire le spazzole o il porta pad sui perni appropriati e premere fino in fondo ATTENZIONE Al porta pad deve essere aggiunto il pad...

Page 14: ...enitori di liquidi sulla macchina 12 Non usare la macchina come mezzo di trasporto 13 Non utilizzare soluzioni acide che potrebbero danneggiare la macchina e o le persone 14 Evitare che le spazzole la...

Page 15: ...5 Indicatore dello stato di carica della batteria 2 SPAZZOLE ASPIRATORE 3 SPAZZOLE H2O ASPIRATORE 4 SPAZZOLE H2O 5 SPAZZOLE 6 ENERGY SAVING 7 ECORAY solo nella versione Ecoray WILLMOP 50 OPERATING MA...

Page 16: ...G MANUAL V01 Il livello di carica di Willmop viene indicato all interno dello schermo posizionato in alto sulla batteria stessa Fig 10 Tale schermo risulta sempre in stand by e per la sua lettura nece...

Page 17: ...blemi WILLMOP 50 OPERATING MANUAL V01 9 TRABAJO 9 1 Preparaci n al trabajo Realizar las operaciones descritas en el cap tulo de apertura del paquete Cap tulo 7 9 2 Llenado del tanque del agua limpia S...

Page 18: ...En el caso de desmantelar la maquina es de suma importancia separar los elementos que la componen y suministrarlos a personal calificado y autorizado segun las normas en vigor 37 Las baterias usadas c...

Page 19: ...uando se complete la carga Para extraer la bater a de Willmop se necesita apagar Willmop girando el selector de programa a la posici n OFF bloquear el tim n en posici n vertical deslizando las dos per...

Page 20: ...rio puede decidir si mantenerla incorporada en Willmop durante la fase de recarga o de quitarla si desea continuar trabajando con un segundo juego de bater a Para posicionar la bater a en Willmop es n...

Page 21: ...01 desconectar la bater a No usar anillos de metal o relojes de pulsera durante el mantenimiento ya que pueden causar un cortocircuito el ctrico que puede causar quemaduras graves CUIDADO En el caso d...

Page 22: ...posure of the battery only occurs if it is used improperly or if it is damaged Avoid contact of electrolyte and lithium with skin and eyes If the battery leaks dispose of it properly The battery must...

Page 23: ...ischarge of the battery providing for recharging within a few minutes of its exhaustion Never leave the batteries completely discharged even if the machine is not used Danger of gas exhalation and lea...

Page 24: ...machine make sure that all doors and covers are positioned as shown in this operating manual 6 Make sure the surface you clean can afford the machine weight 7 When operating the machine be careful of...

Page 25: ...S H2O 5 BRUSHES 6 ENERGY SAVING MODE 7 ECORAY MODE available on the only Ecoray version WILLMOP 50 OPERATING MANUAL V01 ACHTUNG Beachten Sie das Gewicht von Willmop beim Transport und beim Heben um Ve...

Page 26: ...rechenden Griff des Rahmens Abb 16 WILLMOP 50 OPERATING MANUAL V01 It is necessary to press the button a third time to turn off the screen alternative the screen will switched off automatically after...

Page 27: ...n zu setzen muss der oben erl uterte urspr ngliche Zustand wiederhergestellt werden ACHTUNG F llen Sie den Tank immer mit sauberem Wasser mit einer Temperatur von nicht mehr als 50 C Im Innern des Fri...

Page 28: ...Austausch muss von qualifiziertem und qualifiziertem Personal durchgef hrt werden 35 F r die Entsorgung von Verbrauchsmaterialien sorgen die den geltenden Gesetzen genauestens entsprechen 36 Teilen S...

Page 29: ...n Batteriesatz weiterarbeiten m chte Um den Batterie in das daf r vorgesehene Fach am Willmop Lenker zu legen ist Folgendes erforderlich Abb 2 Stellen Sie den Programmw hler an der Konsole auf die Pos...

Page 30: ...pulieren Reparaturen d rfen nur von autorisiertem TSM Personal durchgef hrt werden Nicht verwenden wenn ich nass bin Lassen Sie den Batterie w hrend des Betriebs nicht angeschlossen Ziehen Sie den Net...

Page 31: ...nd en tant qu appareil commercial pour adultes form s et autoris s et que ce n est pas un jouet pour enfant WILLMOP 50 OPERATING MANUAL V01 Vor der Durchf hrung der Willmop Wartung ist Folgendes erfor...

Page 32: ...tection thermique lectronique Reportez vous au tableau des plages de temp ratures ci dessous pour les conditions de fonctionnement recommand es La batterie doit tre charg e exclusivement avec le charg...

Page 33: ...h la broche de mise la terre uniquement Les rallonges connect es cette machine doivent tre des cordons trois fils de calibre 12 avec des fiches et des prises trois broches N utilisez pas de rallonge d...

Page 34: ...male Il est n cessaire de recharger la batterie pendant au moins 5 heures avant d utiliser Willmop pour la premi re fois Pour recharger la batterie l utilisateur peut d cider de la conserver incorpor...

Page 35: ...ualifi 39 Ne pas utiliser la machine en lieux dangereuses 40 Ne pas porter des v tements amples ou des accessoires qui peuvent tre pris dans les parties en mouvement 41 Pendant le nettoyage des sols l...

Page 36: ...essort r tractable pour lib rer la roue pivotante au sol Fig 15 De cette fa on Willmop peut tre d plac sur roues en poussant la poign e dans la direction souhait e comme un chariot ordinaire AVERTISSE...

Reviews: