Easi-Walker User Guide
4
Attaching Easi-Walker Pedometers to the docking station
•
The first time that you attach an Easi-Walker pedometer to the PC, Windows must identify it
and install its own driver. This can take several minutes to complete if many pedometers
are connected at the same time.
TIP:
It is generally quicker to add each pedometer one at a time to the docking station while the
data is uploading from the pedometer to the PC
•
When the pedometers are connected to a PC, they will show the name allocated to that
pedometer. The name can be changed using the Easi-Walker application if required
•
At all times while the Easi-Walker pedometer is connected to the PC it will be charging,
regardless of whether the application software is running
Running the Easi-Walker Application Software
•
From the
Start
menu
,
go to
All Programs
and select the program group
TTS Group
. Then
select
Easi-Walker
•
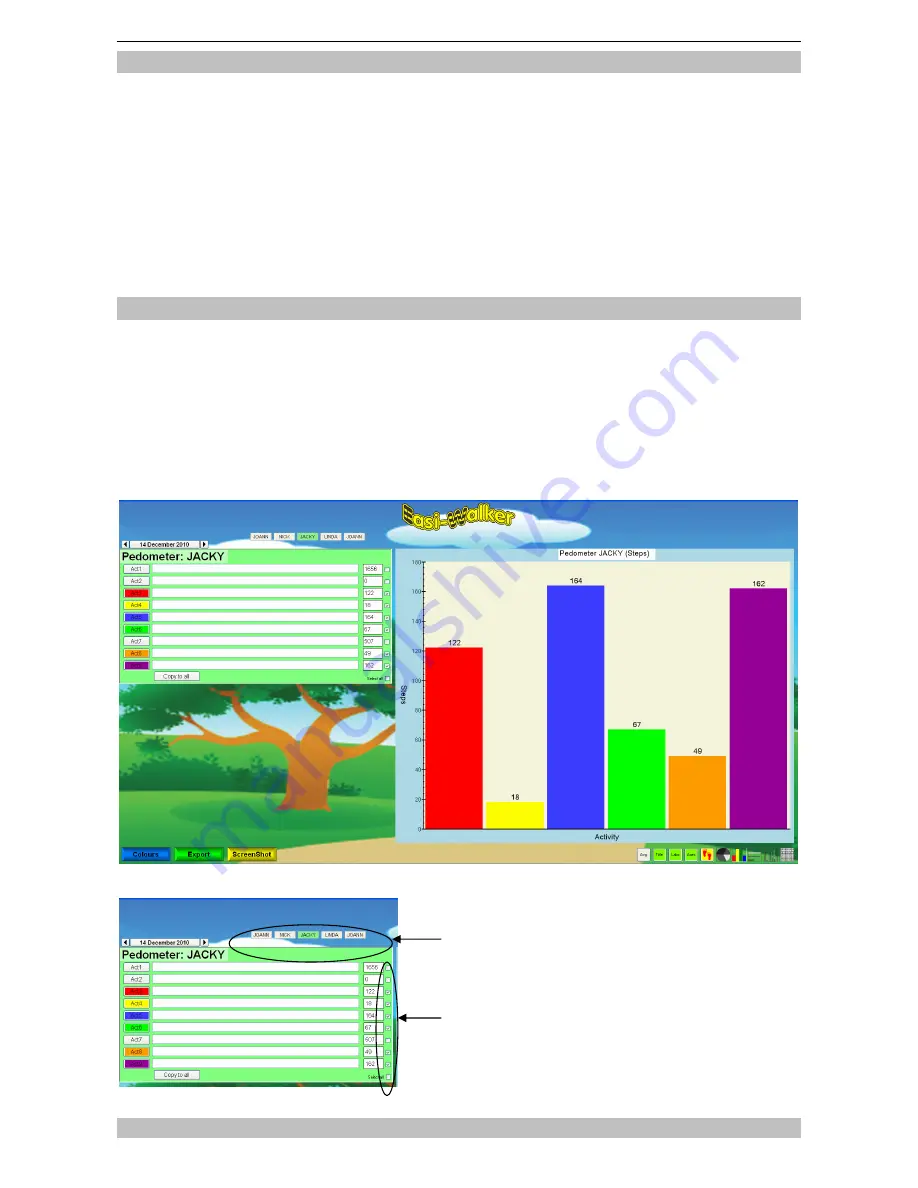
Easi-Walker will run and initially show a blank activity table on the left and a selection of
buttons along the bottom. As pedometers are plugged in, the data from the pedometer will
be loaded and shown as a chart
•
When a pedometer has been loaded, the name is shown near the top of the screen. If the
pedometer is currently attached to the PC, the pedometer name will be in red lettering, if it
is not connected the name is in black lettering
•
The screenshot shows that five pedometers have
been loaded on the 14
th
December and JACKY’s
data has been selected.
•
All 9 activities were completed, if there are
certain values that are 0 steps or you don’t want
to include in the days step count, these can be
unchecked. In the above table only 6 have been
selected to show in the graph.
Summary of Contents for Easi-Walker
Page 1: ......


