background image

15 


5.  After each use of the device, charge the battery to prolong its lifespan. Do not store the scooter battery in rooms with temperatures 

which exceed 50℃ or 

-

20℃ (e.g., do not expose the battery under the sun during summer time); do not leave the battery near fire. 

These dangerous actions may lead to battery deterioration, over-heating and even cause inflammation. If the scooter is not used within 
30 days, charge the battery and keep the device indoor where its cool and dry. You need to charge the battery at least once every 60 
days to prevent possible damages which is beyond limited warranty. 

6.  Always fully charge the battery to extend its lifespan. When using the device at normal room temperature, the battery will last longer 
and its performance will be better; however, vehicle performance will worsen if you ride the scooter while the temperature stays below 

0℃. For instance, at 

-

20℃, the travel distance is less than normal conditions, but as the temperature increases, the vehicle will perform 

better. You can check the remaining distance in the App. 

Note: A fully charge scooter will last about 120-180 days of standby time. The built-in smart chip in the battery will store charging 
information automatically. Failure to recharge the battery at least once a month may result irreversible damages to the battery which is 
beyond limited warranty. (Caution: Do not disassemble the device by unauthorized personnel as there is a risk of electric shock or serious 
injury caused by a short circuit) 

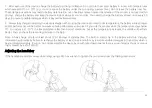
Adjusting the handlebar 

If the handlebar and stem sways while riding, using a M5 hex wrench to tighten the two screws near the folding mechanism. 


Summary of Contents for ONE XM

Page 1: ...O N E TUBO O N E USER MANUAL...

Page 2: ...the electric scooter Contents 1 Device and Accessories 2 2 Product Overview 3 3 Assembling the Scooter 5 4 Charging the Scooter 6 5 Learning to Ride 6 6 Safety Instructions 8 7 Folding and Transporta...

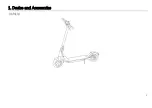
Page 3: ...2 1 Device and Accessories Vehicle...

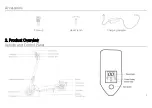
Page 4: ...3 Charging Adapter Accessories 2 Product Overview Vehicle and Control Panel Screw 2 Hex Wrench...

Page 5: ...level is indicated by three power lights on the control panel As power is consumed the lights will change from solid to flashing and finally turn off from left to right 6 Front Light Quickly double c...

Page 6: ...ing the Scooter 1 Unfold the scooter and adjust the steering rob into the upright position 2 Set handlebar vertically 3 Use hew wrench in the box to tighten the screws in the handlebar 4 Testing the p...

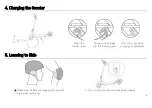
Page 7: ...ing to Ride Open the rubber cover Connect the charger into the charging port Close the cover when charging is completed Please wear helmet and knee pad to prevent injury when practicing 1 Turn on the...

Page 8: ...p on the other foot when the scooter starts to coast then press the accelerate button only accelerate when the speed is beyond 5km h 5 Tilt your body to the steering direction and turn the handlebar s...

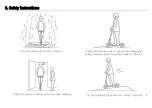
Page 9: ...ecommended to ride in the rain Slightly bend knee to ride on uneven road and speed bumps please adjust to low speed mode 5 10km h Ride with caution and look out for overhead obstacles Do not accelerat...

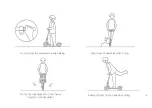
Page 10: ...9 Do not press the accelerator while walking Steer clear of obstacles when riding Do not hang backpacks or other heavy objects on the handlebar Keep both feet on the deck while riding...

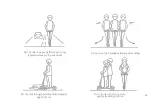
Page 11: ...eavy traffic lanes or busy residential areas with pedestrians Do not turn the handlebar sharply while riding Do not ride through puddles which exceeds depth of 2cm Do not ride with two or more people...

Page 12: ...11 Do not step on the back of the fender Do not touch the disc brake Do not leave your hand off the handlebar while riding Do not ride up and down stairs or jump over obstacles...

Page 13: ...ch to the low speed mode and pass them slowly If you are moving in the same direction with pedestrians please steer to the left side as much as possible applicable to countries with right hand side tr...

Page 14: ...echanism locate at the steering stem release the lever grasp the stand firmly and pull it down Securing the stand by inserting a hook through a special ring which is located on the rear wheel mudguard...

Page 15: ...n destroy internal parts Making sure to turn off the scooter and the power is unplugged when washing do not wash electric scooter using high pressure water When charging is completed it is necessary t...

Page 16: ...last longer and its performance will be better however vehicle performance will worsen if you ride the scooter while the temperature stays below 0 For instance at 20 the travel distance is less than n...

Page 17: ...Degree Water Proof Suspension Front suspension Tire 8 5 Inch solid tyres Brake EBS Brake Disc Brake LCD Display Speed Battery Gears Motor 350W Battery 36V 7 5Ah Charger Voltage Charging Time 4 6 Hour...

Page 18: ...NOTES...

Page 19: ...NOTES...

Page 20: ...TUBO B I K E S com...

Reviews: