Eco Sweeping Machine
1
Conversion for front attachment
The safety instructions in Chapter 3.3 are
mandatory!
Accident hazard!
Pay attention to a safe placement of the Eco
sweeping machine. If necessary, secure the
sweeping machine in additional ways.
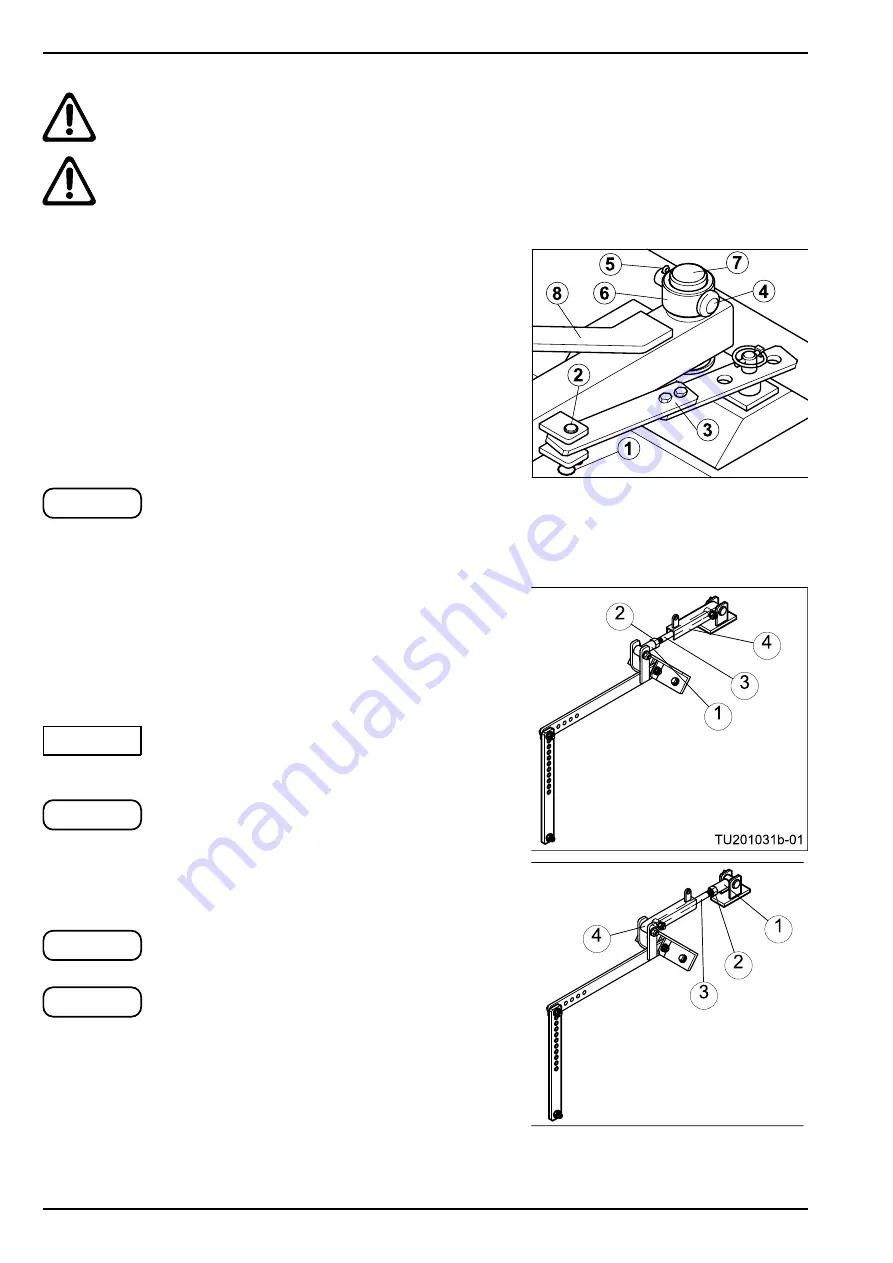
• Remove the hydraulic hoses from the loop of the 3-point
linkage.
• Detach the spring plug (1) and bolt (2).
• Move the pitch rod (3) or pitch control cylinder to the
side.
• Unmount bolt (4) using the splint pin (5) and pull the bar-
rel (6) off the central bolt (7).
• Lift the 3-point linkage from the central bolt and set down
rotated by 180 degrees.
Take the 3-point linkage's own weight into
account. If necessary, shift the support up-
wards.
• Reinstall the barrel (6) together with the bolt (4) and the
splint pin (5) on the central bolt.
• Secure the pitch rod (3) or pitch control cylinder, using
the bolt (2) and spring plug (1).
• Hang the hydraulic hoses back into the loop of the 3-
point linkage.
The positioning of the hydraulic hoses must
be checked, as damage occurs if they get
entangled or squashed.
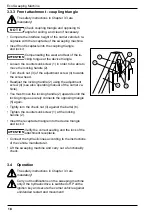
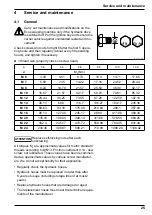
For the Eco sweeping machine with dirt coll-
ection vessel, the emptying mechanism must
be converted.
• Convert parts (1), (2), (3), and (4) according to the at-
tachment version and secure again (see diagram).
Replace self-locking nuts after each unscre-
wing!
The attachment sequence for the frontal at-
tachment is the same as for the rear attach-
ment (see previous page).
front attachment
rear attachment
NOTE
NOTE
NOTE
NOTE
ATTENTION


