background image

16

Check that the hose is not kinked or under tension.
Apart from the connection point the hose must not 

be touching any part of the Barbecue or Wok burner 

where it may get hot and be damaged.

For storage, cylinder exchange or refilling, 

disconnect the hose at the cylinder only.

Do not 

disconnect the hose from the appliance.

Do not

 attempt to open or adjust the regulator, if 

you think it is not working properly consult your local 

dealer.
FOR PERMANENT CONNECTIONS to natural gas or 

a fixed propane supply, an authorised person, in 

accordance with these instructions, local gas fitting 

regulations, municipal building codes, the AGA       

installation code AS5601 and any other relevant 

statutory regulations, must be employed.

For connection to a natural gas bayonet fitting, 

a gas regulator must be fitted at the inlet of the 

appliance, and an approved 10mm, class A, natural 

gas hose (no longer than 2 metres), going from the 

gas regulator to the bayonet point, complying with 

AS1869 must be used.

Where a mobile appliance is to be connected to 

a fixed gas supply via a flexible hose connection 

the restraining cord supplied must be fixed to the 

appliance and the wall/floor within 50mm of each 

connection point. The length of the restraining cord 

shall not exceed 80% of the length of the hose as it 

is designed to prevent stress on the hose assembly 

when the appliance is moved out of its normal 

operating position. 

It is recommended that an isolation valve and union 

be fitted before the barbecue; refer AS5601/ AG601 

for correct pipe sizing to ensure adequate gas is 

supplied to the appliance.
For natural gas check the pressure of the regulator 

and adjust it if necessary to the pressure shown on 

the data plate.

GAS INSTALLATION

PROPANE GAS TO NATURAL GAS 

CONVERSION PROCEDURE FOR 

AUTHORIZED INSTALLER

• 

Disconnect the gas supply and remove the plate, 

grills, flare guards and burners from the barbecue 

and the Wok burner if fitted.

• 

Remove the main injectors and replace them 

with the correct 1.7mm injectors for each main 

burner. If wok burner fitted replace the injector 

with the correct size required. (see data plate) 

• 

Re-assemble the burners, flare guards, plate and 

grills.

• 

Replace the PROPANE GAS hose and regulator 

with an approved natural gas regulator and 

hose.

• 

Turn the gas on and test for leaks, repair if 

necessary.

• 

Light 3 burners and turn them to high and set the 

pressure at 1 KPA.

• 

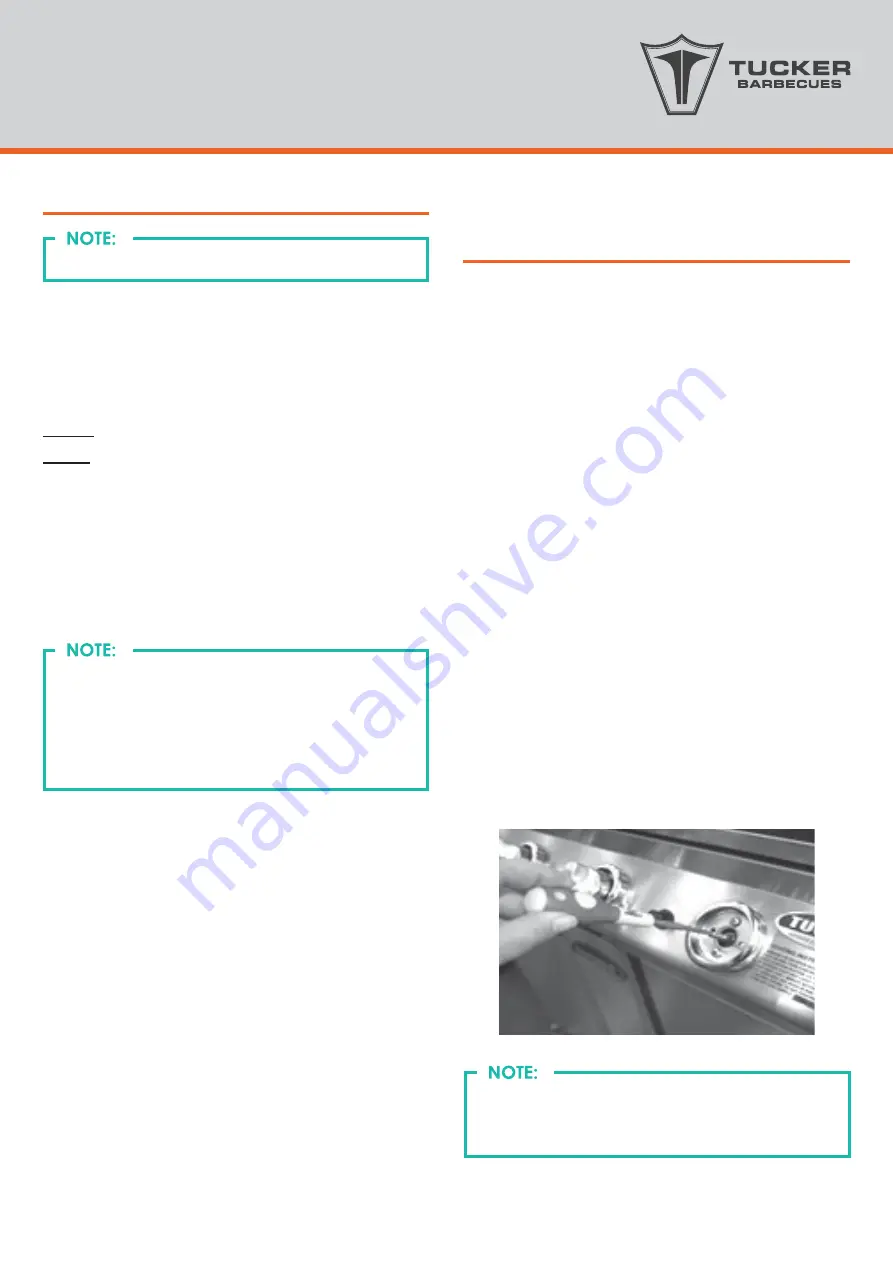
Now turn all the burners to the “LOW” setting and 

check the flame pattern is steady, if necessary 

you can adjust the low setting by removing the 

gas control knobs and insert the 2.4mm slotted 

screw driver supplied into the valve shaft, the 

“low” setting can be adjusted up or down to suit 

your gas pressure by turning the screw driver. 

• 

Turn the screw driver anti-clockwise to adjust 

the flame height up or turn it clockwise to Turn it 

down.

Check for leaks after each gas refill.

The installer must test the BBQ when the            

installation is completed before leaving to 

make sure the appliance operates correctly 

and is safe for the operator to use. The gas inlet       

connection must have a thread in 

accordance with AS ISO 7.1 or AS 1722.2.

You want to achieve the lowest flame height at 

“LOW” but you don’t want to adjust it too low as 

it could blow out on its own or due to a breeze. 

Summary of Contents for GTR Series

Page 1: ... OPERATING INSTRUCTIONS BUILT IN BARBECUE FOR GTR SERIES MODELS GTR3 GTR4 GTR5 GTR6 GTR3 S GTR4 S GTR5 S GTR6 S GTR3 SS GTR4 SS GTR5 SS GTR6 SS IMPORTANT PLEASE READ ALL INSTRUCTIONS BEFORE YOU ASSEMBLE INSTALL OR OPERATE THIS APPLIANCE ...

Page 2: ...Y INSTRUCTIONS INSTALLATION INSTRUCTIONS WARNINGS SPECIFICATIONS DIMENSIONS GAS INSTALLATION AND LEAK TEST PROCEDURE OPERATING INSTRUCTIONS COOKING HINTS TROUBLESHOOTING SERVICE MAINTENANCE WARRANTY 3 4 9 11 12 15 18 19 20 22 23 CONTENTS ...

Page 3: ...ETY If you smell gas 1 Shut off gas supply to appliance 2 Extinguish any open flame 3 Open lid or hood 4 If odour continues immediately call your gas supplier or your Fire Department Read all instructions carefully before assembly and usage of the barbecue Do not use or store flammable materials in or near this appliance Always leak test check hose connections after filling cylinders Check cylinde...

Page 4: ... FOR ASSEMBLY Check that you have the correct gas type Barbecue i e L P GAS red sticker NAT GAS black sticker The Gas Type Label is located on the right hand side of the Barbecue Body BARBECUE PARTS 1x GTR Barbecue Body 1x Barbecue Fascia 1x Grease Tray 1x Control Valve adjustment Screwdriver 1x Grill 1x Plate 1x Hose Regulator Large Flare Guard Check Table Below Small Flare Guard Check Table Belo...

Page 5: ...lation and Operation of the Roasting Hood and or Wok Burner if they are to be fitted to the BBQ GTR Angle Support Kit GTR Side Panels Support Kit GTR ANGLE SUPPORT KIT ASSEMBLY 2x Side Angles 2x Fascia Brackets 4x M6 Bolts 2x Small Bolts 2x Nuts 2x Spacers 4x Washers To install GTR BBQ into Non combustible you must have one of the kits depending if it s going to be hanging or sitting on the bencht...

Page 6: ...the BBQ by sliding them on the bottom BBQ vent cover as per photo 4 Screw the bolts on to the brackets 5 Insert the bolt and spacer into the bracket hole and secure it into the nut attached to the inner part of the fascia as per photos The outer bolt screws into the BBQ pre thread hole but the inner bolt it has to be secured with a washer and nut ...

Page 7: ...ASSEMBLY 1 Remove the grease tray from the BBQ to install the BBQ fascia kit 2 Place the two side panels into the correct side of the BBQ than bolt the four bolts on each side 4 After the installation is done the BBQ will look like the one in the photo bellow 3 Line up the fascia hole with the one of the side panel insert the spacer between the side panel and the fascia and screw the bolt in so it...

Page 8: ...d into the Body of the BBQ Remove any cable ties securing the Wok Trivet and then place it back into position above the Wok Burner 9 The SS Wok Burner can be fitted with an optional Hinged Flat Weather Cover Lid or a Roasting Hood to protect it from the weather when not in use Read any Assembly Installation and Operation Instructions packaged with the Roasting Hood if provided The Wok Trivet is us...

Page 9: ... no overhead cover figure 1 Within a partial enclosure that includes an overhead enclosure and no more than two walls figure 2 and 3 Within a partial enclosure that includes an overhead cover and more than two walls the following shall apply figures 4 and 5 At least 25 of the total wall area is completely open At least 30 of the remaining wall area is open and unrestricted In the case of balconies...

Page 10: ...en and unrestrict ed OPEN AT SIDE AT LEAST 25 OF TOTAL WALL AREA 30 OR MORE IN TOTAL OF THE REMAINING WALL AREA IS OPEN AND UNRESTRICTED OPEN SIDE AT LEAST 25 OF TOTAL WALL AREA 30 OR MORE IN TOTAL OF THE REMAINING WALL AREA IS OPEN AND UNRESTRICTED Open side at least 25 of total wall area 30 or more in total of the remaining wall area is open and unrestrict ed ...

Page 11: ...and hose assembly connection to the appliance is fitted by the manufacturer The appliance inlet is 3 8 S A E male and is located in the base of the BBQ on the right hand side at the front The minimum capacity propane cylinder for this barbecue is 4 KG The intended use of this barbecue is to be installed into a Tucker GTR Cabinet Trolley Pedestal Trolley Chef Stand or into a Tucker Insulation Jacke...

Page 12: ...955 915 320 600 280 630 470 740 490 565 90 260 GTR4 695 655 320 600 280 630 470 740 490 565 90 260 GTR4SS 1115 1075 320 600 280 630 470 740 490 565 90 260 GTR5 855 815 320 600 280 630 470 740 490 565 90 260 GTR5SS 1275 1235 320 600 280 630 470 740 490 565 90 260 GTR6 1015 975 320 600 280 630 470 740 490 565 90 260 GTR6SS 1435 1395 320 600 280 630 470 740 490 565 90 260 A D L B K C E J 90mm 70mm 20...

Page 13: ...ns with GTR Angle Support Kit M Dimensions with GTR Side Panels Support Kit N GTR SS 565 400 420 465 265 GTR3 565 535 555 600 265 GTR3SS 565 955 975 1020 265 GTR4 565 695 715 760 265 GTR4SS 565 1115 1135 1180 265 GTR5 565 855 875 920 265 GTR5SS 565 1275 1295 1340 265 GTR6 565 1015 1035 1080 265 GTR6SS 565 1435 1455 1500 265 L M N ...

Page 14: ... MATERIALS ARE AS FOLLOWS MINIMUM CLEARANCES ABOVE COOKING SURFACE TO COMBUSTIBLE WALLS The manifold inlet is in the base of the BBQ at the front on the right hand side Manifold diameter is 20mm square tube The GTR Roasting Hood if fitted is 320mm high from the top of the Cooking Surface when shut and 410mm high when open The back of the GTR Roasting Hood is flush with the back of the BBQ when ope...

Page 15: ...ke Photo of what a typical leak looks like Photo of what a good connection looks like i e no bubbles If bubbles appear around the connections you have a leak GAS INSTALLATION AND LEAK TEST PROCEDURE Turn off the gas supply and tighten or re seal the connection Leak test the connections again If leaks are still present do not use the barbecue contact the place of purchase or your local dealer There...

Page 16: ...sizing to ensure adequate gas is supplied to the appliance For natural gas check the pressure of the regulator and adjust it if necessary to the pressure shown on the data plate GAS INSTALLATION PROPANE GAS TO NATURAL GAS CONVERSION PROCEDURE FOR AUTHORIZED INSTALLER Disconnect the gas supply and remove the plate grills flare guards and burners from the barbecue and the Wok burner if fitted Remove...

Page 17: ...ners and make any necessary adjustment Ensure the data plate is changed altered to contain correct information i e remove the old Gas type label and replace it with a natural gas label and date of conversion Natural gas is lighter than air you may need to adjust the ignition probe up a little higher for it to light ...

Page 18: ... not light after 10 seconds or go out due to strong winds care should be taken Remove the Barbecue Grease Tray and wait 1 minute before trying to re light the BBQ to let any gas that may have built up to disperse Do not force the Control Knobs they will turn easily depress the Knob and turn it anti clockwise The Gas Control Knobs can be adjusted from high to low To turn the Barbecue off simply tur...

Page 19: ...y every 20 30 seconds as this will ensure the meats fat and enzymes are evenly cooked you may like to cook your steaks until the blood shows through them before you turn them but you will not be able to cook rare or medium rare steaks this way as they will start to overcook in this manner Place sausages on the grill or plate and turn them frequently to brown the surface evenly Be careful not to us...

Page 20: ...nd gauze on the throat of the burner and push a screwdriver up it to clear the blockage One of the burners won t light Remove the knobs and spray the valve shaft with unceasing lubricant then oil the shafts of the control valves and replace the knobs Control knobs are stiff TROUBLESHOOTING SOLUTIONS Check the injector nipple that supplies the gas to the burner it maybe has a blockage Valve injecto...

Page 21: ...arbecue doesn t seem to be as hot anymore Check burner inlet and burner port holes for blockages or regulator pressure Insects maybe in the burners Check the injectors are not blocked on the control valves ...

Page 22: ...a wire brush Make sure the ports are clear from obstructions unscrew the air mixture cap and gauze from the throat of the burner periodically and brush away any dust spider webs or insect nests that may have built up replace them and screw them back on When replaced turn each burner on and check that the flame pattern is good you can adjust the air mixture by turning the cap on the end of the burn...

Page 23: ...and freight charges both ways is to be paid by the owner No liability is accepted for loss or damage during transit 2 The appliance is installed by a qualified person and operated and maintained in accordance with the instructions supplied Repairs and service must be carried out by an authorized person 3 Installation must conform to the standards laid down by the local codes or in the absence of l...

Page 24: ...TUCKER AUSTRALIA PTY LTD 138 Silverwater Road Silverwater NSW 2128 AUSTRALIA PHONE 612 9748 8368 FAX 612 9748 8138 WEB SITE www tuckerbbq com au EMAIL mail tuckerbbq com au ...

Reviews: