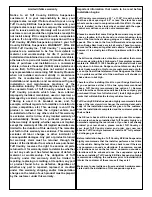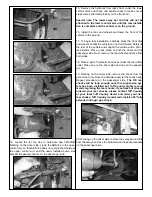
9. Locate (6) 3/8 nylon nuts and (6) 5/16” USS flat washers
from hardware bag D2P-NB. Working on the driver side,
install the newly modified coil over into the upper location
and secure using the new hardware. Make sure to use loc-
tite and torque to
32 ft lbs.
Repeat procedure on the pas-
senger side.
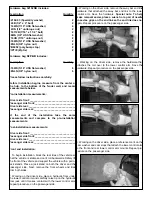
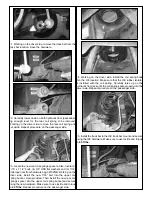
10. Working on the driver side, install the lower portion of the
coil over to the lower control arm using the OE hardware. Do
not tighten at this point. Repeat procedure on the passenger
side.
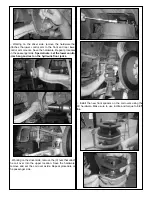
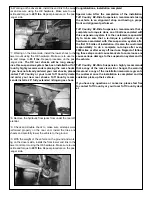
11. Working on the driver side, install the lower control arm
into the front and rear lower control arm pockets using the
OE hardware. Make sure to use loctite, refer back to the
marks that were scribed on the cam washer and cam stops
and torque the front and rear mounting hardware to
105 ft
lbs
. Repeat procedure on the passenger side.
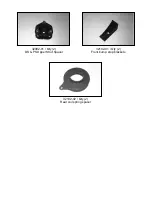
12. Locate the new front bump stop brackets. Also, locate (2)
poly bump stops, (2) 3/8” nylon nuts and (2) 5/16” USS flat
washers from hardware bag 32102NB. Install the new bump
stops to the new bump stop brackets and secure using the
new hardware. Make sure to use loctite and torque to
24 ft
lbs.
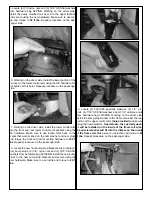
13. Locate (2) 32102-03 specialty washers, (2) 1/2” x 4”
bolts, (4) 7/16” USS flat washers and (2) 1/2” unitorque nuts
from hardware bag 32102NB. Working on the driver side,
install the bump stop bracket to the frame rail under the rear
portion of the upper control arm
(hole provided)
and secure
using the new hardware.
Special note, the specialty wash-
er will be installed on the inside of the frame rail. Also,
the special washer will fit into the dimple on the inside
of the frame rail.
Make sure to use loctite and torque to
65
ft lbs.
Repeat procedure on the passenger side.


