9
PXLS-7950 Super Rack ( Power Rack + Half Rack )
Thank you for purchasing the PXLS-7950 Super Rack ( Power Rack + Half Rack ). This machine is part of the TuffStuff line of quality strength
training equipment. To maximize your use of the equipment, please study the Owner’s Manual thoroughly.
Required Tools
The basic tools that you will need to assemble the PXLS-7950 but are not
limited to:
• 7/16” , 3/4” Combination Wrenches
• Ratchet Wrench with 7/16” , 3/4” sockets
• Two Strong Step Ladders
• Rubber mallet, measuring tape & utility knife
• Windex or household glass cleaner
Assembly Requirements
Follow these installation requirements when assemblying the PXLS-7950.
Use the overhead view on the Content Page to layout your floor plan
before assemblying.
Set up the PXLS-7950 on a clean, solid, flat surface. A smooth, flat surface
under the machine helps keep it level.
Allow ample space around the machine for safe unrestricted use and
easier access.
Insert all bolts in the same direction. For aesthetic appearance, insert all
bolts in the same direction unless specified (in text or illustration) to do
otherwise.
Leave room for adjustments. Do not fully tighten fasteners until in-
structed in the assembly steps to do so (to prevent any difficulty with
alignment of parts during the assembly process). When not instructed,
tighten fasteners such as bolts, nuts and screws so the unit is stable, but
leave room for adjustments.
Assembly Tips
Read all “Notes” on each page before beginning each step.
While you may be able to assemble the PXLS-7950 using the illustrations
only, IMPORTANT safety notes and other tips are included in the text.
Some pieces may have extra holes that you will not use. Use only those
holes indicated in the instructions and illustration.
NOTE:
With so many assembled parts, proper alignment and adjustment
is critical. While tightening the nuts and bolts, be sure to leave room for
final adjustments.
CAUTION:
Obtain assistance from TuffStuff if you have difficulty
assemblying the PXLS-7950. Please do not attempt to complete the
assembly as this could result in equipment failure and serious injuries to
the users.
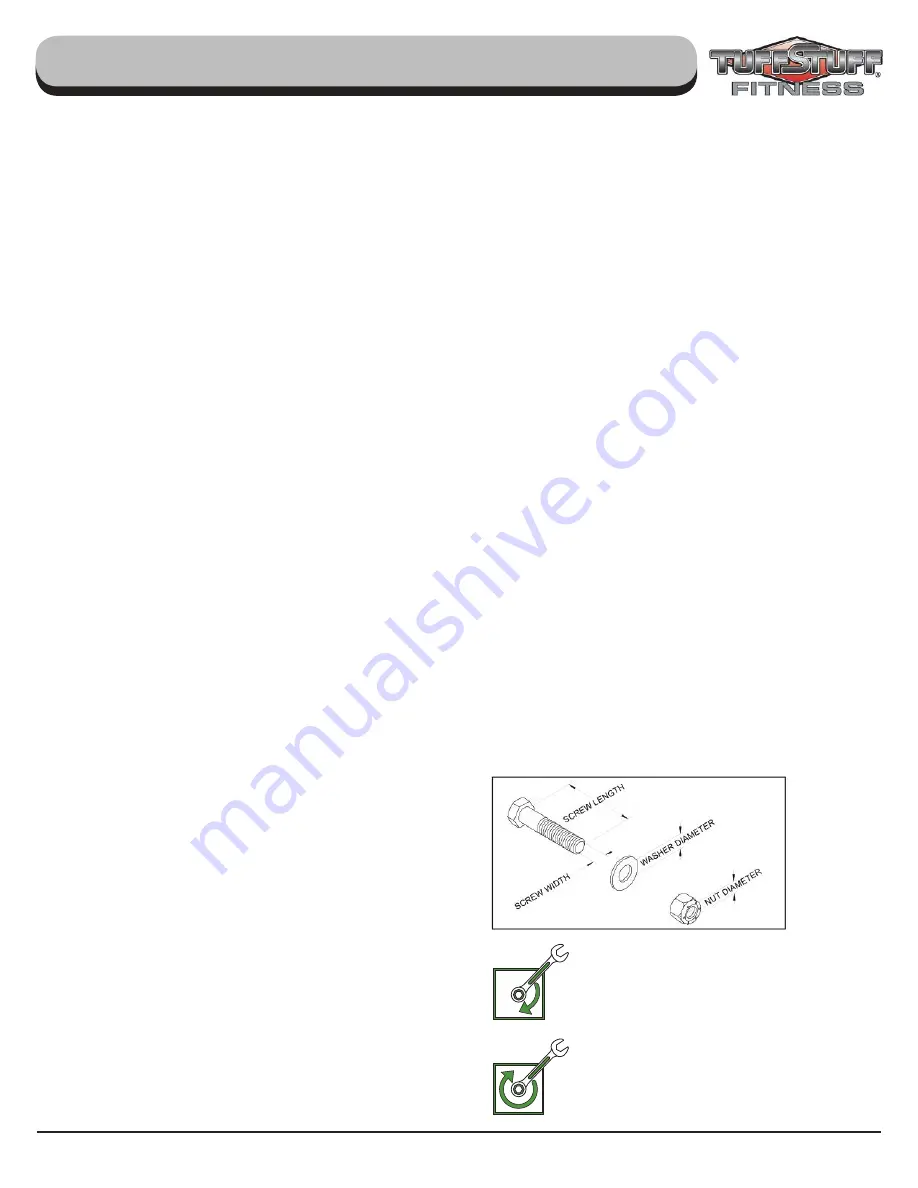
Symbols & Description
Registration
To avoid unnecessary delays on warranty parts and to insure that a
permanent record of your purchase is on file with our company, be
sure to register online at www.tuffstuffitness.com within 10 days
of purchase.
Obtaining Service
Please use this Owner’s Manual as your guide to all parts included in
your shipment. When ordering parts, you must specify the part number
and description from this manual.
Use only genuine TuffStuff
replacement parts when servicing the equipment.
Failure to do
so will void warranty and could result in serious injury or death.
For information about product operation or service:
Phone:
909-629-1600 Toll Free 888-884-8275
Fax:
909-629-4967
E-mail:
service@tuffstuff.net or service1@tuffstuff.net
Hours:
M–F 8:00 – 4:30 PST
Or write to:
TuffStuff Fitness Equipment Inc.
Customer
Service
13971 Norton Avenue, Chino, CA 91710
Retain this Owner’s Manual for future reference when ordering
service or parts. To assist you better, please be prepared to
provide the following information:
1. Model Number
2. Place of Purchase
3. Serial Number
4. Part # and Description
Loosely Fasten
Finger tighten all hardware in this step. DO NOT wrench tighten.
Some component(s) may need pre-assembly and alignment during
the assembly process.
Fully Fasten
Wrench tighten all hardware in this step.
Registration, Service & Assembly


