


Assembling Process for celling type
Preparation stage:
Please remove the four M6*10 Screws on the heater,and use them for
the
step1.
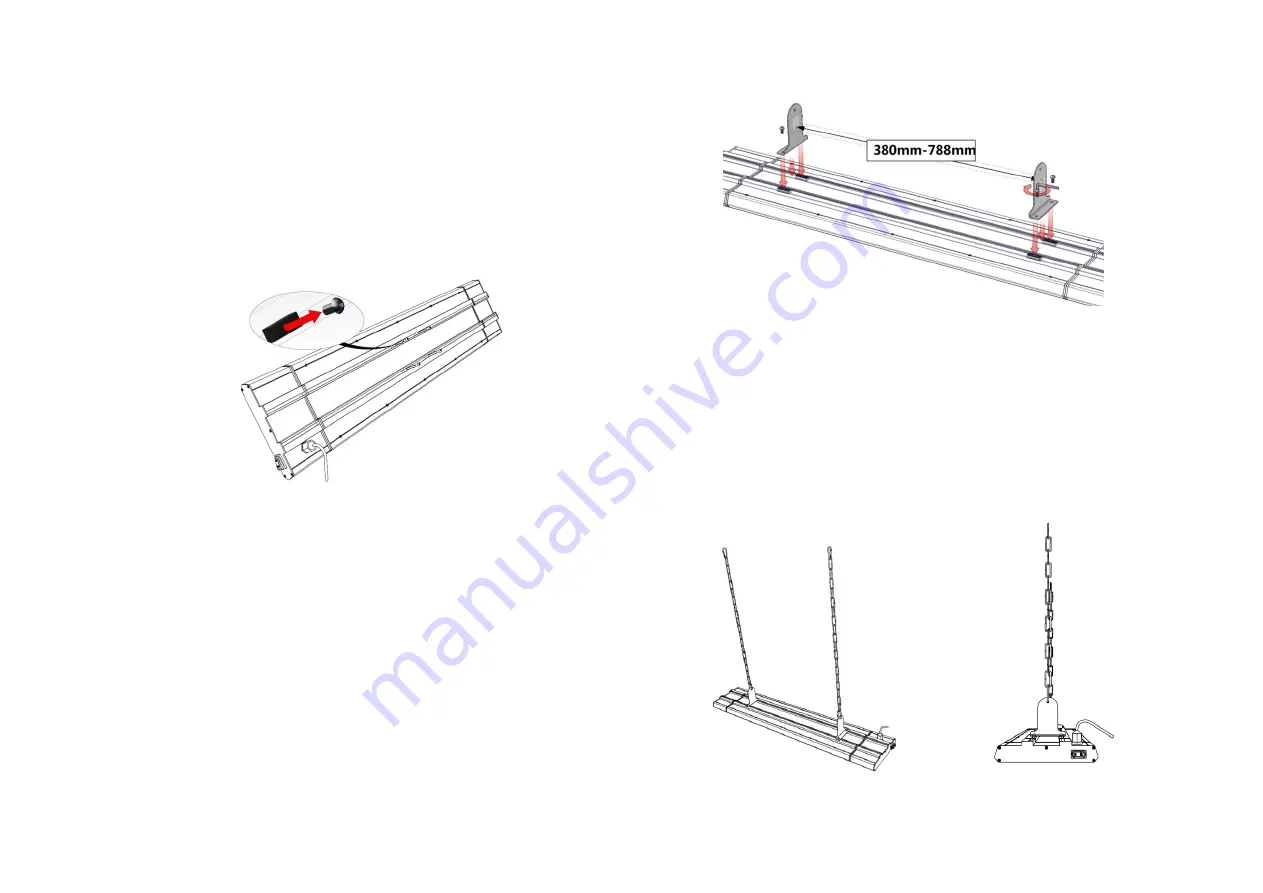
Step1:
Adjust the four sliders which inside the track.The distance between the
sliders should be between 600 mm to 788 mm. Fix the Brackets
⑥
with four M6*18 screws, tighten them with ‘L ‘hexagonal wrench.
Step2:
Let the carabineer at the end of the chains
○
12 through the holes of the
Brackets .The length adjustment range of two Chains
○
12 are between
500mm-750mm.
Complete!


