14
CLUTCH AND DRUM DISASSEMBLY
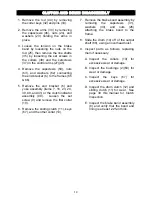
1. Remove the rod (44) by removing
the cotter keys (32) and pins (33).
2. Remove the arms (34) by removing
the capscrews (46), nuts (24), and
washers (23) holding the arms in
place.
3. Loosen the tension on the brake
band by loosening the nuts on the
rod (25), then remove the line shafts
(35) by loosening the set screws in
the collars (38) and the setscrews
(37) in the control arms (27)(45).
4. Remove the capscrews (59), nuts
(63), and washers (62) connecting
the end bracket (6) to the frames (65
& 66).
5. Remove the end bracket (6) and
yoke assembly (items 7, 16, 23, 24,
39, 40, and 41) or the clutch indicator
assembly (90). Loosen the set
screw (9) and remove the first collar
(10).
6. Remove the sliding clutch (11), keys
(67), and the other collar (10).
7. Remove the brake band assembly by
removing the capscrews (31),
washers (30), and nuts (26)
attaching the brake band to the
frame.
8. Slide the drum (14) off of the output
shaft (68), using an overhead hoist.
9. Inspect parts as follows, replacing
them if necessary:
A.
Inspect the collars (10) for
excessive wear or damage.
B. Inspect the bushings (2)(60) for
wear or damage.
C.
Inspect the keys (67) for
excessive wear or damage.
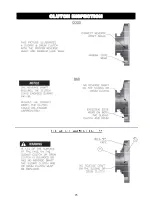
D. Inspect the drum clutch (12) and
sliding clutch (11) for wear. See
page 30 this manual for Clutch
Inspection.
E. Inspect the brake band assembly
(8) and verify that the band and
lining is at least .225-in thick.


