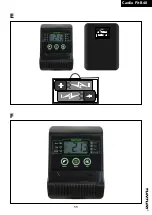
1 5
English
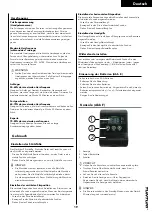
Odo
Automatically accumulates the number of strokes for all exercise
sessions.
Dist
Distance for the workout.
-
M
Indicates parameters in meter.
Pulse
Display current heart rate if measured.
‼ NOTE
•
Before measuring your pulse rate, please place your palms of
your hands on both of your contact pads and the monitor will
show your current heart beat rate in beats per minute(BPM) on
the LCD after 6~7 seconds.
•
During the process of pulse measurement, because of the
contact jamming, the measurement value may be higher than
the virtual pulse rate during the first 2~3 seconds, then will
return to normal level.
•
The measurement value cannot be regarded as the basis of
medical treatment.
Cal
Automatically accumulates Calorie burnt when exercising.
‼ NOTE
•
This data is a rough guide for comparison of different exercise
sessions which cannot be used in medical treatment
Explanation of buttons
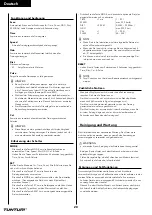
MODE
-
Press MODE button to select console functions; Time, Speed, Dist,
ODO, Cal. & Pulse
-
Push and hold for 4 seconds to reset: Time, Count, Dist & Calorie.
SET
Set the values for: Time, Count, Dist & Calorie when not in scan
mode.
-
Press SET button to set console in goal input mode.
-
Press MODE to select goal you like to set. (the selected goal will
blink when able to set value.)
-
Press SET Button to higher the goal input, hold SET button to
higher the value fast.
-
Press RESET button shortly to reset the changed selected goal.
-
Press MODE Button to active next optional goal to be set.
TIME
+ 1 min
( 1 ~ 99)
SPEED
( max. 99,9 Km/h)
DIST
+ 0,5KM
( 0,5KM ~ 99,50Km )
ODO
( max. 999,9 Km)
CAL
+ 1
( 1 ~ 999 )
PULSE
+ 1
( 40 ~ 240 )
‼ NOTE
•
When you set a goals the set goal value will Count down in
active mode.
•
When goal is reached the console will notify by 4 dual acoustic
beep signals. The reached value will now Count up starting from
“0”.
•
You can set more than one goal, all goals will notify when goal
is reached.
RESET
-
Push and hold for 4 seconds to reset: Time, Dist., Cal., & Pulse
‼ NOTE
•
Total Count can only be reset by a batteries exchange.
Extra notes
-
If the display is faint or shows no figures, please replace the
batteries.
-
The monitor will automatically shut off if there is no signal received
after 4 minutes .
- The monitor will be auto-powered on when starting to exercise
push button w/signal in.
- The monitor will automatically start calculating when you start to
exercise and will stop calculating when you stop exercising for 4
seconds .
Cleaning and maintenance
The equipment does not require special maintenance. The
equipment does not require recalibration when it is assembled, used
and serviced according to the instructions.
⚠ WARNING
•
Do not use solvents to clean the equipment.
-
Clean the equipment with a soft, absorbent cloth after each use.
- Regularly check that all screws and nuts
are tight.
-
If necessary, lubricate the joints.
Defects and malfunctions
Despite continuous quality control, defects and malfunctions caused
by individual parts can occur in the equipment. In most cases, it will
be sufficient to replace the defective part.
-
If the equipment does not function properly, immediately contact
the dealer.
-
Provide the model number and the serial number of the equipment
to the dealer. State the nature of the problem, conditions of use
and purchase date.
Trouble shooting:
-
When the display of LCD is dim, it means the batteries need to be
changed.
-
If there is no signal when you pedal, please check if the cable is
well connected.
‼ NOTE
•
When stop training for 4 minutes, the main screen will be off.
•
If the computer displays abnormally, please re-install the
batteries and try again.
Transport and storage
⚠ WARNING
•
Carry and move the equipment with at least two persons.
•
Move the equipment and carefully put the equipment down.
Place the equipment on a protective base to prevent damage to
the floor surface.
•
Move the equipment carefully over uneven surfaces. Do not
move the equipment upstairs using the wheels, but carry the
equipment by the handlebars.
•
Store the equipment in a dry place with as little temperature
variation as possible.
Summary of Contents for Cardio Fit B40 Bike
Page 2: ......
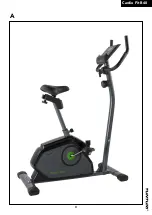
Page 3: ...3 Cardio Fit B40 A...
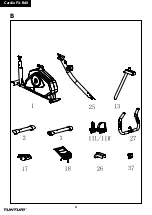
Page 4: ...4 Cardio Fit B40 B...
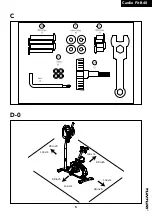
Page 5: ...100 cm 100 cm 100 cm 100 cm 40 inch 40 inch 40 inch 40 inch 5 Cardio Fit B40 C D 0...
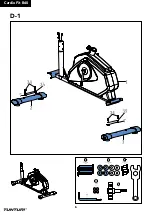
Page 6: ...6 Cardio Fit B40 D 1...
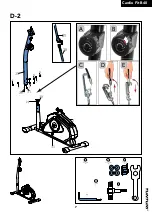
Page 7: ...A B C D E M a x 7 Cardio Fit B40 D 2...
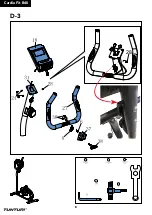
Page 8: ...28 8 Cardio Fit B40 D 3...
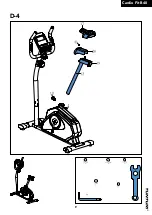
Page 9: ...9 Cardio Fit B40 D 4...
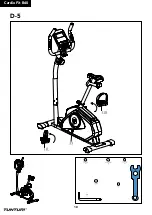
Page 10: ...1 0 Cardio Fit B40 D 5...
Page 11: ..._ _ AA A A _ _ AA A A 1 1 Cardio Fit B40 E F...
Page 59: ......


