background image

GB

O W N E R ’ S   M A N U A L


P U R E   R U N   3 . 1

3

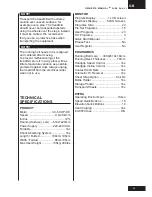
•  The device must not be used by 

persons weighing over 135 kg (298 

lbs).

•  Always insert the safety key and 

attach the clip to your clothing at your 

waist before beginning your workout.  

If you should encounter problems 

and need to stop the motor quickly, 

simply pull on the cord to disengage 

the safety key from the console.  To 

continue operation, simply reinsert 

the safety key into the console

•  Remove the safety key and store 

it away in a safe place when the 

treadmill is not in use.  Keep the 

safety key away from children.

S AV E   T H E S E   I N S T R U C T I O N S !

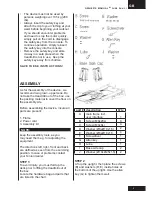
ASSEMBLY

As for the assembly of the device, we 

recommend two grown-up persons. Do 

not take the treadmill out of the box: use 

the packing material to cover the floor on 

the assembly site.

Before assembling the device, insure all 

parts are present:

1. Frame

2. Power cord

3. Assembly kit 

NOTE:

keep the assembly tools, as you 

may need them e.g. for adjusting the 

equipment.

The directions left, right, front and back 

are defined as seen from the exercising 

position. In case of problems contact 

your Tunturi dealer.

STEP 1:

To avoid injury, you must fold up the 

deck prior to lifting the treadmill out of 

the box. 

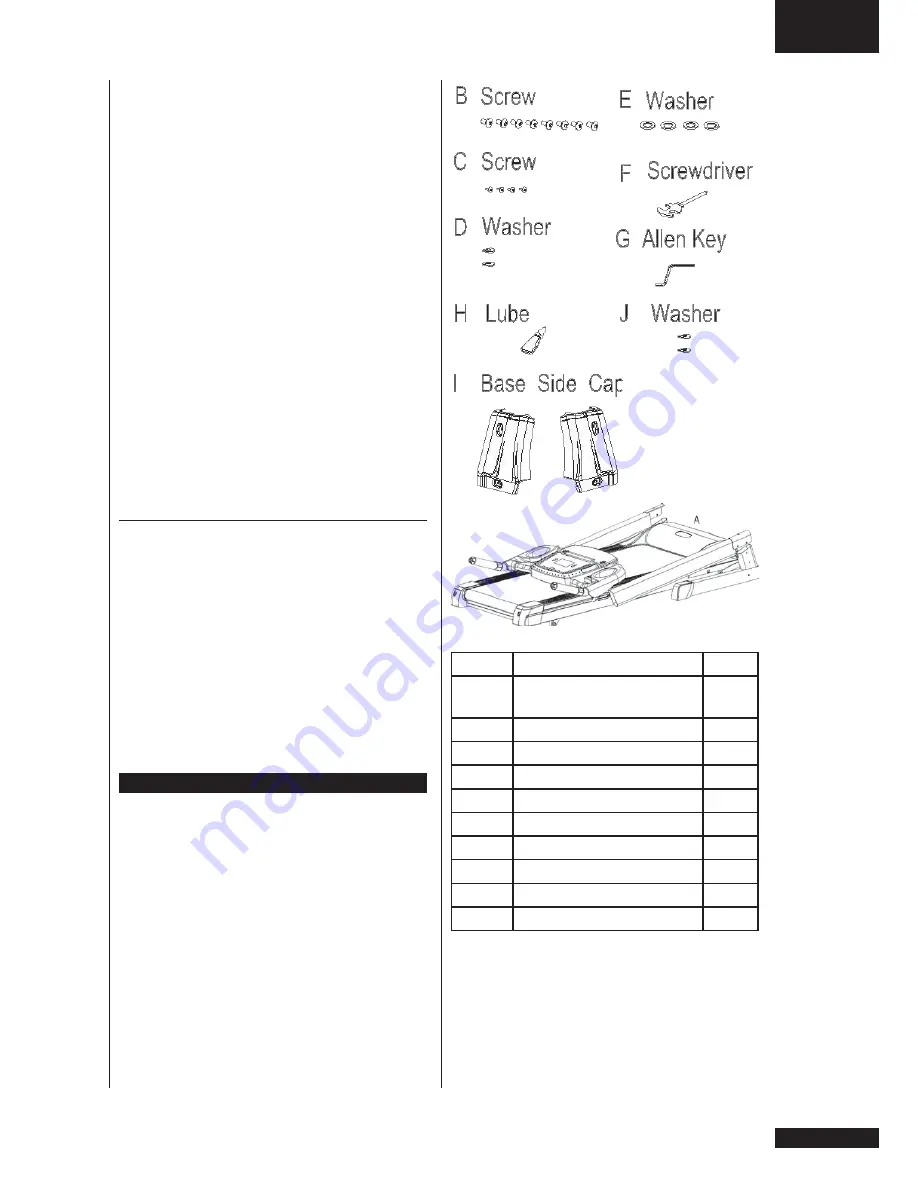
Locate the hardware bag and parts that 

are listed in the chart.

part # description

Q’ty

A

main frame incl. 

user interface

1

B

Screw (M8x20L)

8

C

Screw (M4x8L)

4

D

Washer (Ø8xØ19x1.5)

2

E

Washer (Ø8xØ18x1.5

4

F

Screwdriver

1

G

Allen key

1

H

Lube

1

I

Base side cap

2

J

Washer (Ø10xØ25x1.5)

2

STEP 2

Lift up the upright, then place the screws 

(B) and washers (D, E) inside holes at 

the bottom of the upright. Use the allen 

key (G) to tighten them well.

User manual Tunturi Style-Treadmill Run 3.1 20140310.indd   3

02/04/2014   20:24:08

Summary of Contents for Pure 3.1

Page 1: ...WWW TUNTURI COM SERIAL NUMBER SERIAL NUMBER 3 1 PURE RUN 3 1 USERMANUAL...

Page 2: ......

Page 3: ...other than that which has been specified in this manual will ultimately void any warranty implied or otherwise WARNING To reduce any risk to persons Keep hands clear of any moving parts Never place ha...

Page 4: ...he packing material to cover the floor on the assembly site Before assembling the device insure all parts are present 1 Frame 2 Power cord 3 Assembly kit NOTE keep the assembly tools as you may need t...

Page 5: ...feet on either side and in front of the treadmill We recommend that the equipment is placed on a protective base ABOUT USING THE EQUIPMENT Always unplug the treadmill from the electrical outlet after...

Page 6: ...um heart rate Exercise at this level suits only the fittest and presupposes long endurance workouts BEGINNING AN EXERCISE SESSION To avoid muscular pain and strain begin and end each workout by stretc...

Page 7: ...Starts or stops the program ENTER Press this button to confirm your desired program or setting value SELECT Switches from one to one another programs in an order of the 19 programs SPEED Increases the...

Page 8: ...kilometers the treadmill belt has gone on the current workout When SELECT key is pressed during workout it will display Elevation in meter the user has climbed during the current workout CALORIES CAL...

Page 9: ...user controls the elevation TIME OUT If the treadmill is turned on and the belt is not moving the monitor will hibernate after five minutes and shutdown after seven minutes RE START If the Treadmill i...

Page 10: ...distance goal press START the treadmill belt starts and the user controls the speed and incline The distance will count down in the distance window P 13 TARGET CALORIES This program counts down the c...

Page 11: ...keys the user enters his her age Target heart rate THR is computed at 65 of maximum 220 AGE and appears in the heart rate window THR can be changed at this time using the elevation keys Press START an...

Page 12: ...he lubrication needs be checked at shorter intervals This is best done before you begin a training session Check the lubrication as follows Ensure the treadmill is powered off Step on the treadmill be...

Page 13: ...the left adjustment bolt turn anti clockwise 3 If the belt remains centered the adjustment is correct If not continue to make small adjustments as above until the belt is correctly aligned If the belt...

Page 14: ...may continue to use the treadmill Otherwise call the dealer for service TROUBLE SHOOTING TREADMILL WILL NOT START 1 Not plugged in Plug into suitable outlet 2 Safety key not attached correctly Insert...

Page 15: ...tion is at 0 before folding the deck If the elevation is not at 0 folding will damage the mechanism UNFOLDING Lightly kick the switch indicated in the middle of the shock absorb rod to fold down the f...

Page 16: ...FICATIONS PRODUCT Motor 3 0 5 0 HP DC Speed 0 8 20 km h Incline 12 Running Surface Lxw 510x1420mm Power Supply 220 240V AC Foldable Yes Shock Absorbing System Yes Length Folded 188cm 106cm Width Folde...

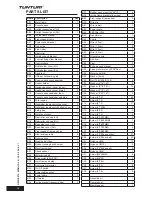
Page 17: ...Speed sensor 1 B28 Motor drive belt 1 B29 Drive motor 2 0HP DC 1 B30 main frame end plug 2 B31 Overcurrent protector 1 B32 On Off switch 1 B33 Power cable socket 1 B34 Power cable 1 B35 Lift motor 1 B...

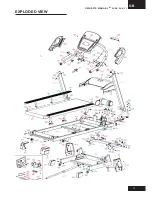
Page 18: ...GB OWNER S MANUAL PURE RUN 3 1 17 EXPLODED VIEW...

Page 19: ......

Page 20: ...w w w tu n tu r i c o m Version 20140402 TUNTURI FITNESS B V P O BOX 60001 1320 AA THE NETHERLANDS www tunturi com...

Reviews: