5
2.
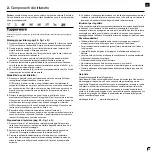
Mincer Components
The
FusionMaster Mincer
allows you to mince meat, fish, vegetables, or make
sausages. It comes with 2 mincer discs, one with small holes for fine mincing and
one with larger holes for coarse mincing.
a
s
D F G J H
Use a low temperature programme on your dishwasher to save energy and protect the environment.
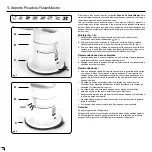
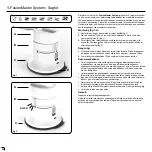
Assembling for mincing (pg58 - fig. 1 & 2):
1.
After assembling hopper (E) to the suction foot (K), slide the mincer screw (C)
into the hopper. The metal end is on the hopper’s front side.
2.
Fix the cutting fan (I) with the flat side pointing outwards. To ensure it’s well
fixed, the metal of the screw should be sticking out.
NOTE: You won’t be able to slide the mincer disc correctly if the blade is
mounted with the flat side pointing towards the screw.
3.
Select and mount one of the mincer discs (B) on to the hopper’s front with the
groove fitting perfectly into place.
4.
Turn the screw ring (A) counterclockwise gently with your index finger only. As
soon as you feel resistance, turn an extra 90° (or ¼ of a turn) and then stop
turning.
5.
Slide the crank (G) on the gear side of the screw (D) and fix them together by
screwing the crank screw.
How to use your food mincer:
1.
After assembling the unit, place a bowl or container below the head to
collect the minced food flowing through the mincer disc.
NOTE: Please ensure that the food is thawed thoroughly before mincing.
The meat mincer is intended to mince boneless meat for household use
only. Check the meat for bones and unwanted fat. Clean the food/meat and
cut into dices to fill the hopper.
2.
Turn the crank clockwise to process the food. If necessary, you can use the
plunger (F) to help process the food. Do not apply excessive force when
pushing down, it will be harder to process the food and this could damage
your mincer.
NOTE : Always use the plunger provided. Never use your fingers or any
other utensils (e.g. spatula, knife…).
3.
There is a chance that the food/meat will get stuck in the screw during
operation: if this happens, turn the crank counterclockwise a few times
to release the jam and revert to the forward direction again. Never apply
excessive force.
How to make sausage (pg59 - fig. 1 & 3):
1.
Follow step 1 to 3 of the assembly section. Slide the sausage insert (H)
through the screw ring. Then, follow step 4 of the assembly section.
2.
Slide the entire sausage skin over the sausage insert and knot the end. We
recommend using hog casings of type 32-34.
3.
Press the sausage skin around the sausage insert and control the squeezing
pressure while processing the food to create the desired sausage tube. When
done, knot the other end.
4.
You create sausages by squeezing with your fingers at the desired length and
turning the sausage around its own axis once or twice. It can be done during
the processing or when all food was processed. Knot the end to close the last
sausage.
Cleaning guidelines:
Clean thoroughly all parts used in processing the food immediately after use.
The FusionMaster Mincer is dishwasher safe. However, it is recommended to
wash and dry the metal parts by hand. Never let the cutting fan come in contact
with other metal, ceramic or glass instruments as this would damage its cutting
edges. It is recommended to wash and dry the foot by hand.
Recommendations:
• Use the plunger as a storage compartment to store the following dried
elements: the cutting fan, the mincer disc and the sausage insert.
•
For high fat food, start to mince first with the mincer disc with larger holes.
•
Mincing result is influenced by the tightening or the loosening of the
screw ring.
• Process the food several times to achieve desired texture and mixture.
This can be done before using the sausage insert.
• Cold food is easier to mince.
•
Do not try to mince food with hard fibers like ginger, nuts or other hard foods.
• For their safety, do not allow children to play with the product.
•
Be careful when handling the cutting fan; the cutting edges are sharp.
Guarantee
Limited Tupperware guarantee applies.
Do not use the FusionMaster Mincer without any ingredients inside the hopper.
This can cause damages to your product and is not covered by the Tupperware
Guarantee.
The Tupperware guarantee protects the FusionMaster Mincer against chipping,
cracking, breaking or peeling under normal non-commercial use for the lifetime
of the product. This guarantee does not include replacement for used blades,
nor does it cover rusting or other damage to the product resulting from negligent
use or misuse of the product. Please contact your Tupperware consultant for
a replacement.
www.tupperwarebrands.com
EN
Summary of Contents for FusionMaster System
Page 1: ...FusionMaster System www tupperware eu FusionMaster ...
Page 2: ......
Page 58: ...58 A H B C I E D K F G L J fig 1 2 Mincer Components Slice Julienne thick Julienne thin ...
Page 59: ...59 fig 2 fig 3 ...
Page 60: ...60 3 Cookie Inserts CLICK CLICK a s D F G J H 1 4 2 5 3 6 Slice Julienne thick Julienne thin ...
Page 61: ...61 4 Tube Insert CLICK 1 4 2 CLICK 5 3 6 a s D F G J H Slice Julienne thick Julienne thin ...
Page 62: ...62 5 Chef Press Connection a s D F G J H 1 5 CLICK ...
Page 63: ...63 7 2 6 3 4 CLICK ...
Page 65: ...65 4 5 6 ...
Page 66: ...66 Notes ...
Page 67: ...67 Notes ...


