background image

4

To install the hose on the gun, pull back the ring on the quick disconnect coupler to connect it to the male tailpiece

on the end of the gun handle.

For proper testing prior to spraying, refer to page 8 of this manual.

GENERAL OPERATING INSTRUCTIONS


OPERATING INSTRUCTIONS AND PAINTING TIPS

The following general instructions are meant to be a guideline for success with your Sprayfine

 sprayer. Although

practice makes perfect, there are a number of books, videos and courses available on the market to help you further

refine your knowledge and skills of spraying in general, should you wish to do so.


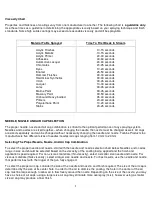
PAINT PREPARATION AND VISCOSITY CHART

Most coatings must be thinned (diluted) to be sprayed

. Always follow the paint or coating manufacturers’

instructions regarding thinning solvents and dilution ratios when preparing the coating to be sprayed. Always mix and

store your thinned material in a separate container, and label your containers based on original coating, thinning

solvent used and percent dilution.

The thickness of a coating is defined by its "viscosity in seconds": "viscous coatings" are thicker materials; "non-

viscous coatings" are thinner materials. To properly measure the viscosity of a coating, use a viscosity cup.

Completely submerge the viscosity cup in the coating to be measured

Lift the viscosity cup out of the coating and begin timing.

Measure the time in seconds until the first break in the stream of coating

The time lapsed will determine the viscosity of the coating, i.e.: 25 seconds.


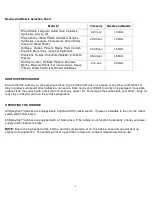
Once you have prepared the estimated quantity of coating required, select an appropriate needle/nozzle/air cap

combination for use with the coating.

Once you have selected and installed the appropriate size needle, nozzle and air cap, detach the paint cup from the

gun, pour the diluted material (paint, coating, etc.) through a cone filter into the cup, and re-attach it to the gun.

For optimum results, always test coating viscosity, spraying distance, pattern size, film thickness, needle/nozzle/air

cap combination and finish, on a sample of the surface to be coated.

Summary of Contents for HVLP Sprayer

Page 1: ...ant you to obtain all the benefits that your Sprayfine sprayer has to offer To ensure the proper use and maintenance of your Sprayfine sprayer please carefully read the information contained in this m...

Page 2: ...ry or death To reduce the risk of electric shock do not expose turbine unit to rain or water Store indoors RISK OF BURSTING May cause property damage or severe injury Use only authorized parts that ar...

Page 3: ...r outlet All Sprayfine systems are equipped with a 15 amp fuse If the turbine is not functioning properly check your power supply and or replace the fuse NOTE Due to the high speed of the turbine 18 0...

Page 4: ...tainers based on original coating thinning solvent used and percent dilution The thickness of a coating is defined by its viscosity in seconds viscous coatings are thicker materials non viscous coatin...

Page 5: ...nozzle must be changed as well Air caps are sized separately and can be changed without necessarily changing the needle and nozzle Turbine Products Inc manufacturers five different sizes of needles no...

Page 6: ...and free from dust oil grease or any other contaminant A dirty or greasy surface will affect adhesion can spoil a finish and is very difficult to correct once sprayed If possible always clean the sur...

Page 7: ...pray pattern rotate the air cap at the front of the gun When the air cap is in the diagonal position the spray pattern will be round when in the horizontal position the spray pattern will be vertical...

Page 8: ...le but note that the tube that pressurizes the paint cup is internal Do not turn the gun on it side or upside down when there is paint in the cup as the paint may block the air holes and prevent the p...

Page 9: ...small try larger size air cap Air cap may be too close to the nozzle turn the air cap ring slightly to move air cap further from nozzle Even Drip Even Drip Figure 8 Running Dripping From Extremities...

Page 10: ...cessive strokes Select the needle and nozzle that performs best with the trigger of the gun fully engaged When spraying odd shaped objects spray hard to reach areas curved surfaces and corners and edg...

Page 11: ...lvent in the clean paint cup and spray it with the gun into a bucket until the spray is clear 4 To clean the underside of the paint cup top either shake the gun while spraying the cleaning solvent or...

Page 12: ...iers remove the nozzle To Clean Parts Individually And Replace Gaskets 1 Soak all dirty parts in clean cleaning solvent nozzle tip of needle siphon tube extension etc If necessary soak the entire gun...

Page 13: ...side inward and the ball guide lined up with the groove in the housing 3 Press the spring plate into the housing making sure that the ball guide is sliding into the groove in the housing and hold it i...

Page 14: ...BASIC TROUBLESHOOTING CHART Problem Probable Cause Solution s Turbine not working at all A No power to the turbine B Fuse is blown A Check power outlet socket B Replace fuse Low Air Flow A Filters are...

Page 15: ...zzle B Dry paint on end of nozzle C Coating is too thick not enough pressure to pump from cup to nozzle D Foreign unwanted particles in the coating E Air tube blocked preventing pressurization of pain...

Page 16: ...far from the surface A Use variable speed controller to reduce air volume output of turbine B Spray 6 8 from the surface to be coated TROUBLESHOOTING FINISH PROBLEMS Problem Probable Cause Solution s...

Page 17: ...in spots A Ensure that surface is clean dry and free from any contaminants prior to spraying add anti crater fisheye eliminator to material being sprayed Dry Spray Surface is dull and rough Dry paint...

Page 18: ...s and how to select the proper combination for your application refer to pages 5 and 6 of this manual ACCESSORIES Remote Cup Assembly For maximum portability and control and to keep the weight of the...

Page 19: ...ts at our expense but if we determine there is no defect or that the defect resulted from causes not within the scope of our warranty then you must bear the cost of returning the product All statement...

Reviews: