background image


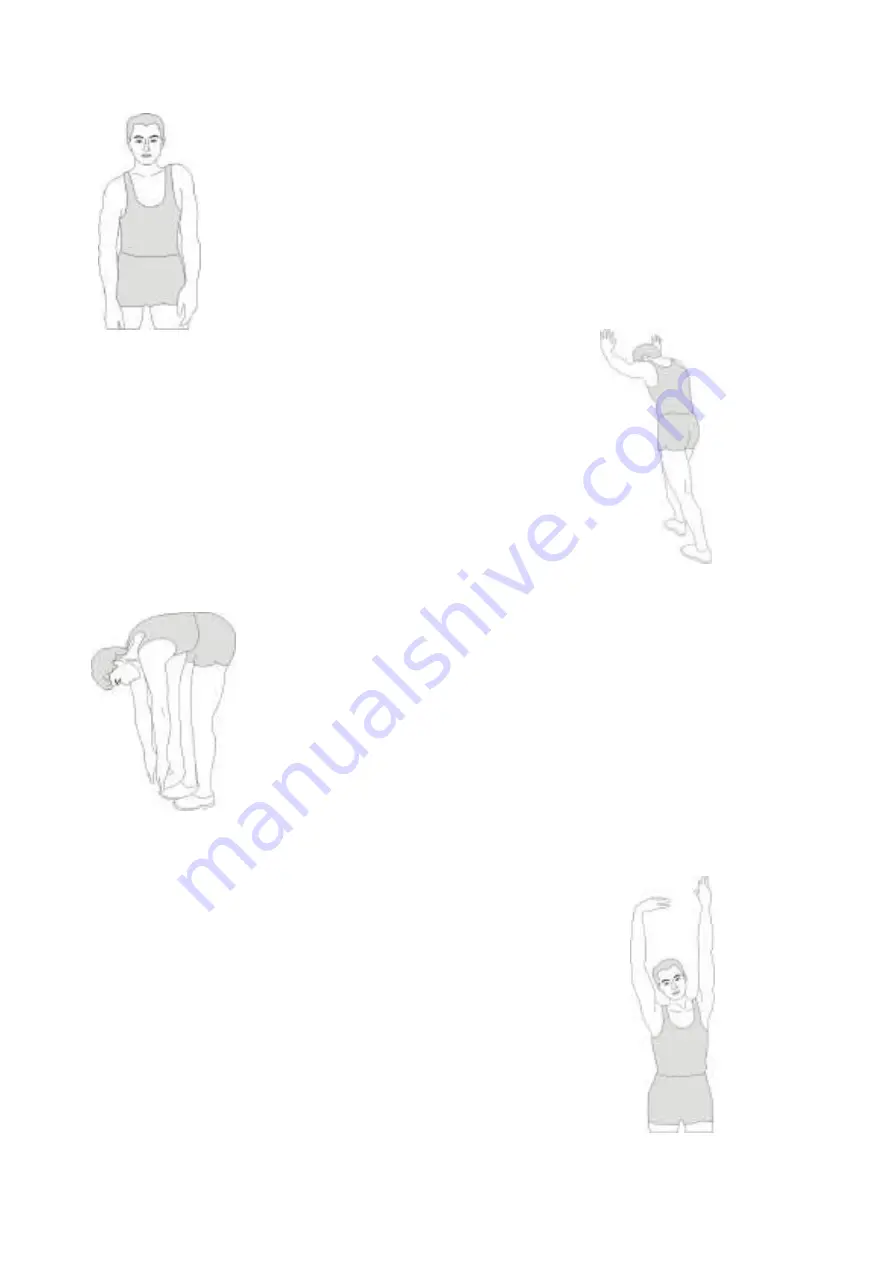
Calf-Achilles Stretch


Lean against a wall with your left leg in front of the right 
and your arms forward. Keep your right leg straight and 
the left foot on the floor; then bend the left leg and lean 
forward by moving your hips toward the wall. Hold, then 
repeat on the other side for 15 counts.


Shoulder Lift


Lift your right shoulder up toward your ear for one count. Then 
lift your left shoulder up for one count as you lower your right 
shoulder.


Toe Touch


Slowly bend forward from your waist, letting your 
back and shoulders relax as you stretch toward your 
toes. Reach down as far as you can and hold for 15 
counts.


Side Stretch


Open your arms to the side and continue lifting them 
until they are over your head. Reach your right arm 
as far upward toward the ceiling as you can for one 
count. Feel the stretch up your right side. Repeat this 
action with your left arm.


Summary of Contents for Sport-Tronic ElliptiForce X7

Page 1: ...EN OWNER S MANUAL FITNESS ELLIPTICAL MACHINE ST X7 http www sporttronic eu...

Page 2: ...any maintenance or adjustments other than those described in this manual Should any problems arise discontinue use and consult an Authorized Service Representative 6 Do not use the equipment outdoors...

Page 3: ...HARDWARE LIST 1x M6 1x M5 1x 1x...

Page 4: ...corresponding grooves and tighten with the nuts or bolts in each stabilizer 2 Install the stand tube Loose the screws in the stand tube No 2 Connecting the adjustor No 5 with its wire No 83 and upper...

Page 5: ...stand tube No 2 then place the left right handrail tube No 27 and 28 onto the stand tube and tighten Attach the left right pedal tube No 32 and 33 onto corresponding handrail tube and tighten with the...

Page 6: ...pedal Place the left right upper handrail No 19 and 20 onto the left right handrail tube No 27 and 28 and fasten Attach the left right pedal No 40 and 41 onto the corresponding pedal tube No 32 33 and...

Page 7: ...5 Install the front handrail Across the sensor wire through the hole of the stand tube and fasten the front handrail 1 0 6 1 1...

Page 8: ...6 Install the monitor Connecting three sensor wires with the wires on the stand tube then place the monitor No 1 onto the stand tube and fasten 1...

Page 9: ...clear the set up value Press RESET key and hold for 2 seconds to reset all function figures TOTAL RESET To power on the console again RECOVERY To test heart rate recovery status BODY FAT To start or s...

Page 10: ...on will be counting down from the preset to zero while the training starts Once the target is achieved to zero the monitor start to beep SCAN Displays all function TIME DISTANCE CALORIES PULSE RPM SPE...

Page 11: ...r presses RECOVERY button the RECOVERY function is active At this time only PULSE and TIME is working other functions will not be displayed and the Sensor Input is not available TIME starts to count d...

Page 12: ...ar stabilizer 2 The rear stabilizer end caps have not been leveled when adjusting 1 Remove the object 2 Adjust the rear stabilizer end caps Handlebar is shaking The Bolts are loose Tighten the Bolts L...

Page 13: ...sore muscle problems We suggest the following warm up and cool down exercises Inner Thigh Stretch Sit with the soles of your feet together with your knees pointing outward Pull your feet as close into...

Page 14: ...up toward your ear for one count Then lift your left shoulder up for one count as you lower your right shoulder Toe Touch Slowly bend forward from your waist letting your back and shoulders relax as y...

Reviews: