background image

READ AND SAVE THESE INSTRUCTIONS

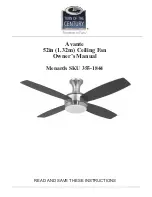
Menards SKU 355-1844

Avante

52in (1.32m) Ceiling Fan

Owner’s Manual

Summary of Contents for Avante 355-1844

Page 1: ...READ AND SAVE THESE INSTRUCTIONS Menards SKU 355 1844 Avante 52in 1 32m Ceiling Fan Owner s Manual ...

Page 2: ...ing a minimum of 35 pounds Use only UL Listed outlet boxes marked FOR FAN SUPPORT 6 The fan must be mounted with a minimum of 7 feet clearance from the trailing edge of the blades to the floor 7 Avoid placing objects in path of the blades 8 To avoid personal injury or damage to the fan and other items be cautious when working around or cleaning the fan 9 Do not use water or detergents when cleanin...

Page 3: ...Required Helpful Flathead Screwdriver Phillips Screwdriver Safety Glasses Pliers Step Ladder Wire Strippers Wire Cutters Soft Cloth Electrical Tape To Begin Tools Needed Not Supplied 3 ...

Page 4: ...pport Secure outlet box directly to the building structure using wood screws included Outlet box must support 35 lbs min Fig 2 Install mounting plate to outlet box in the ceiling using washers and the mounting screws provided in the hardware bag Fig 3 Outlet Box Mounting Plate Flat Washers Spring Washers Mounting Screws Wood Screw 2 pcs Sprining Washer 2 pcs Star Washer 2 pcs 1 Set of blades 4 2 M...

Page 5: ...holes at the outer rim of the canopy Figure 4 Hanging the Fan Canopy Hook Mounting Plate Figure 4 Warning The hook as shown in figure 4 is only to balance the fan while attaching wiring Failure to hang as shown in figure 4 may result in tab breaking causing the fan to fall Tab must pass from inside to outside of canopy 5 ...

Page 6: ...eutral wire from the ceiling to the white wire marked AC in N from the receiver Secure the wire connections with the plastic wire connecting nuts provided Fig 6 5 If your outlet box has a ground wire green or bare copper connect it to the fan ground wires otherwise connect the hanging bracket ground wire to the mounting bracket Secure the wire connection with a plastic nut provided After connect i...

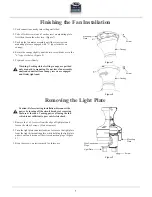
Page 7: ... plate from the light kit mounting plate while holding the light plate under your fan disconnect the wire connection plugs Figure 9 3 Keep the screw you just removed for future use Finishing the Fan Installation Removing the Light Plate Figure 7 Figure 8 Figure 9 Warning Locking slots of ceiling canopy are prvided only as an aid to mounting Do not leave fan assembly unattended until all four canop...

Page 8: ...arning To reduce the risk of personal injury do not bend the blade arms while installing balancing the blades or cleaning the fan Do no insert foreign objects between rotating fan blades Blade Balancing The following procedure should correct most fan wobble Check after each step 1 Check that all blade and blade bracket screws are secure 2 Most fan wobble problems are caused when blade levels are u...

Page 9: ...ding the light plate under your fan connect the white wire connectors from the light plate and fan follow the same procedure with the black wire connectors Fig 13 3 Place the key holes on the light plate over the 2 screws previously loosened from the light kit mounting plate turn light plate until it locks in place at the narrow section of the key holes Secure by tightening the 2 screws previously...

Page 10: ...ed on the top of motor housing Figure 17 Slide reverse switch for changing fan moving direction Slide the switch to the Left for warm weather operation Slide the switch to the Right for cool weather operation Warm weather Counter Clockwise direction A downward air flow creates a cooling effect as shown in Figure 18 This allows you to set your air conditioner on a higher setting without affecting y...

Page 11: ...es from the transmitter and receiver are set to the same frequency Make sure all motor housing screws are snug Make sure the screws that attach the fan blade bracket to the motor hub is tight Make sure wire nut connections are not rattling against each other or the interior wall of the switch housing Allow a 24 hour breaking in period Most noises associated with a new fan disappear during this tim...

Page 12: ... particular purpose become void This warranty and any implied warranty including but not limited to any implied warranty of merchantability or fitness for a particular purpose do not cover glass globes light bulbs or finish on any metal portions of the Fan This warranty is in lieu of express warranties The duration of any implied warranty of merchantability or fitness for a particular purpose with...

Reviews: