9
Turn of the Century
TM
OPERATING INSTRUCTIONS
1
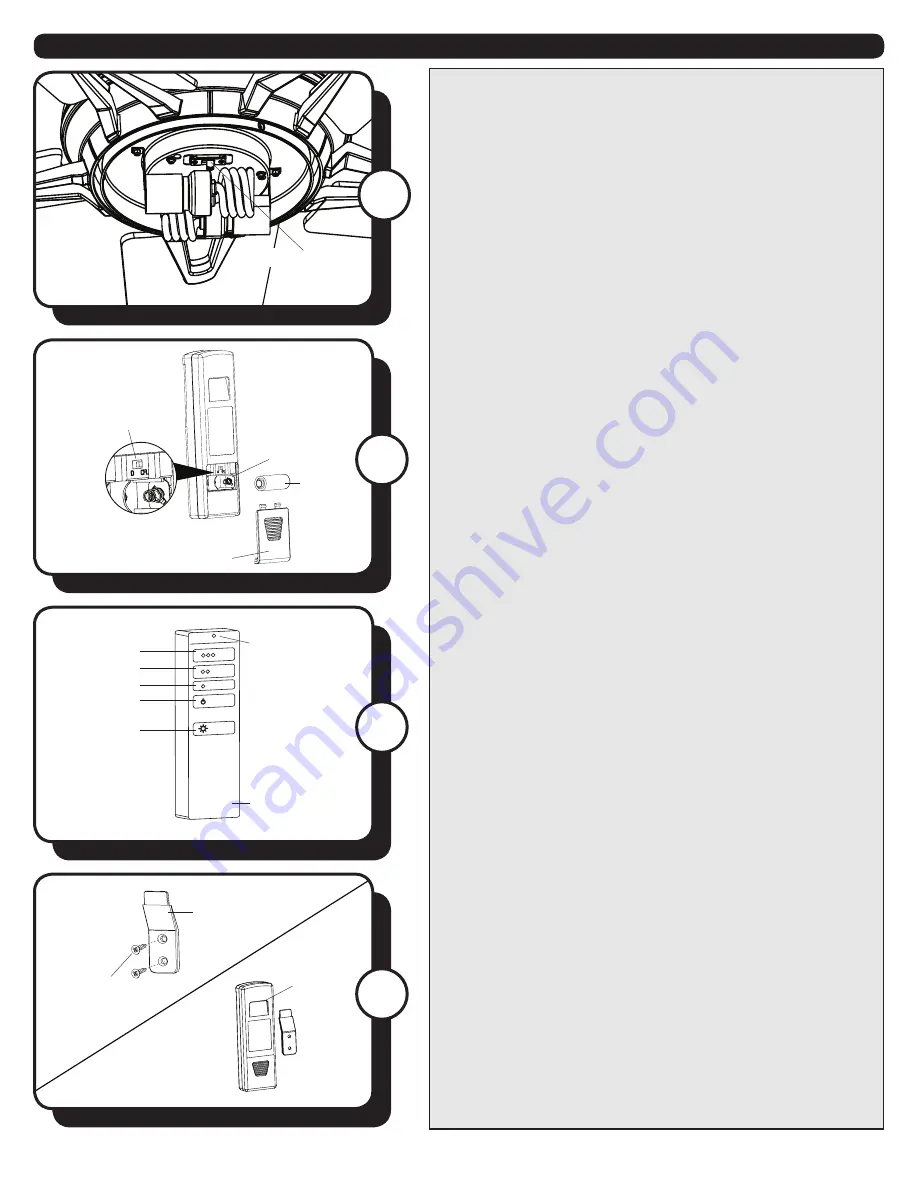
1. Use the fan reverse switch, located on the light kit to
optimize your fan for seasonal performance.
Note:
The
glass bowl must be removed to access the reverse switch.
Using a ceiling fan will allow you to raise your thermostat
setting in summer and lower your thermostat setting in
winter without feeling a difference in your comfort.
Note:
Wait for the fan to stop before moving the reverse
switch.
In warmer weather,
push the reverse switch left which
will result in downward airflow creating a wind chill effect.
In cooler weather,
push the reverse switch right which
will result in upward airflow that can help move stagnant,
hot air off the ceiling area.
A
B
C
D
E
3
4
2. Remove the battery cover from the back of the remote
transmitter and insert the 12-volt battery. Replace the
battery cover.
D/CFL Switch: Switch should be set to “CFL” to correspond
with the included CFL bulbs. Flip to “D”, to enable the
dimming function if you change to incandescent bulbs.
IMPORTANT:
The dimmer function does NOT work with
CFL bulbs.
3. To operate the fan using remote control, press and
release the following buttons:
A - High fan speed
B - Medium fan speed
C - Low fan speed
D - Turns the fan off. Press and hold this button for 5
seconds to enter
Light Delay Off
mode, which will turn
off light after one minute. The LED on the remote control
will flash four times to confirm mode setting.
E - Turns the light on and off. Press and hold this button
to dim or brighten when using incandescent bulbs.
4. Install wall bracket for remote control (optional) - Use
the two mounting screws to attach the wall bracket to
the wall.
Note:
A slot on the back of the remote control
allows it to be stored on the wall bracket when not in use.
2
R
emote
Battery
Battery
Cover
Remote
Slot
Mounting
Screw
Battery
Compartment
D/CFL Button
Reverse Switch
LED Indicator
Wall Bracket


