background image

Mobi 360

28

1

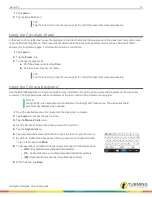
In

Lesson

mode, tap the

Screenshot Sorter

icon.

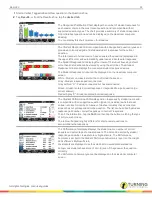
Thumbnails of screenshots display on the left side of the classroom computer screen.

2

Tap the

screenshot

you want to display.

TIP

If too many screenshots are displaying, tap the Sorter icons that are NOT related to the category
of screenshot you are looking for, and then tap the screenshot you want to display.

For example: If you are looking for a Verbal Question screenshot, tap the three icons OTHER
than the Verbal Question icon.

3

To close the screenshot, tap

Desktop Display

or

Whiteboard Display

.

Annotating Screenshots

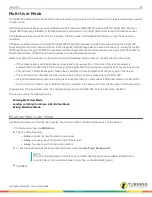
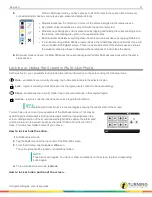
In Screenshot mode, you can use any annotation tool to make changes to the current screenshot. When you navigate away
from that screenshot using either the screenshot navigation arrows or by changing the display option, Insight 360 automatically
captures a new screenshot with the changes. Once you end a class session, the screenshots are saved by Insight 360.

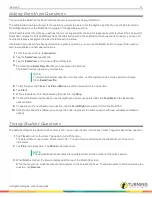
1

Access the desired screenshot.

2

Use an annotation tool to make changes to the screenshot.

3

To save changes, click the screenshot navigation arrow or change the display option to

Computer Desktop

or

Whiteboard

.

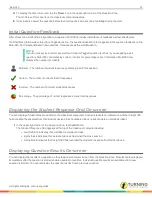
Accessing Screenshots from Insight 360

Insight 360 stores screenshots captured by the Mobi 360 in a folder on the classroom computer’s hard drive.

Once a session is ended, you can no longer view the screenshots from the Mobi 360. However, you can view screenshots for a
session through the Session Content Report in Insight 360.

NOTE

All favorites, classes, student data, tests, screenshots and other Insight 360 information reside on the
classroom computer used to set up this data. It will not be accessible if you take the Mobi 360 to another
classroom even if that classroom computer is running Insight 360, unless you have also set up that
computer with the same classes, students, favorites and other data.

turningtechnologies.com/user-guides

Summary of Contents for MOBI 360

Page 1: ...Mobi 360 User Guide...

Page 2: ...the FCC Rules Operation is subject to the following two conditions 1 This device may not cause harmful interference and 2 this device must accept any interference received including interference that...

Page 3: ...n Battery 12 Lesson Zone Display Options 15 Displaying the Computer Screen from the Mobi 360 15 Displaying Whiteboard Mode from the Mobi 360 15 Using the Curtain to Hide the Screen 15 The Digital Pen...

Page 4: ...shots 28 Accessing Screenshots from Insight 360 28 Question Zone Asking Verbal Questions During Instruction 30 Asking Tagged Questions 30 Asking ExamView Questions 31 Timing Student Questions 31 Initi...

Page 5: ...ough the Mobi 360 you can l Navigate and control the classroom computer desktop l Access Favorites l Ask Verbal and Tagged questions l Interact with any software installed on your classroom computer b...

Page 6: ...re How to pair the Mobi 360 with the receiver 1 Turn on the classroom computer on which the Insight 360 software is installed 2 Insert the Mobi 360 receiver into a USB port NOTE If a USB hub is needed...

Page 7: ...on Recalibrating ensures that the Mobi 360 recognizes digital pen taps in the same place that you are actually tapping writing or drawing on the touchscreen 1 From the Mobi 360 Home screen tap Setting...

Page 8: ...on the Mobi 360 is accurately reflected 1 From the Mobi 360 Home screen tap My Settings 2 Tap Calibrate DualBoard 3 Follow the on screen directions to tap each dot as it appears NOTE Use the digital p...

Page 9: ...rn off or disconnect the Mobi 360 receiver or the Mobi 360 USB cable 8 When the update is complete the Firmware Update dialog box appears Click OK Mobi 360 Zones Mobi 360 organizes its functions into...

Page 10: ...the students during the class session 1 Tap Teach Class Confirm the class name time and period number correct NOTE If this is not the class you want to start tap Change Class If no classes are listed...

Page 11: ...pen and student devices in a clean dry place l Clean with a dry or lightly damp cloth NOTE DO NOT SUBMERGE the Mobi 360 digital pen or student devices l Periodically charge the battery on the Mobi 360...

Page 12: ...en Battery The Mobi 360 digital pen is delivered with a partial charge to allow you to start using it directly after unpacking the system l The digital pen charges whenever it is securely placed in it...

Page 13: ...minal facing toward the tip of the pen 4 Press the pen tip The LED located at the pen tip will flash four times if the battery was inserted correctly If the LED does not flash four times remove the ba...

Page 14: ...desktop Whiteboard mode A plain white screen as a background for drawing or writing Display Screenshots Screen captures called screenshots taken during the same class session l Annotation tools l Note...

Page 15: ...If your classroom computer is connected to a projector or large monitor you can use the Mobi 360 to project a white background visible to all students in the class The white background can be used li...

Page 16: ...Keyboard Using the Pen as a Mouse Pointer Using the pen as a mouse pointer allows you to control the classroom computer desktop NOTE The pen works on the primary display It cannot cross to a second sc...

Page 17: ...nesses sizes and shapes of other tools such as the Highlighter Shapes and Eraser TIP Tap the Point icon to use the mouse point to control the classroom computer desktop Using the Pen as a Highlighter...

Page 18: ...and outline style a With the shape tool selected tap Outline Outlined and solid shapes of various colors appear b Tap the shape color and style of your choice 3 To change the shape a With the shape t...

Page 19: ...nformation into various documents and programs on the classroom computer The Keyboard mode inserts characters at the text cursor within a document or program NOTE Using the Pen as a keyboard is not av...

Page 20: ...tructors using the Insight 360 Teacher app can assign devices to specific sections l The instructor s Mobi 360 keeps its teach class capability and can annotate and control any part of the screen l Th...

Page 21: ...formation on the screen using the following icons Hide annotations are currently showing tap to hide annotations in the selected region Lock region is currently unlocked tap to lock the region users c...

Page 22: ...1 Tap Exit in the upper left corner of the Multi user mode screen 2 Tap Yes Annotating the Screen You can use the Mobi 360 digital pen as a mouse pointer an annotation tool or to control the Mobi 360...

Page 23: ...the screen Hiding Annotations Using the Mobi 360 you can hide all annotations currently displayed on the classroom computer screen Hiding annotations temporarily removes all writings and drawings gene...

Page 24: ...ting a Note Note Icons Note View contains the following icons Mouse Pointer Uses the pen as a computer mouse while in Note View Scroll Left Scroll Right Scroll through saved notes Pen Writes or draws...

Page 25: ...on the computer screen l Resize Note on the computer screen l Delete Note from the computer screen l Control the computer using the digital pen as a mouse 1 From the Lesson Zone tap the Note icon 2 Ta...

Page 26: ...e the note from the Mobi 360 1 To delete a Note from the computer screen a With the Mouse Pointer tool click X in the top corner of the note NOTE Deleting a note from the computer screen does not dele...

Page 27: ...ordered in white and contain a numeric identification in the upper left corner When you enter Screenshots Display mode the last saved screenshot initially appears on the classroom computer screen bord...

Page 28: ...eenshot with the changes Once you end a class session the screenshots are saved by Insight 360 1 Access the desired screenshot 2 Use an annotation tool to make changes to the screenshot 3 To save chan...

Page 29: ...e the corresponding items on and off the screen Tap once to view and tap again to hide Timer Displays the timer on screen for students to view Student Response Grid Displays a grid indicating which st...

Page 30: ...ect information in the initial feedback Mobi 360 only displays the number of students who answered the question To get specific answer data tap Results 7 Tap Timer to set the timer Tap Plus or Minus t...

Page 31: ...as a mouse pointer to browse for an ExamView file 5 To set the timer tap Timer Tap Plus or Minus to set the timer with more or less time 6 Tap Start 7 When students are finished answering the question...

Page 32: ...orrect The number of incorrect student responses Percentage The percentage of correct responses versus total responses Displaying the Student Response Grid On screen You can display a Student Response...

Page 33: ...oom computer screen 3 To display the correct answer tap the Show Hide Correct Answer icon The correct answer is displayed in green NOTE The chart will refresh when a new question is asked If you do no...

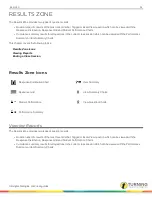
Page 34: ...Results Zone Icons Viewing Reports Ending a Class Session Results Zone Icons Response Distribution Chart Item Summary Response Grid View Summary Charts Student Performance View Question Charts Perfor...

Page 35: ...response pad is connected Gray with red X Pad was connected but has disconnected Green Student entered correct response or responded to a poll question no correct answer Red with gray X Student enter...

Page 36: ...w to filter them tap Filter The Item Summary cannot be displayed on the classroom computer screen Ending a Class Session A class session does not end in Insight 360 until you tap End Class If the devi...

Page 37: ...pport turningtechnologies com or support einstruction com a brand of Turning Technologies Office Locations Ohio 255 West Federal Street Youngstown Ohio 44503 Toll Free 866 746 3015 Direct 330 746 3015...

Reviews: