AudioTron
Reference Manual
Page 31
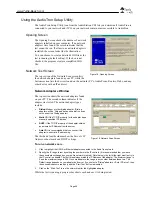
To convert a CD into a digital music file with AudioStation…
1.
Set the recording format (MP3, WMA or WAV):
From the “Record Options” dialog, select “Options
à
Preferences
à
Record Options”.
§
If you’re using WMA format, uncheck the option labeled “Secure my music files when encoding”
(AudioTron can’t play WMA files recorded in secure format.)
§
Turning off the “Play file while Recording” option will significantly speed up the recording process.
§
Setting the “Quality Level” to a higher number will improve fidelity but produce larger files. Settings of
160kbps for MP3 and 96kbps for WMA should produce good fidelity for most listeners.
2.
Read the CD tracks:
Place the CD in the tray and AudioStation should automatically read the tracks, listed
as Track 1, Track 2 etc.. You can enter the tag data manually for each track by highlighting the track, then
selecting “File
à
Edit Track Info…”, or you can use the CDDB feature to automatically load the tag data.
3.
Loading track names with the CDDB feature:
If you’re logged on to the Internet and have the CDDB
feature enabled, the track data should automatically appear after CDDB searches its database for your CD.
If CDDB doesn’t launch, make sure you have the CDDB feature enabled in the “Options
à
Preferences
à
CDDB” dialog box. If it’s turned on, try refreshing the CDDB feature by selecting “View
à
Refresh CDDB
Info”. If you still have problems, try again later, just in case the CDDB system is temporarily inactive.
4.
Record the CD tracks:
After you’re done entering the tag data for the CD, press the AudioStation record
button. Any track with a check mark on the left side will be recorded into the format (WMA or MP3) selected
in the “Record Options” dialog.
Creating playlists
A Playlist is a group of music files saved in a special format with the .M3U extension.
AudioStation can export M3U playlists for use with the “Lists” menu item AudioTron’s main
display. AudioTron searches for these M3U playlists in the shared directories where the MP3,
WMA and WAV music files are stored, as described in the Appendix “
Shared Directories
”.
The default AudioStation playlist directory is C:\My Documents\My Music\AudioStation. If you
have M3U playlists from other PC jukebox programs, they may be imported into AudioStation by
selecting the “Import Playlist” option from the AudioStation “File” menu. To access playlists with
AudioTron, you need only move the files to an AudioTron music directory so that AudioTron may
access them when scanning the hard drive for music and playlist data.
To create an AudioStation Playlist…
1.
Click on the AudioStation Music Library tab in the left pane to see a Windows Explorer-style directory tree of
the playlists available in AudioStation. Right click on the “User Defined” folder in the Library tree and choose
“New Playlist” in the pop-up menu. Alternatively, you can click on the “New Playlist” button at the top of the
music library window.
2.
Right click on the “New Playlist” folder, enter a name for the playlist, (in the same manner as you would
rename a directory folder in Windows Explorer.)
3.
Click on the “All” folder at the top of the Library tree to show the tracks in the music library.
4.
Drag and drop tracks from the Playlist pane (on the right) to the “New Playlist” folder in the Library tree.
5.
Click on the “New Playlist” folder to see the contents of your playlist.
6.
Save the playlist in the directory used for your music files (e.g. \My Music) by selecting “Export Playlist” in
the AudioStation “File” menu.
To view the Artist, Genre, Album and Playlists in AudioStation’s database….
1.
Select the “Open Playlist” option in the AudioStation “Files” menu.
2.
Scroll over the “Album, Artist, Genre, User” categories in the menu to see the items in each category.
3.
Highlight and left-click on the desired selection to load the tracks into AudioStation.

