background image

7

Audio Control Unit (ACU) Functions

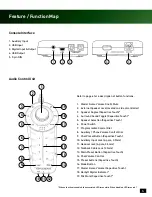
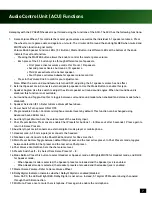
Gameplay with the XP SEVEN headset is performed using the functions of the ACU. The ACU has the following functions:

1.   Game Volume Wheel: This controls the master game volume as well as the individual 5.1 speaker volumes.  Press 

the wheel to mute game audio and again to un-mute. The circular LED around the knob lights RED when muted and 
WHITE when functioning normally.  


 Volume Knob Speaker Function LEDs / 5.1 Button / Master Button: Six different LEDs at the bottom of the knob 
indicate the current function:


-   Pressing the MASTER button allows the knob to control the master game volume.


-   Each press of the 5.1 button cycles through different sets of speakers.


•  First press activates volume control for Front L / R speakers.


•  Second press activates Surround L / R speakers.


•  Third press activates the Center speaker.


•  Fourth press activates Subwoofer speaker volume control.


-   Press in the Volume Knob to confirm your adjustments.


Note: When the surround sound feature is turned OFF, adjusting the 5.1 speaker volume has no effect.

  2.   External Speaker Jack: Connects external desktop speakers. Use the Mode Button to enable this jack.
  3.   Speaker Angles: Use this switch to adjust the virtual speaker surround sound angles. When Surround Sound is 

disabled, this function is not available.

  4.   Surround Sound Toggle: Use this to toggle between surround sound mode (when enabled) and stereo mode (when 

disabled). 

  5.   Speaker Selection (5.1): Refer to Game Volume Wheel above.
  6.   Power Switch: Turns power ON or OFF.
  7.   Programmable Control: Controls microphone monitor levels by default. This function can be changed using 

Advanced Sound Editor tool.

  8.   Auxiliary Input Volume: Sets the volume level of the auxiliary input.
  9.   Chat Presets Button: Press once to enable Chat Presets for buttons 1 – 8 (times out after 5 seconds).  Press again to 

return to Game Presets.

  10.  Auxiliary Input Jack: Connects an external digital music player or mobile phone.
  11.  Headset Jack: A 3.5mm 4-pole jack connects the headset.
  12.  Talkback Jack: Connects to the Xbox®360 Controller for Xbox Live chat.
  13.  Main Preset Button: Toggle between default Main preset and the last active preset. In Chat Presets mode, toggles 

between default Main Chat preset and the last active Chat preset.

  14.  Chat Volume Control Dial: Sets the chat volume level.
  15.  Presets Switches (1 – 8): Select from Game Presets 1 – 8.
  16.  Mode Button: Press this button to select Headset or Speaker mode. LED lights WHITE for Headset mode, and BLUE 

for Speaker mode.


-   When Speaker mode is selected, the Speaker presets are loaded and the Speaker jack is enabled.


-   When Headset mode is selected, the Headset presets are loaded and the Headset jack is enabled.

  17.  Master Game Volume: Refer to Game Volume Wheel.
  18.  Dolby Digital Indicator: Indicates whether Dolby® Digital is enabled/disabled.
 

 Note: On PC, the LED will light RED. Dolby Digital is not active. Instead, 5.1 digital PCM audio is being channeled 
through the USB connection.

  19.  Mic Mute: Press once to mute the microphone. Press again to enable the microphone.

Summary of Contents for Ear Force XP SEVEN

Page 1: ...User Guide...

Page 2: ...ell played so far This premium product is designed to bring unmatched realism and effects to your gaming experience enhancing it in ways you haven t known previously Welcome to Turtle Beach excellence...

Page 3: ...dset on Xbox 360 9 Using your XP SEVEN Headset on PS3 11 Connecting your XP SEVEN Headset to a PC Mac 13 Using your XP SEVEN Headset on a PC 14 Using your XP SEVEN Headset on a Mac 16 Using your XP SE...

Page 4: ...5 1 channel surround sound using the XP SEVEN headset so you can hear the sound all around you as if you were listening to a 5 1 speaker system Adjustable surround sound angles for the optimum surrou...

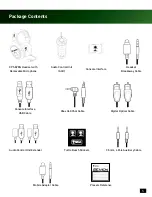
Page 5: ...x 360 Chat Cable Digital Optical Cable Headset Breakaway Cable Audio Control Unit Extender 3 5mm 4 Pole Auxiliary Cable Presets Reference FOR POUR XBOX 360fi I PS3 I PC MACfi Presets Reference EN Down...

Page 6: ...e Control Dial 9 Chat Preset Button Capacitive Touch 10 Auxiliary Input Jack 4 pole 3 5mm 11 Headset Jack 4 pole 3 5mm 12 Talkback Cable Jack 2 5mm 13 Main Preset Button Capacitive Touch 14 Chat Volum...

Page 7: ...ed 5 Speaker Selection 5 1 Refer to Game Volume Wheel above 6 Power Switch Turns power ON or OFF 7 Programmable Control Controls microphone monitor levels by default This function can be changed using...

Page 8: ...vel from other players could become difficult to hear over the game sound However with Chat Boost as the game audio increases the chat volume also increases When the game volume quiets down again Chat...

Page 9: ...he Console Interface as shown below Utilize the Control Unit Extender Cable if necessary 3 Connect your Xbox Controller to the ACU using the Xbox Talkback Cable as shown below 4 Connect the XP SEVEN H...

Page 10: ...der Voice Output choose Play Through Headset Xbox 360 Audio Configuration Select Back Digital Output Current Setting Dolby Digital Choose the digital output type for your system This setting only appl...

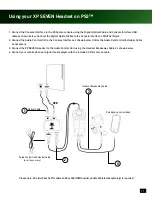
Page 11: ...face as shown below Utilize the Audio Control Unit Extender Cable as necessary 3 Connect the XP SEVEN Headset to the Audio Control Unit using the Headset Breakaway Cable as shown below 4 Connect your...

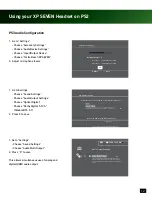
Page 12: ...taneous use of analog and digital HDMI audio output Audio Device Settings Microphone Level 3 Back X Enter OK Audio Output Setting s Select the connector on the TV or AV amplifier receiver Turn on the...

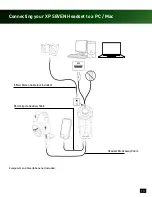
Page 13: ...13 Connecting your XP SEVEN Headset to a PC Mac Computers and Smartphone not included 3 5mm Stereo Cable not included 3 5mm 4 pole Auxiliary Cable Headset Breakaway Cable...

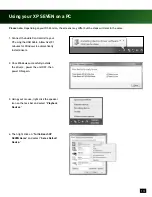
Page 14: ...2 Once Windows successfully installs the drivers power the unit OFF then power ON again 3 Using your mouse right click the speaker icon on the task bar and select Playback Devices 4 Then right click o...

Page 15: ...Configure to confirm 5 1 channel audio 7 Press Next two 2 times to ensure that Front Left and Right and Surround Speakers are set to full range Then press Next again to confirm setting 8 Click on the...

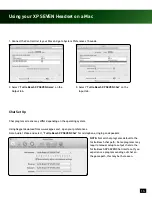
Page 16: ...speakers 1 Connect the Control Unit to your Mac and go to System Preferences Sounds 2 Select Turtle Beach XP SEVEN Game on the Output tab 3 Select Turtle Beach XP SEVEN Chat on the Input tab NOTE Not...

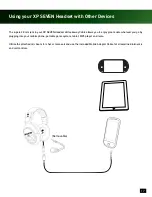
Page 17: ...s Breakaway Cable allows you to enjoy great audio wherever you go by plugging into your mobile phone portable game system tablet MP3 player and more Utilize the attached mic boom for chat or remove it...

Page 18: ...n Speaker Mode 1 Connect the ACU to a digital music player using the included 3 5mm auxiliary cable as shown 2 Connect desktop speakers not included to the Control Unit using the 3 5mm jack 3 Connect...

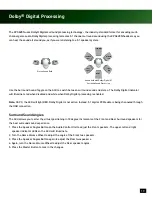
Page 19: ...t speakers The upper left and right speaker indicator LEDs on the ACU will illuminate 2 Turn the Game Volume Wheel to adjust the angle of the Front two speakers 3 Press the Speaker Angles Button again...

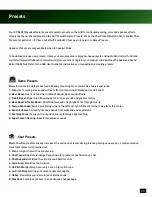
Page 20: ...isper sounds and greater clarity 4 Bass Boost Treble Boost Rumbling lows and crisp highs come through clearly 5 Stereo Expander Stereo processing widens the left and right channels further away from t...

Page 21: ...frequencies for crisper sounds and greater clarity 4 Bass Boost Treble Boost Rumbling lows and crisp highs come through clearly 5 Speech Amplifier Focuses on human voice frequency range for clearer di...

Page 22: ...ollowing two conditions 1 This device may not cause harmful interference and 2 this device must accept any interference received including interference that may cause undesired operation Canadian ICES...

Page 23: ...6 2008 EN61000 4 11 2004 The products are licensed as required for additional country specific standards for the International Marketplace Additional issued licenses available upon request Environmen...

Page 24: ...tioned parts made by various manufacturers in performing warrantyrepairsandbuildingreplacementproducts IfVTBrepairsorreplacesaproduct theoriginalWarrantyPeriodisnotextended however VTB warrants that r...

Page 25: ...ified or tampered with is damaged by Acts of God power surge misuse abuse negligence accident wear and tear mishandling misapplication or other causes unrelated to defective materials or workmanship s...

Page 26: ...layStation is registered trademark and PS3 is a trademark of Sony Computer Entertainment Xbox Xbox 360 and Xbox LIVE are registered trademarks of Microsoft Corporation Mac is a registered trademark of...

Reviews: