Grill Assembly
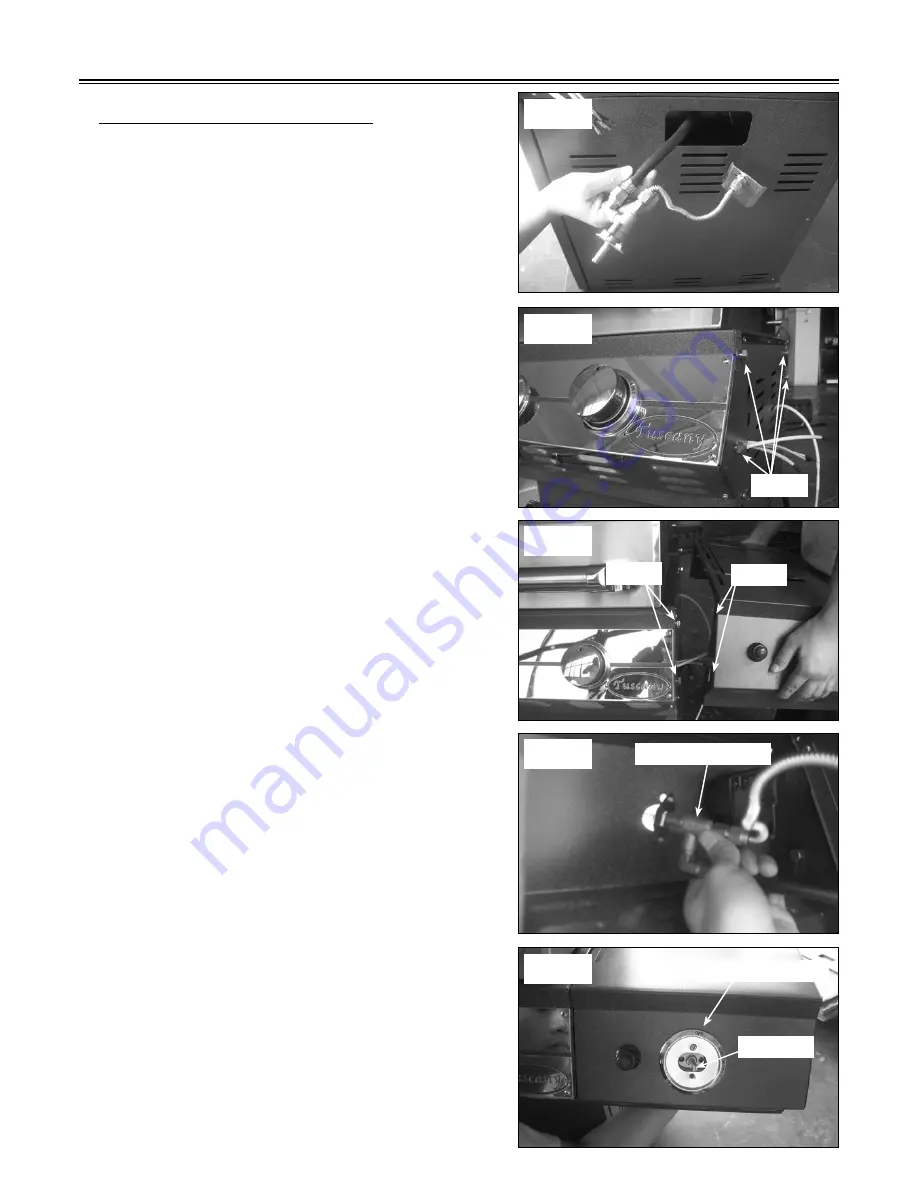
Fig. 4
Fig. 5
Fig. 6
Fig. 7
Fig. 8
SIDE BURNER PARTS ASSEMBLY
1 . R e m o v e s i d e b u r n e r v a l v e a s s e m b l y f r o m
packaging. Feed the valve assembly through the
large cut out in the side of the cart. (See Fig. 4)
2. Loosen the four hex head bolts on the side of the
grill by approximately 1/4". (See Fig. 5)
3. Attach the side burner by inserting the four bolt
heads into the holes on the side burner. (See Fig. 6)
Tighten the four bolts to secure the side burner (See
Fig. 3 on page 6)
4. Slide the side burner valve stem through the center
hole in the front of the shelf. (See Fig. 7)
5. Insert one valve screw through the bezel and in to
the side burner valve and tighten. Next, install the
second valve screw through the bezel and tighten.
Make sure the bezel is installed with the "OFF"
position facing up. (See Fig. 8)
Install control knob, making sure to line up the flat
side of the valve stem with the flat side of the knob
stem.
Bolts
Holes
Bolts
7
Side burner valve
"OFF" on the bezel
vavle stem


