background image

14

Note:
Scheduled recording only works when the unit power is on,it can not work when
the unit is standby.

The recording files can be deleted on this unit, you can go to the PVR,and press yellow
bottun to delete it.

and PC using a suitable player, but can not be played back

on DVD or PDVD

For recording the high definition TV programs,the version of usb device should be 2.0 or 
above,otherwise the unit may can not record the hd programs correctly.

When recording to usb stick or external hard disc on this model, you have to wait a few 
seconds before pushing rec. after inserting the media. Otherwise the unit can freeze in the 
signal.If that happens, then please take off power and connect again to fix this.

Note:

 cannot guarantee compatibility (operation and/or bus power) with all

USB mass storage devices and assume no responsibility for any loss of
data that may occur when connected to this unit.

 large amounts of data, it may take longer for the system to read the

    contents of a USB device.

 USB devices may not be properly

 when they are in a supported format, some files may not play or

  display depending on the content.

- We

- With

.

d

e

s

i

n

g

o

c

e

r

e

m

o

S

-
- Even

 
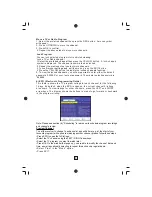
•Select "OTHER RECORDING" in the "Mode" option.
•Press EXIT.

A few seconds before starting to record, a warning message with a count-down is 
displayed on screen, which will change to the programmed channel when the 
count-down ends. Once the recording has finished, a confirmation message appears 
on screen.

To view the scheduled events, press the blue button.
To delete a scheduled event, select the event and press the blue button.


mts

Summary of Contents for T2505

Page 1: ...High Definition Digital Receiver T2505 ...

Page 2: ...tachments accessories specified by the manufacturer 11 Unplug this apparatus during lightning storms or when unused for long periods of time 12 Refer all servicing to qualified service personnel Servicing is required when the apparatus has been damaged in any way including damage to the mains cord or plug if the unit has been exposed to liquid or moisture has been dropped or is not operating corre...

Page 3: ...uct incorporates double insulation between hazardous mains voltage and user accessible parts When servicing use only identical replacement parts This symbol on the product or in the instructions means that your electrical and electronic equipment should be disposed at the end of life separately from your household waste There are separate collection systems for recycling For more information pleas...

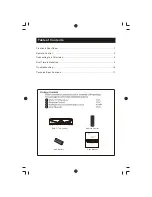
Page 4: ... Rear Panel 1 Remote Control 2 Connecting to a Television 4 First Time Installation 5 Troubleshooting 16 Technical Specifications 17 AAA Battery DVB T TV Receiver User Manual Remote Control High Definition Digital Receiver T2505 ...

Page 5: ...your external Aerial RF LOOP THROUGH This socket will the RF signal to either your TV or another video system High definition audio and video output used to connect to a HDMI device HDMI 5 2 1 REMOTE CONTROL SENSOR Used to receive the signal from the Remote Control USB For software upgrade and media playback ...

Page 6: ... RECALL Go back to the previous viewed channel Red green yellow blue Use to navigate between pages in teletext mode TTX Switch on Teletext if current channel has this option and use EXIT key to quit Teletext SUBTITLE Display subtitle options availability depends on the channel LANG Change the Audio language and Left Right channel availability depends on the channel EXIT Use this key to quit curren...

Page 7: ...artment O PEN CLO SE 1 Open the cover 2 Install batteries 3 Close the cover Using the Remote Control To use the Remote Control point it towards the front of the Digital Set Top Box The Remote Control has a range of up to 7 metres from the Set Top Box at an angle of up to 60 degrees The Remote Control will not operate if its pa h is blocked Sunlight or very bright light will decrease the sensitivit...

Page 8: ... Box to the television use the Composite connection outlined below For a higher quality connection use the Component Video connection outlined below combined with the Composite Audio Connection For the highest quality connection use a direct HDMI connection see below 4 ...

Page 9: ...nnected to the Main Power Press Power button to switch on If you are using the for the first time or n e e r c s V T r u o y n o r a e p p a l l i w e h t t i n u e h t t i n u unit or have restored the unit to Factory Default Installation Guide Menu Basic Operation 1 Program Manage Settings To access the Menu press the MENU button and select Program The Menu provides options to adjust the Program...

Page 10: ...ill appear 2 Press UP DOWN to 3 Press OK to select your favourite TV or Radio Program 1 Select the Program and then press the BLUE button A will appear Press OK to delete the 2 Repeat the previous step to select more to delete Skip TV or Radio 1 Select the you would like to skip and press the GREEN button A skip symbol is displayed The is marked as a skip 2 Repeat the previous step to more y e k T...

Page 11: ...ays By default when the EPG is opened the current channel s listings are shown To view listings for other channels press the LEFT and RIGHT arrow keys The display shows the buttons to press to go forward or backward in the programs listing channel channel viewing channel preferred channel channel channels confirm your settings and channels function channels required 7 Note Please see section d Sch...

Page 12: ...press RIGHT LEFT to adjust that setting Press EXIT to exit the menu c Sort Sort your channels from the following options By LCN Sort the channels in ascending order By Service Name Sort the channels in alphabetical order By Service ID Sort the channels according to the station By ONID Sort the channels according to ONID d LCN Logical channel number Set LCN on or off 3 Channel Search and C S M s to...

Page 13: ...leted Any channels that have been found will be saved 1 Select Auto Search and press OK or RIGHT to start channel search 2 To cancel channel search press EXIT b Manual Search This option allows you to scan for new channels without deleting previously saved channels and settings 1 Select Manual Search then press OK or RIGHT The channel search screen will appear 9 ...

Page 14: ...Time using the RIGHT LEFT keys The enu provides options to adjust the time settings elect an option and press RIGHT LEFT to adjust the setting Press EXIT to exit the menu a Time offset b Country Region Select the Country Region when Time Offset is set to Auto To access the enu press MENU select Option using the RIGHT LEFT keys The menu provides options to adjust the Select an option and press to a...

Page 15: ...the UP DOWN key to s M a Set Password Set or change the password for locked programs Enter your old password or the default password 000000 You will then be asked to enter your new d r o w s s a p w e n r u o y d r o w s s a p Once it is confirmed press EXIT to exit the Menu The master unlock password is Press OK button to confirm 888888 11 b Restore Factory Default Reset your Set Top Box to the D...

Page 16: ...usic Photo and Multimedia files It can support AVI MP3 WMA JPEG and BMP formats The unit will only support USB device with FAT32 NTFS file system a Multimedia When a USB device is attached you can select from the Music Photo or Movie options in this menu using the RIGHT LEFT keys and OK to select If a USB device is not connected the warning message Not find any usb Device will appear 12 ...

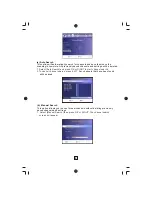
Page 17: ... background Subtitle Font Color Red Displays Subtitle in red font Blue Displays Subtitle in blue font Green Displays Subtitle in green font d USB RECORDING This function is available only when a USB storage device is connected to the receiver Instant recording If you want to start recording a live show which is currently being broadcast go to the desired channel and press the REC button Press agai...

Page 18: ...ain to fix this Note cannot guarantee compatibility operation and or bus power with all USB mass storage devices and assume no responsibility for any loss of data that may occur when connected to this unit large amounts of data it may take longer for the system to read the contents of a USB device USB devices may not be properly when they are in a supported format some files may not play or displa...

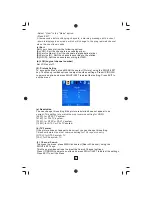
Page 19: ...e from the below picture s bottom which is showing the time shift status In this case you may make the unit to play the recorded program from the start e Timeshift When you are playing the program you can insert the USB and at any time you can press the Time shift button the frame will be paused and you may press the PLAY button after a second ...

Page 20: ...ction with audio cable Connect the audio cable correctly Sound on mute Turn off mute function Only sound no image on the screen No or incorrect connection with AV cable Make sure cables are connected correctly The program is a radio program Press TV RADIO key to shift into TV mode Remote Control is not responding The battery is exhausted Change battery Remote Control is not facing or close enough ...

Page 21: ...1 2 3 WMA AC3 Audio output Coaxial Power Supply Voltage 110 240V50 60Hz Maximum Power Consumption 6 W Item Sub Item Parameter Tuner Input Frequency RF Input level IF Bandwidth 0 m B d 2 81 5 Modulation QPSK 16QAM 64QAM 256QAM Standby Power Consumption 0 5W USB 2 0 Supported Capacity 500GB Supported Media MP3 WMA JPEG BMP AVI Weight Size 0 4 kgs 160x110x45mm 17 44 1002MHz 6MHz 7MHz 8MHz ...

Page 22: ......
Reviews: