6
NATURAL GAS INSTALLATION
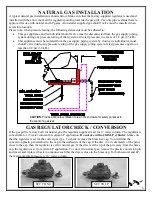
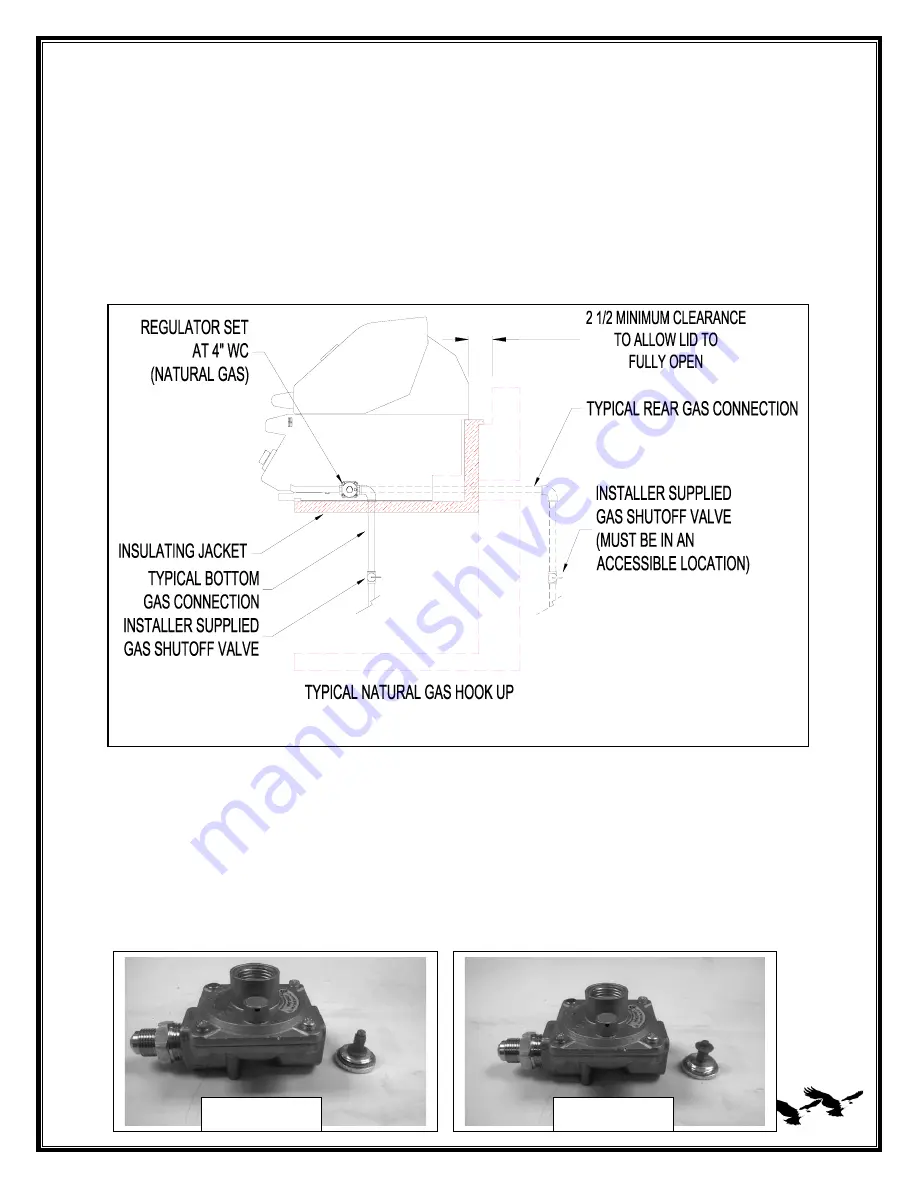
A typical natural gas installation is shown below. Make sure that the factory-supplied regulator is used and
installed with the arrow mark on the regulator pointing towards the gas grill. Use only pipe sealants that are
approved for use with natural and LP gases. An installer-supplied gas shutoff valve must be installed in an
accessible location.
Please note, when pressure testing, the following statements must be adhered to:
This gas appliance and its individual shutoff valve must be disconnected from the gas supply piping
system during any pressure testing of that system at the test pressures in excess of 1/2 psi (3.5 kPa).
This appliance must be isolated from the gas supply piping system by closing its individual manual
shutoff valve during any pressure testing of the gas supply piping system at test pressures equal to or
less than 1/2 psi (3.5 kPa).
GAS REGULATOR CHECK / CONVERSION
If the gas grill is factory built for natural gas, the regulator supplied is set for 4” water column. The regulator is
convertible to 10” water column for system LP application.
Do not use with a 20-lb LP cylinder.
Make sure
that the regulator is set for the correct gas type. To check, remove the brass hex cap. You will find the
conversion plastic pin attached to the cap to the underside of the cap. If the disc (1/2 in. diameter) of the pin is
close to the cap, then the regulator is set for natural gas. If the disc is at the tip of the pin, away from the brass
cap, the regulator is set for system LP application. To convert to natural gas, remove the plastic conversion pin
and invert and replace it back in a manner such that the disc is close to the brass cap. For both natural and LP,
the maximum inlet pressure is 14” water column.
CAUTION: Provide adequate ventilation holes in the enclosure for safety purposes in
the event of a gas leak.
SET TO NG
SET TO LP
Summary of Contents for TEBQ30G-C
Page 28: ...23 EXPLODED VIEW ...
Page 31: ...26 WIRING DIAGRAM ...


