7
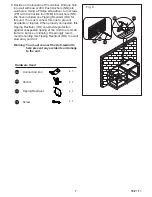
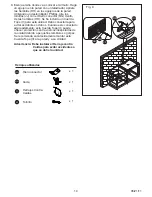
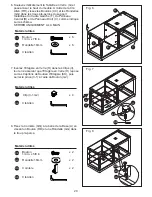
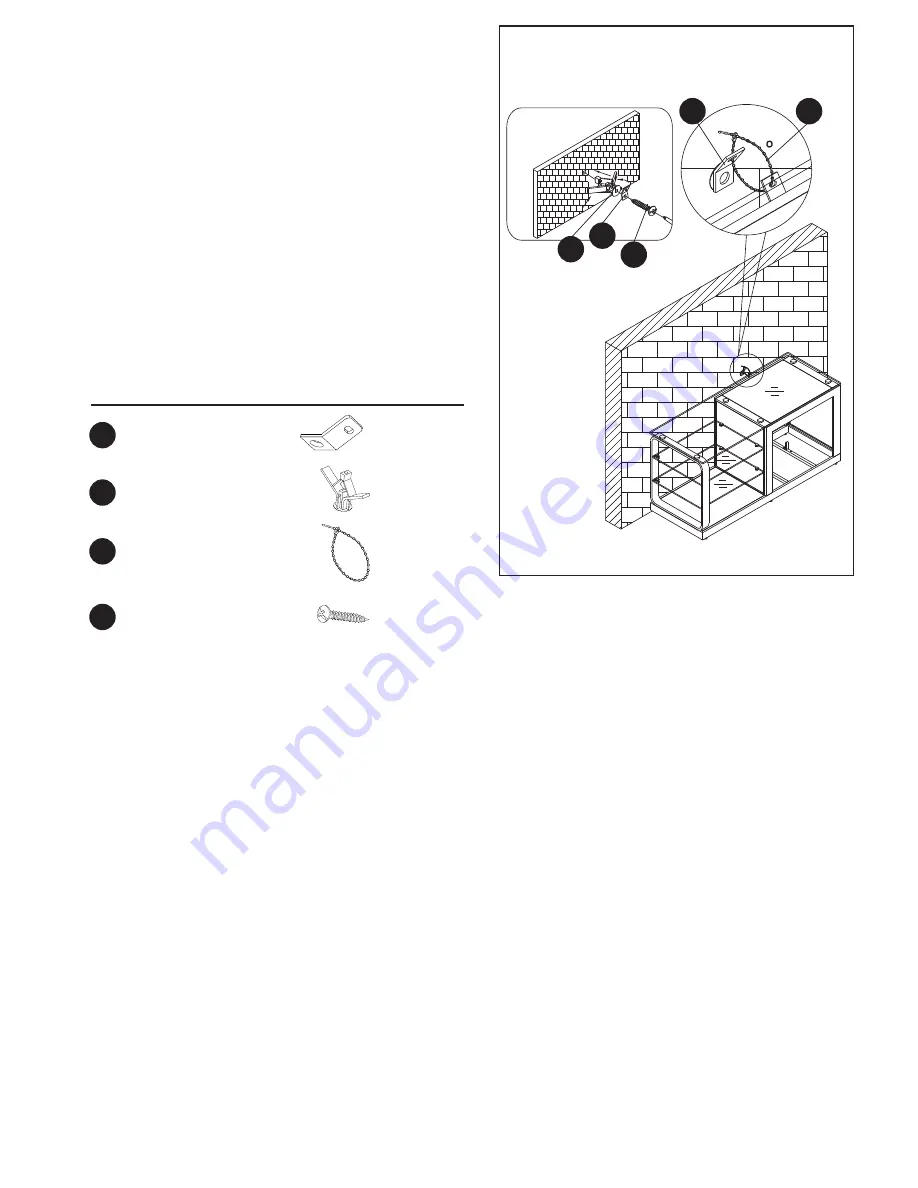
Fig. 9
OO
MM
NN
MM
PP
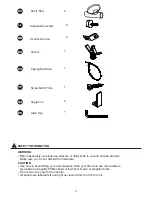
Hardware Used
MM
NN
OO
PP
x 1
x 1
x 1
x 1
Anchor
Connection iron
Tipping Restraint
Screw
9. Decide on the location of the cabinet. Drill one hole
into wall with power drill, Push Anchors (NN) into
wall holes. Using a Phillips screwdriver, turn screws
(PP) with Connection iron (MM) into Anchors (NN).
We have included one Tipping Restraint (OO) for
this unit. You must connect this one to prevent
accidents or injuries. When properly connected, this
Tipping Restraint (OO) can provide protection
against unexpected tipping of the Unit due to small
tremors, bumps or climbing. We strongly recom
mend mounting this Tipping Restraint (OO) to a wall
stud and your Unit.
Warning: You must connect the Anti-rewind to
help prevent any accidents or damage
to the unit.
06/21/11


