background image

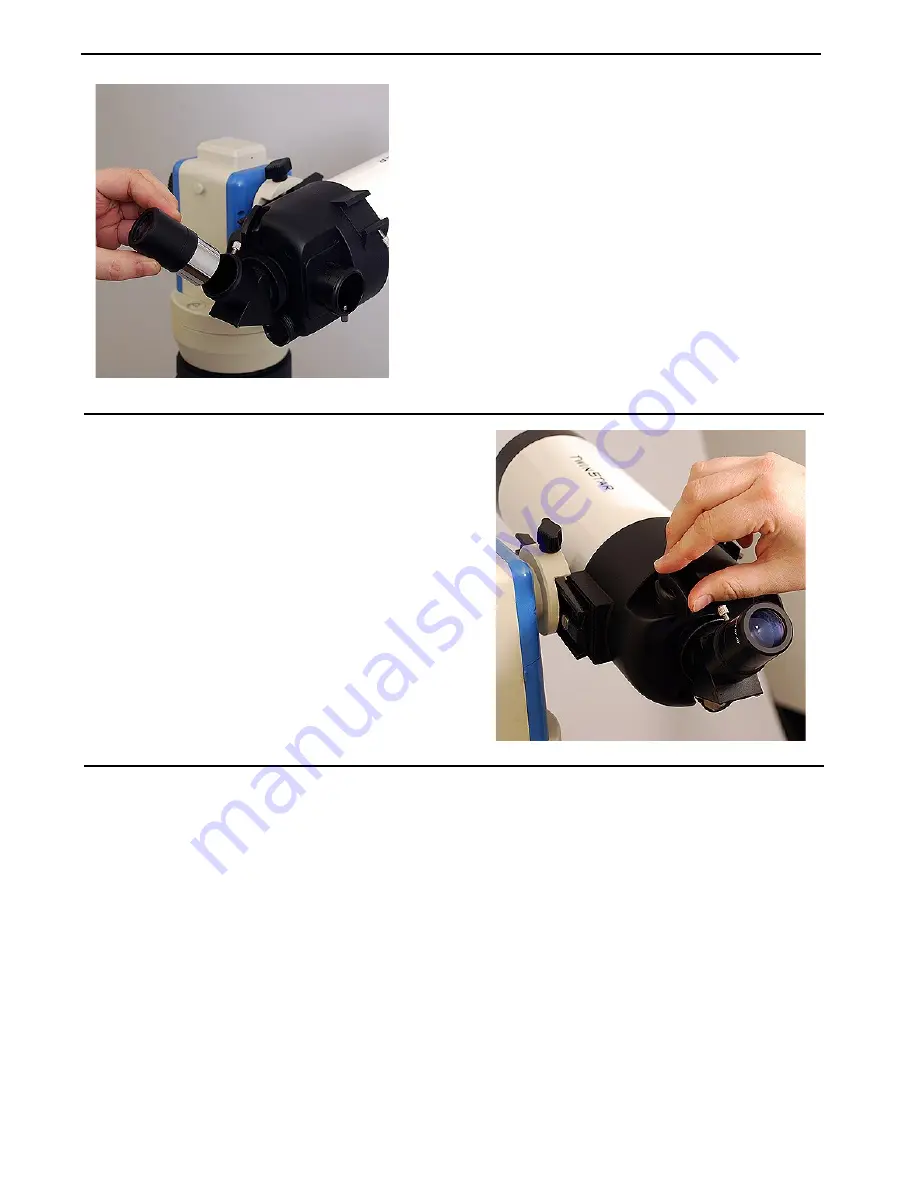
Step 8 

Finally, insert one of your eyepieces 
into the back of the angle prism, as 
shown in Figure 8, and you are ready to 
begin observing.  Be sure to tighten the 
set screw that holds the eyepiece in 
place. 

Thanks again for your business. We hope you enjoy your new 
telescope! 

Figure 8 – An eyepiece goes into the angle 
prism.  Be sure to tighten the silver set screw. 

Step 9 

Check the flip mirror switch.  This 
switch lets you choose to observe 
through the back of the telescope or the 
top of the telescope. To observe using 
the back of the telescope, the switch 
should be oriented parallel to the tele-
scope tube, as shown in Figure 9. 

Figure 9 – The flip mirror is set so that 
the image can be seen through the back 
of the telescope. 

All content in this guide is copyright 2003-2015 by The Green Group LLC. 

Summary of Contents for 619013-E

Page 1: ...perly We know that many people are visually oriented and that pictures of the assembly process are help ful We have put this guide together to help you assemble your telescope for your first night of ob serving Once your telescope is assembled and ready to go the rest is up to you Learning astronomy is all the fun anyhow So let s get started ASSEMBLING THE TELESCOPE Step 1 Attach the iOptron Smart...

Page 2: ...mount plate is pre attached Other times you may have to attach the plate yourself It s easy Using a screwdriver simply attach the dovetail mounting plate to the bottom of the tele scope Be sure the long end of the mount plate is oriented to the front of the tele scope as shown in Figure 4 Figure 3 The completed iOptron Smart Star tripod and mount Step 4 Figure 4 The 90mm Telescope tube the dovetai...

Page 3: ...it in place with the set screw as shown in Figure 5 Next you can attach the optional sighting scope to the main telescope as shown in Figure 6 Step 6 Figure 6 The optional sighting scope can be at tached to the telescope tube Step 7 Figure 7 The angle prism screws into the telescope tube The angle prism screws into the back of the telescope tube as shown in Figure 7 ...

Page 4: ...es into the angle prism Be sure to tighten the silver set screw Step 9 Check the flip mirror switch This switch lets you choose to observe through the back of the telescope or the top of the telescope To observe using the back of the telescope the switch should be oriented parallel to the tele scope tube as shown in Figure 9 Figure 9 The flip mirror is set so that the image can be seen through the...

Reviews: