INSTALLATION · RADIO ASSEMBLY
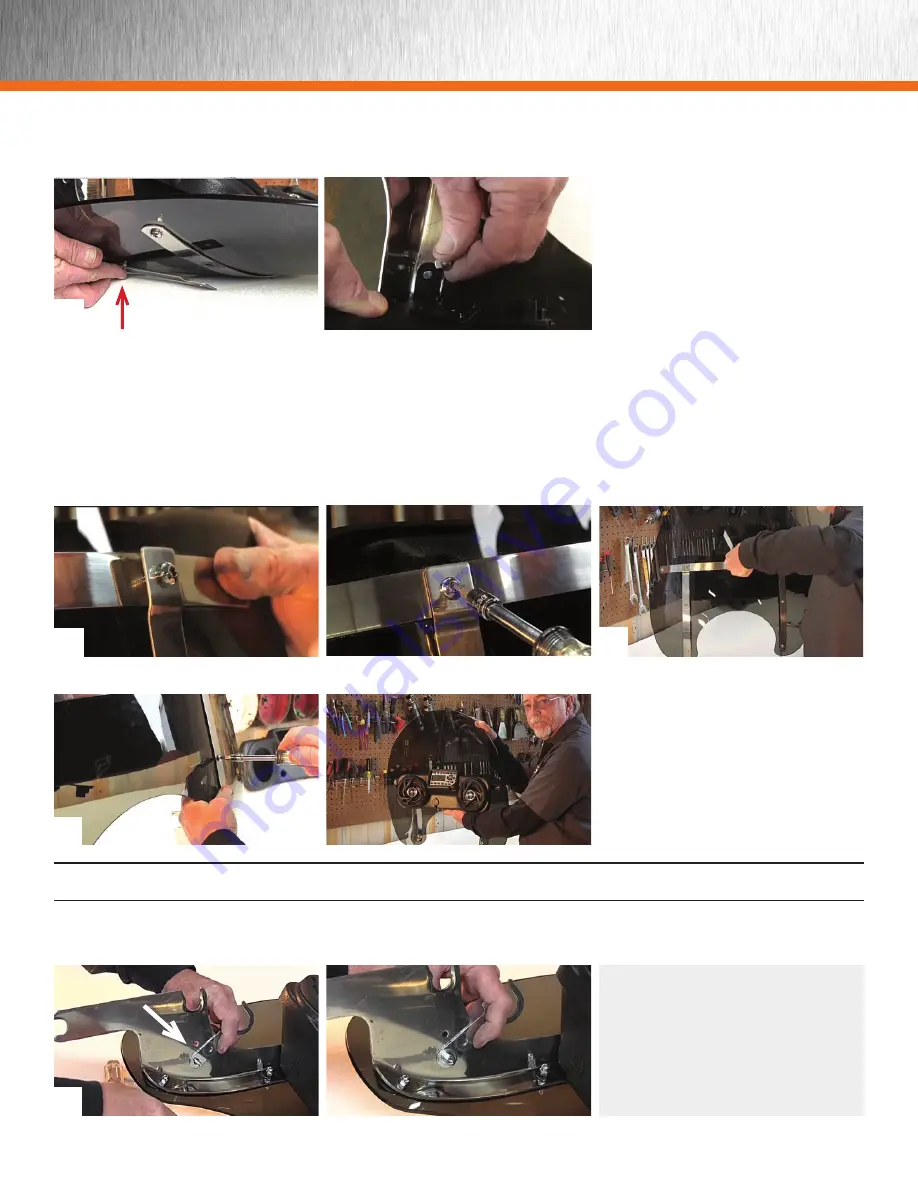
Use the longer screws you set aside earlier and
use them to attach the lower radio brackets to the
windshield vertical frame members. Install screws,
but do not tighten (f).
Now, install the two shorter screws that were supplied
with your radio. Attach them through the top holes
on the windshield vertical brackets. Screw them
in loosely(g).
Once you have all the screws in, gradually tighten
all the securing fasteners (h) so you can check
proper alignment as you go. On the lower bracket
screws you will need to use the wrench while you
tighten with the torx drive(i).
Your audio system is now installed on the windshield.
NOTE: THIS LOCKING SYSTEM
DOES NOT GUARANTEE
TO PREVENT THE THEFT OF
THE WINDSHIELD OR
AUDIO SYSTEM.
First, remove the windshield’s stock locking spring
hardware. Insert the bolt through the side frame
and hook-lock (j)
and fasten with a 3/8˝ wrench.
Repeat this procedure for the second lock.
f
g
i
j
h
5
OPTIONAL LOCKING BRACKET
(If you purchased the optional locking kit, now is the time to install them on the windshield.)


