16
http://www.TYAN.com
3.
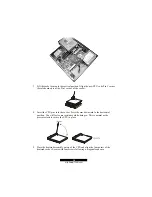
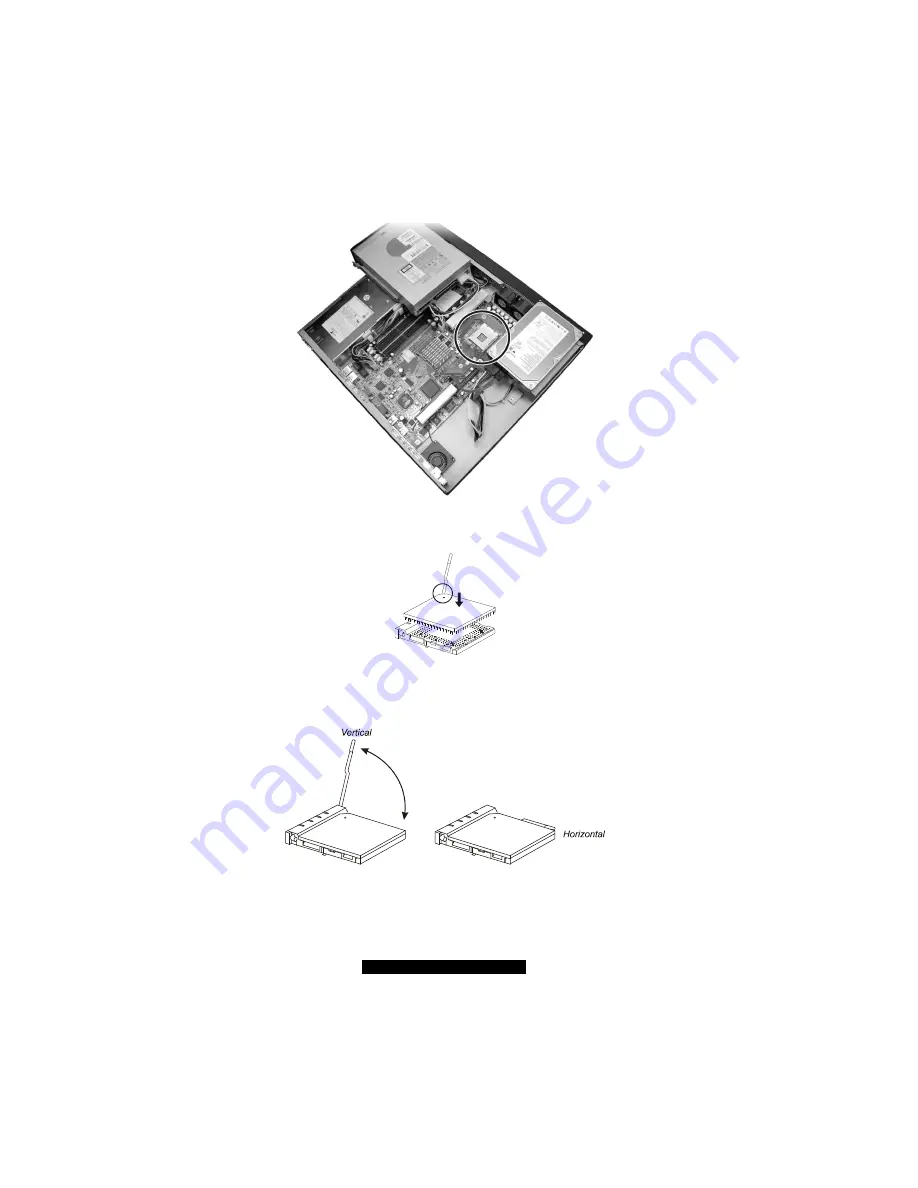
Lift the socket arm up to the vertical position. Align the new CPU so its Pin 1 corner
(beveled corner) is at the Pin 1 corner of the socket.
4.
Insert the CPU pins into the socket. Press the arm downward to the horizontal
position. You will feel some resistance while doing so. This is normal as the
pressure starts to secure the CPU in place.
5.
Place the heatsink assembly on top of the CPU and align the four points of the
heatsink socket. Secure with four screws following a diagonal sequence.
Summary of Contents for B5103G12S2
Page 6: ......
Page 12: ......
Page 40: ......
Page 60: ...60 http www TYAN com 4 Click on Create to create the new RAID volume 5 Click on OK to finish ...
Page 62: ...62 http www TYAN com 3 Click on Yes Y to continue 4 Click on Yes Y to continue ...
Page 76: ......
Page 84: ......


