http://www.tyan.com
27
1.4 Standard Parts List
This section describes GC68-B8036 package contents and accessories. Open the
box carefully and ensure that all components are present and undamaged. The
product should arrive packaged as illustrated below.
1.4.1 Box Contents and Accessories
If any items are missing or appear damaged, contact your retailer or browse to
TYAN’s website for service:
http://www.tyan.com
GC68-B8036 Box Contents
1U chassis
(1+1) 850W(80+ Platinum) w/ PFC redundant power supply (pre-installed)
(6) 40x40x28mm Fan (pre-installed)
S8036 Motherboard (pre-installed)
M1724G68-FPB Front Panel Board (pre-installed)
M1725G68-USB Front USB Board (pre-installed)
M8036-R16-1F 1U PCI-E Riser (pre-installed)
M8036-L16-1F 1U PCI-E Riser (pre-installed)
M1631G68-D-PDB Power Distribution Board
(
pre-installed
)
M1312G68-BP6E-4 & M1302G68-BP12-4 Drive Backplane Boards
(pre-installed on B8036G68V4E4HR-LE SKU)
M1303G68A-BP12E-12 Drive Backplane Board (pre-installed on
B8036G68AV10E2HR-LE SKU)
M1299G68A-BPE-12 Drive Backplane Board (pre-installed on
B8036G68AE12HR SKU)
GC68-B8036 Accessories
(1) Tool-less Rail Kit
(1) CPU Heatsink
(1) CPU Air Duct
(2) US Power Cords
(2) EU Power Cords
(1) Screw Pack for OCP 2.0 LAN Mezzanine
(2) M.2 Board Clip
(1) OCP I/O Plate (w/ Gasket) for dual-port RJ-45 LAN mezzanine
(1) OCP I/O Plate for dual-port SFP28/SFP+ LAN mezzanine
(1) Tyan Quick Installation Guide
Summary of Contents for GC68-B8036
Page 1: ...1 http www tyan com GC68 B8036 GC68A B8036 Service Engineer s Manual ...
Page 2: ...2 http www tyan com ...
Page 33: ...http www tyan com 33 1 5 5 Chassis Dimensions ...
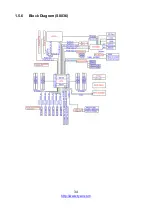
Page 34: ...http www tyan com 34 1 5 6 Block Diagram S8036 ...
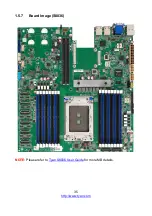
Page 36: ...http www tyan com 36 NOTE ...
Page 42: ...http www tyan com 42 4 Use a screw driver to fasten the rear top cover ...
Page 47: ...http www tyan com 47 Memory Population table ...
Page 53: ...http www tyan com 53 5 Insert the drive tray into the chassis and close the lever ...
Page 55: ...http www tyan com 55 4 Insert the drive tray into the chassis and close the lever ...
Page 60: ...http www tyan com 60 4 Insert the M 2 card into the slot Pull the latch to lock the M 2 card ...
Page 64: ...http www tyan com 64 Front ...
Page 66: ...http www tyan com 66 3 Fasten the chassis ear to the front surface of chassis ...
Page 68: ...http www tyan com 68 NOTE ...
Page 90: ...http www tyan com 90 2 Unscrew the motherboard to lift it up for replacement ...
Page 100: ...http www tyan com 100 BIOS Temp Sensor Name Explanation ...


