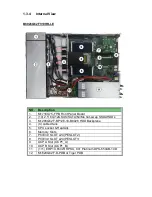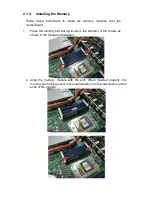
2.1.3 Installing the CPU and Heat sink
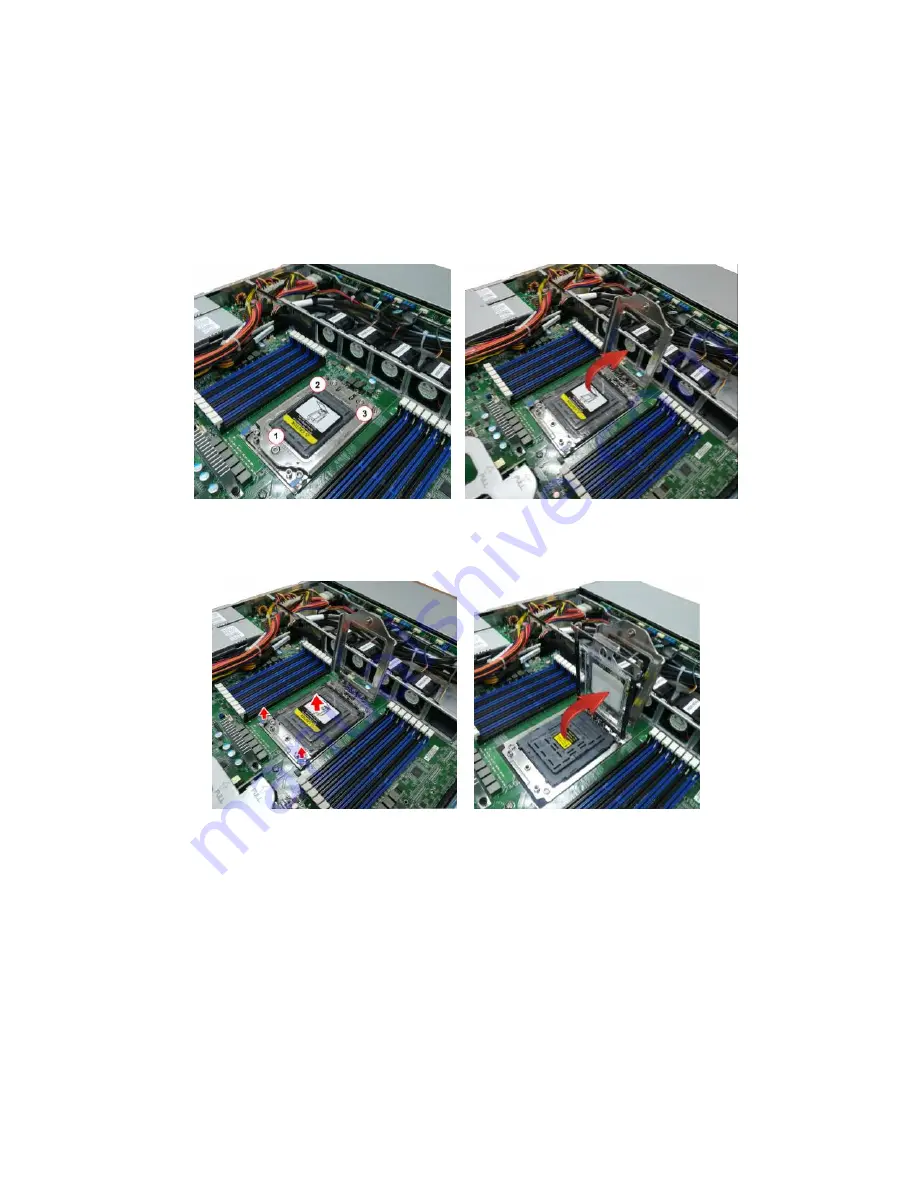
Follow the steps below on installing CPUs and CPU heat sinks.
1.
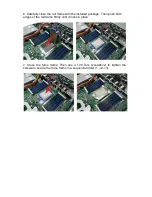
Use a T20 Torx screwdriver to loosen the screws securing the force frame
in a sequential order (3->2->1).
Note: The force frame will automatically eject after the captive screws are
being released.
2.
By placing your both index fingers on the sides on the metal handle, pull to
release the rail frame. Then lift the rail frame to its fully open position.
Summary of Contents for GT62F-B8026
Page 1: ...GT62F B8026 Service Engineer s Manual...
Page 31: ...2 1 2 Removing the Air Duct 1 Remove the air duct from the chassis...
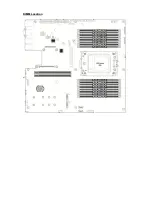
Page 36: ...DIMM Location...
Page 40: ...4 Insert the PCI E card in the direction of arrows as shown...
Page 41: ...5 Screw the PCI E cards firmly to the riser card bracket...
Page 46: ...http www tyan com 46 3 Secure the mounting ears of chassis to the rack with 2 M5 15L C screws...
Page 50: ...http www tyan com 50 3 4 1 Riser Card Features M7106 L16 1F Riser Card M7106 R16 1F Riser Card...
Page 53: ...http www tyan com 53 7 Remove the eight screws securing the bracket to the HDD backplane...
Page 83: ...http www tyan com 83 4 3 1 1 CPU0 Information...
Page 91: ...http www tyan com 91...
Page 107: ...http www tyan com 107 4 3 11 NVMe Configuration...
Page 108: ...http www tyan com 108 4 3 12 SATA Configuration...
Page 114: ...http www tyan com 114 4 4 1 2 Socket 0 Information...
Page 116: ...http www tyan com 116 4 5 AMD CBS Menu...
Page 118: ...http www tyan com 118 4 5 1 1 Core Thread Enablement Submenu...
Page 121: ...http www tyan com 121 4 5 3 UMC Common Options Submenu...
Page 122: ...http www tyan com 122 4 5 3 1 DDR4 Common Options Submenu...
Page 129: ...http www tyan com 129 4 5 4 FCH Common Options Submenu...
Page 134: ...http www tyan com 134 4 6 2 BMC Network Configuration Submenu...
Page 152: ...http www tyan com 152 7 Insert the LAN card into the OCP slot...
Page 153: ...http www tyan com 153 8 Secure the LAN card to the chassis...
Page 157: ...http www tyan com 157 NOTE...


