NFPA 13D or NFPA 13R for the re-
quirements relating to preventing the
possible release of a Model TFP1
heat responsive element, due to ex-
posure to heat sources other than
abnormal fire.
Installation
The Model TFP1 must be installed in
accordance with the following instruc-
tions:
NOTES
The Protective Cap is to remain
on the sprinkler during installa-
tion and until the ceiling installa-
tion is complete. The Protective
Cap must be removed to place the
sprinkler in service.
A leak tight 1/2 inch NPT sprinkler
joint should be obtained with a
torque of 7 to 14 ft.lbs. (9,5 to 19,0
Nm). A maximum of 21 ft.lbs. (28,5
Nm) of torque is to be used to in-
stall sprinklers. Higher levels of
torque may distort the sprinkler in-
let with consequent leakage or im-
pairment of the sprinkler.
Do not attempt to compensate for
insufficient adjustment in an Es-
cutcheon Plate by under- or over-
tightening the Sprinkler. Readjust
the position of the sprinkler fitting
to suit.
Step 1.
The Sprinkler must be in-
stalled only in the pendent position
and with the Sprinkler waterway cen-
terline perpendicular to the mounting
surface.
Step 2.
Install the sprinkler fitting so
that the distance from the face of the
fitting to the mounting surface will be
nominally 29/32 inches (23,0 mm) as
shown in Figure 1A.
Step 3.
With pipe thread sealant ap-
plied to the pipe threads, hand
tighten the Sprinkler into the sprin-
kler fitting.
Step 4.
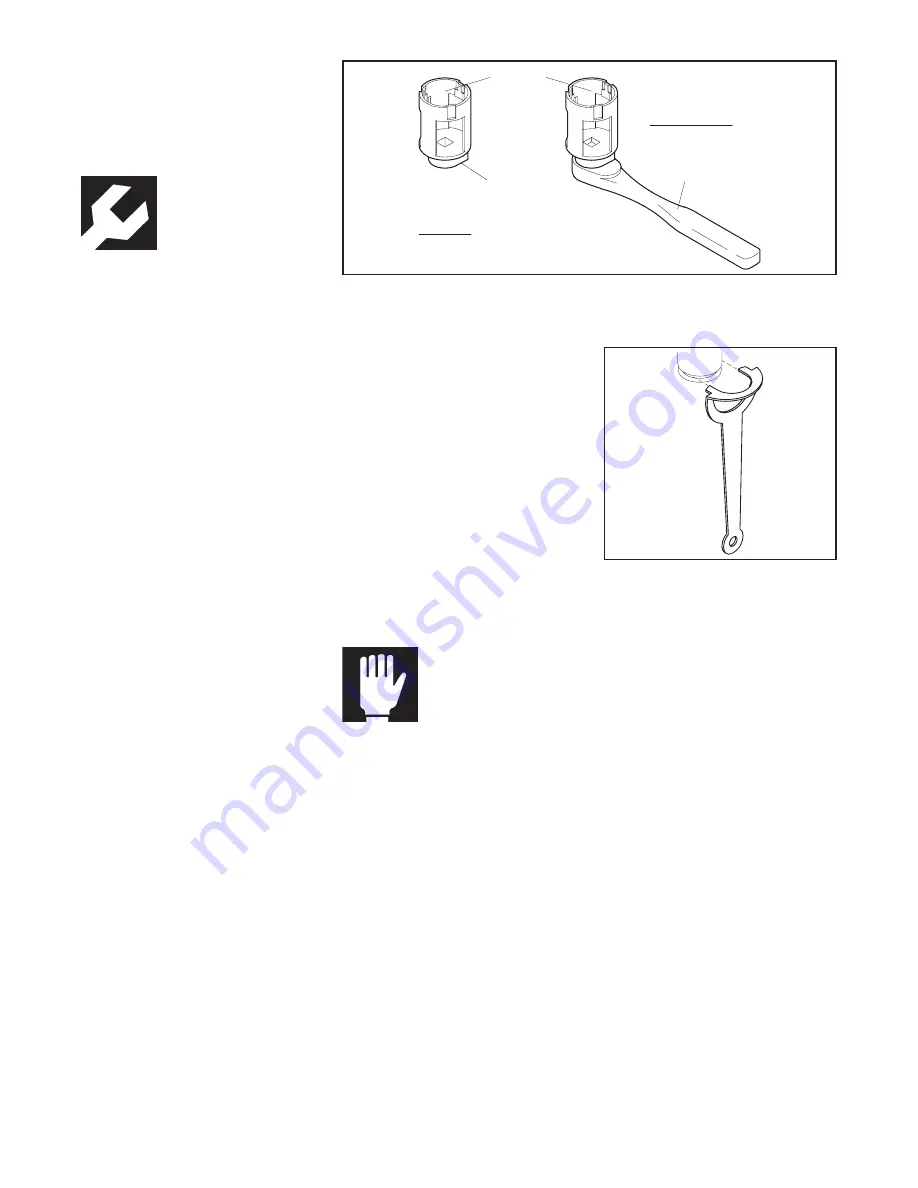
Wrench tighten the Sprinkler
using only the Sprinkler Socket or
Wrench & Socket Combination (Ref.
Figure 4). The wrench recess of the
Socket is to be applied to the sprin-
kler wrenching area (Ref. Figure 1A).
Step 5.
Use the “ceiling level toler-
ance limit” indicator on the Protec-
tive Cap to check for proper installa-
tion height. Relocate the sprinkler
fitting as necessary. If desired the
Protective Cap may also be used to
locate the center of the clearance
hole by gently pushing the ceiling
material against the center point of
the Cap.
Step 6.
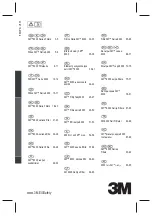
After the ceiling has been
completed with the 2 inch (50 mm)
diameter clearance hole, use the
Protective Cap Removal Tool (Ref.
Figure 5) to remove the Protective
Cap and then push on the Escutch-
eon until its flange just comes in con-
tact with the ceiling. Do not continue
to push on the Escutcheon such that
it lifts a ceiling panel out of its nor-
mal position. If the Escutcheon can-
not be engaged with the Sprinkler, or
the the Escutcheon cannot be en-
gaged sufficiently to contact the ceil-
ing, relocate the sprinkler fitting as
necessary.
Care and
Maintenance
The Model TFP1 must be maintained
and serviced in accordance with the
following instructions:
NOTES
It is the responsibility of the in-
stalling contractor to provide a
copy of this document to the
owner or his representative, and
in turn, it is the obligation of the
owner to provide a copy of this
document to a succeeding owner.
Wet pipe sprinkler systems must
be maintained at a minimum tem-
perature of 40°F/4°C to prevent
freezing and bursting of the pipe
and/or sprinklers.
Automatic sprinklers are not to be
tested with a heat source. Opera-
tion of the heat responsive ele-
ment can result.
Absence of an Escutcheon Plate
may delay the time to sprinkler op-
eration in a fire situation.
Before closing a fire protection
system main control valve for
maintenance work on the fire pro-
tection system which it controls,
permission to shut down the af-
fected fire protection system must
be obtained from the proper
authorities and all personnel who
may be affected by this action
must be notified.
Do NOT enclose sprinklers within
drapes, curtains, or valances.
Do NOT hang anything from the
sprinklers.
Do NOT cleanse the sprinklers
with soap and water, detergents,
ammonia, cleaning fluids, or other
chemicals. Remove dust, lint, cob-
webs, cocoons, insects, and lar-
vae by gently brushing with a
feather duster or gently vacuum-
ing with a soft bristle (i.e., dust-
ing) brush attachment.
Exercise suitable safety precau-
tions in the use and storage of
highly flammable materials. The
rapid rate of fire development and
spread of which can be caused by
such materials can reduce the abil-
ity of the sprinkler system to aid
in the control of a fire in which
they are involved.
Figure 4
TFP1 Sprinkler Socket
TFP1 Wrench & Socket Combination
DRIVE
3/8" SOCKET
ACCEPTS
WRENCH
RECESS
WRENCH
COMBINATION
WRENCH & SOCKET
#4948
#4947
SOCKET
Figure 5
TFP1 Protective Cap
Removal Tool
5
OBSOLETE


