4
STEP 5:
Install DIN rail to enclosure using the two screws provided.
Install MPPT solar controller to DIN Rail.
STEP 6:
Find the temperature sensor cable that came with the MPPT
Solar Controller and place it on or near the batteries. Connect the bat-
tery cable(s) to the solar controller battery inputs and then to the batter-
ies making sure to observe the proper polarity.
STEP 7:
Install the cable glands in the back of the enclosure and route
the long solar panel cables through the cable gland and connect to the
solar controller (PV) inputs. You can shorten the cables as necessary
for a cleaner install. You can also lengthen the cables by adding addi-
tional lengths of 12AWG cable. Please note that the longer the cable,
the more cable loss you will see.
STEP 8:
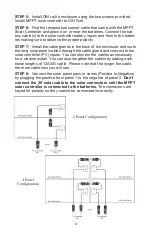
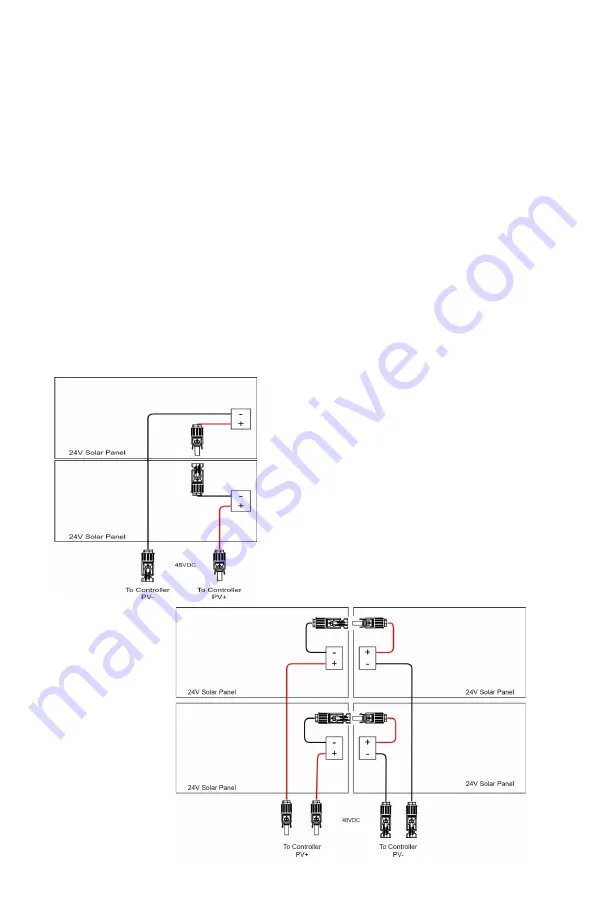
Connect the solar panel pairs in series (Positive to Negative)
by plugging the positive from panel 1 to the negative of panel 2.
Don
’
t
connect the
20’
solar cable to the solar connectors until the MPPT
solar controller is connected to the batteries.
The connectors are
keyed for polarity so they cannot be connected incorrectly.
2 Panel Configuration
4 Panel
Configuration
Summary of Contents for RemotePro RPAL MPPT
Page 3: ...3 ...


