8000060 Rev 1 23-Feb-18
4
9. U-Bolts
10. Battery compartment
11. Reset button
12. LED Indicator: light is on for 4s if the unit powers up. Then the LED will
flash once every 48 seconds (the sensor transmission update period).
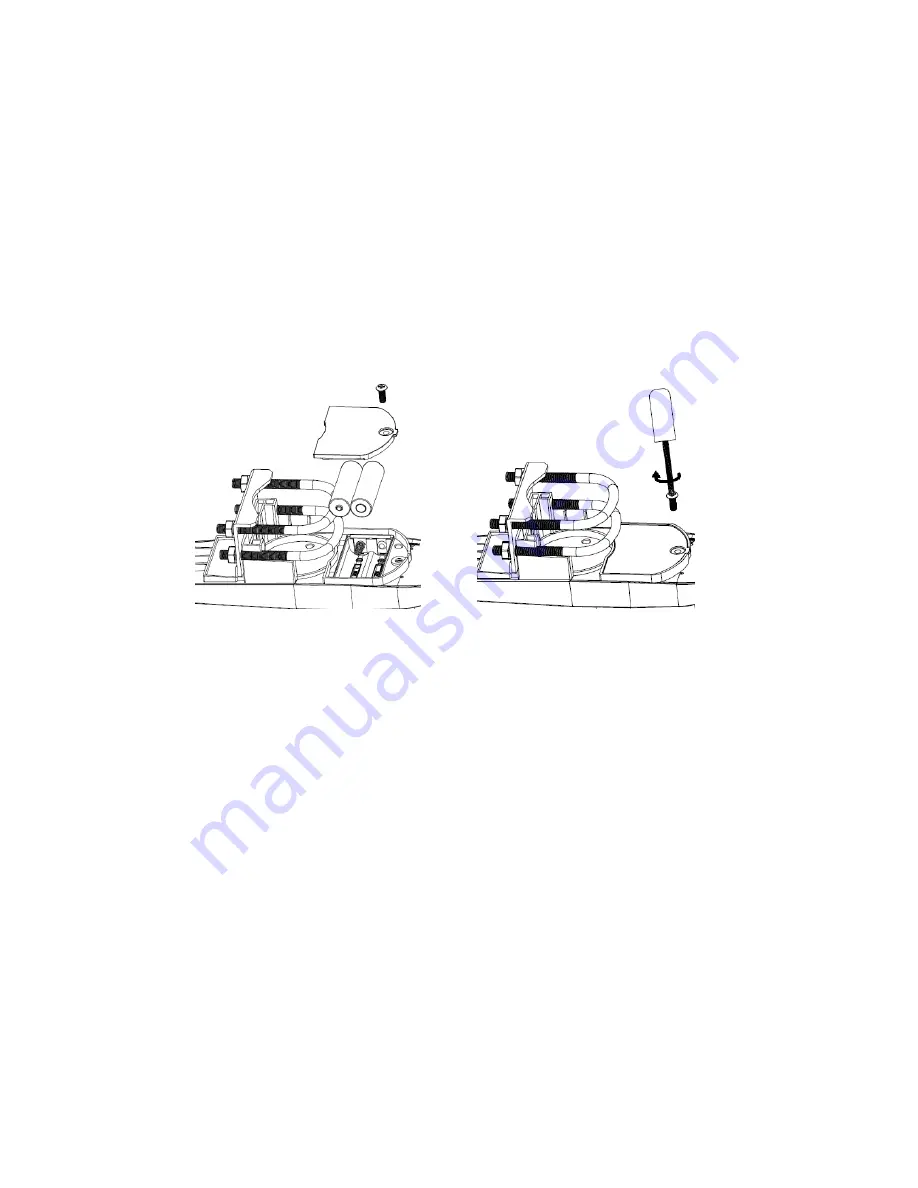
2. Install Batteries
The sensor array is powered by the solar panel which charges a super capacitor, but
batteries are required as a backup power source. Insert 2X AA batteries in the battery
compartment and tighten the screw of battery cover. The LED indicator on the back of
the transmitter will turn on for four seconds and normally flash once every 48 seconds
(the sensor transmission update period).
Figure 4
Note:
If no LED light or if LED is on steady, make sure the batteries are inserted
correctly. If still an issue press the reset button momentarily.
Caution ! Do not install
the batteries backwards as you can permanently damage the outdoor sensor.
Note: We recommend lithium batteries for cold weather climates, but alkaline
batteries are sufficient for most climates.
We do not recommend rechargeable batteries.
They have lower voltages, do not operate well at wide temperature ranges, and do not last
as long.
3. RF (Radio Frequency) Receiving Mode
1. After power-up, the display console waits for an RF signal from the sensor array
for 144s.
2. Once synchronized, the sensor array will transmit a data update every 48 seconds.
If the display station does not receive a signal from the sensor array for eight
48s time-periods, the outdoor temperature and humidity will
display “
----
”.
The
display console will start to search for a new signal from the outdoor sensor array for 144s.
3.
If the display console loses sync permanently with the outdoor sensor array, press the


