(2) installation
Reassemble in reverse order of removal.
1) Install the axle bracket on the engine.
2) Retighten the right-hand pivot metal
(support) mounting bolts.
3) Connect the piping of the power steering
system.
4) Install the battery bracket and battery.
5) Install the radiator and oil cooler on the front
axle bracket.
6) Connect the upper, lower and drain radiator
hoses.
7) Install the air cleaner assembly and the inlet
pipe of the air cleaner.
8) Connect the wiring of the head lights and
other harness.
9) Connect the ground strap and the battery
cables.
10) Install the engine hood.
11) Fill the radiator with coolant.
3.SEPARATION OF THE ENGINE
AND THE TRANSMISSION.
Parts which can be inspected during this
operation.
operation.
-Fly wheel
-HST unit
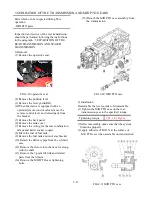
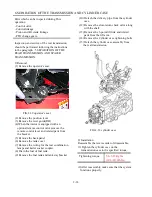
(1) Removal
1) Drain the transmission of the oil
In the case of the 4WD version, remove the
front wheel drive shaft.
2) Support the engine on the bottom with a jack
or stands.
3) Hold the transmission with a garage jack or a
crane so that the transmission side can be
moved when needed.
4) Open the front grille
5) Detach the head light wiring.
6) Remove the pin that hold the engine Hood.
FIG.2-14 Engine Hood
FIG.2-15
FIG.2-13
2-8
Summary of Contents for T233 HST
Page 14: ...1 11...
Page 15: ...1 12...
Page 22: ...SECTION 3 GEAR TRAIN DIAGRAMS FIG 1 3 GEAR TRAIN DIAGRAM 1 19...
Page 33: ...SECTION 2 OPERATION CHART FOR DISASSEMBLY AND REASSEMBLY BY MAJOR BLOCKS 2 4...
Page 60: ...3 HST main pump case 4 5...
Page 64: ...6 Hydrostatic system schematic 4 8...
Page 100: ...3 Rear transmission case 5 15 Fig 5 23...
Page 121: ...Power Train Diagram Fig 5 60 5 36...
Page 210: ...SECTION 6 WIRING DIAGRAM 10 12...


