Doc No. FM0626 issue C Page 2
How to use the Property Exit Sensor
The resident does not need to do anything, all visitors including carers, family or friends need to be aware that the sensor is
installed, and they must follow the procedure below;
1. Enter the home and spend time with the resident as normal.
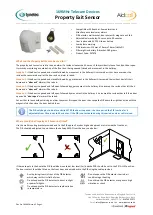
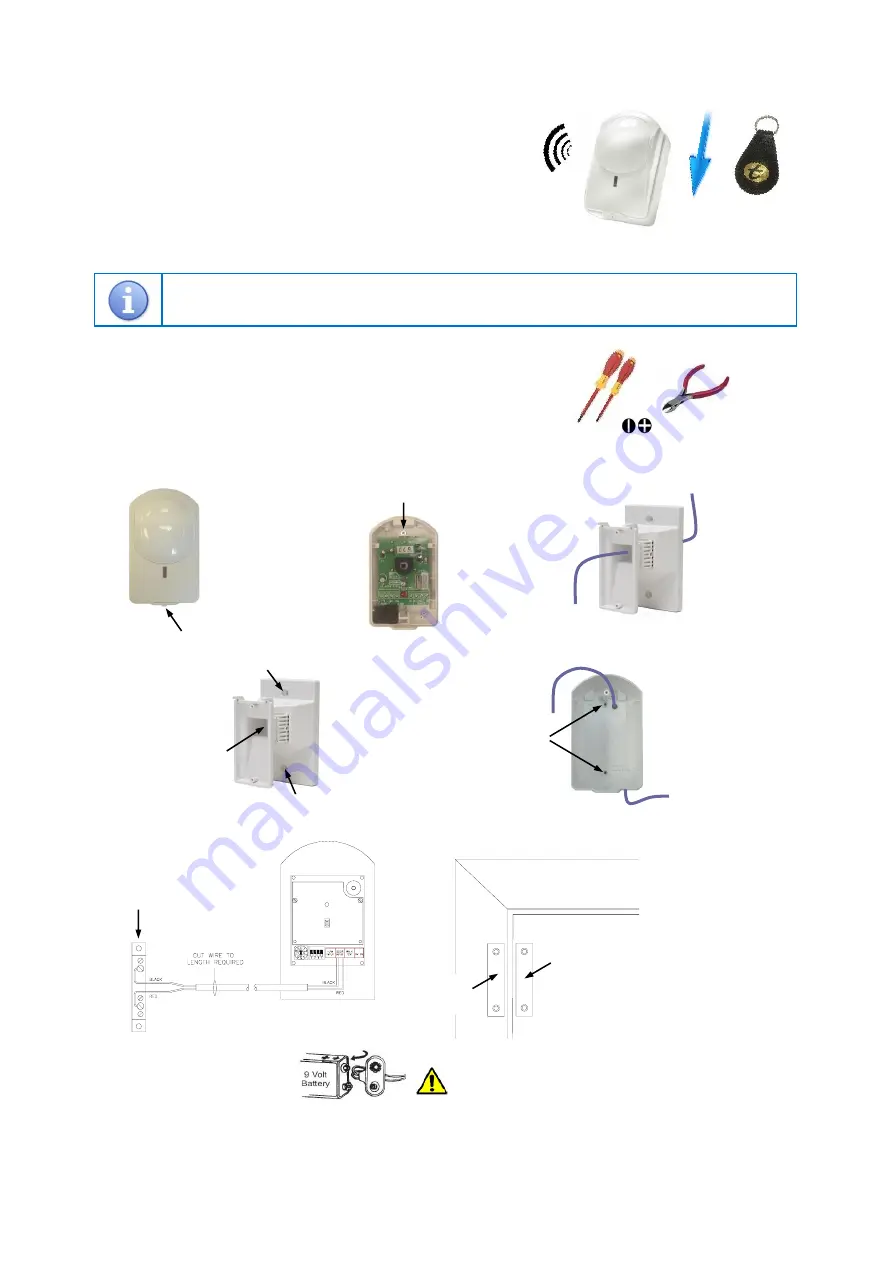
2. When leaving, first OPEN THE DOOR then SWIPE the PIR detector
down the RIGHT HAND SIDE with the magnetic fob.
3. The PIR will sound a double
“
BEEP
” when swiped correctly
, you can
now leave and close the front door behind you.
NOTE: failure to swipe the PIR before leaving will result in a false alarm call.
The magnetic fob can be left hidden in the hallway for all visitors to use or additional fobs are available
separately
–
order Part No. YW9970
Typical Tools Required
A medium sized Pozi screwdriver is required to fix the PIR and door contacts.
Electricians side cutters are required to cut and strip the door contact wire.
A small flat bladed screwdriver is required to terminate the door contact wiring.
Installation
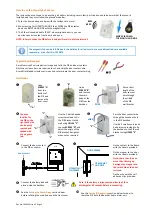
Choose a
location for
the PIR so the
right hand side
can be easily
reached and
swiped with
the magnetic
fob.
BEEP
BEEP
SWIPE PIR DOWN
THE RIGHT HAND SIDE
DOOR FRAME
Fix the contact to the frame
with the screws provided.
Fix the magnet to the door
with the screws provided.
Note: there should be no
more than 10mm gap
between the magnet and
the switch when the door
is closed.
Fix the wire with the self
adhesive clips provided.
FIT MAGNET
ON DOOR
FIT SWITCH
ON FRAME
Undo
SCREW
“
A
”
from the
bottom of
the PIR and
remove the
front cover.
Undo
SCREW
“
B
”
and remove
the main
body of the
PIR from the
backbox.
“B”
“
A
”
Pass a short
length of the
door contact
wire through
the middle
of the PIR
wall bracket.
“
C
”
“
C
”
Use the 2 white headed
screws provided to fix
the PIR bracket to the
wall using
HOLES “C”
.
Loosen
SCREW “
D
”
and
adjust the angle of the
PIR bracket. Retighten
when set as required.
Pass the door contact wire
through the knockout hole
in the PIR backbox.
Use the 2 small countersunk
head screws provided to fix
the backbox to the PIR wall
bracket using
HOLES “E”
.
“
E
”
“
D
”
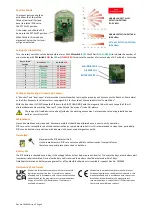
Connect the door contact
to the PIR as shown;
Connect the battery lead and
place inside the backbox.
See the
Setting the Alarm Delay
section below
before refitting the main body and the front cover.
See the
Testing & Registering
section below for how to
learn the PIR onto the Reach at-home alarm unit.
The PIR is now ready for
TESTING
.
DOOR CONTACT
PIR
WIRE
WIRE
Note: if the battery is disconnected allow the PIR to
discharge for 30 seconds before reconnecting.

