background image

13

BACKUP CAMERA POWER, MODES & LED INDICATORS
Power / Mode Status

LED Indicators

Power On

Press and hold Power button for 1 second, Camera will power on.

Blue LED light flashes 2 times when Camera is powered on.

Power Off

Press and hold Power button for 2 seconds and release, Camera will 

power off.

Red LED light flashes 1 time when the Camera is powered off.

Pairing Mode

To begin Pairing Mode, press the Power button on Camera until 

blue LED light flashes quickly. Now Camera is in Pairing Mode.

Blue LED light flashes quickly for 1 minute or until pairing success 

is complete.

Low Battery Power Off

Camera will power off when the battery is used up.

Red LED light flashes to indicate low battery.

USB Charging

This LED light is next to the MicroUSB port.

While charging, the Red LED light will remain solid. When Camera is 

fully charged, Red LED light turns off.


DASH MONITOR INDICATOR

If you see this message on the Dash 
Monitor, that means the battery of 
the Wireless Backup Camera is lower 
than working voltage. Please fully 
charge the camera.

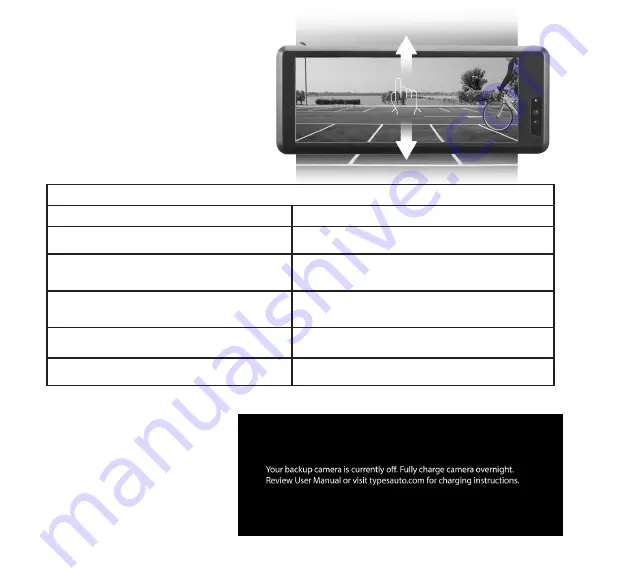
ADJUST CAMERA VIEW 
Swipe up and down to adjust view.

NOTE: You cannot adjust the parking 
aid line and camera view in the split 
screen mode.

Summary of Contents for 1458166

Page 1: ......

Page 2: ...TS 1 Introduction 1 2 Package Contents 2 3 Product Specifications 3 4 Before You Install 4 5 Installation Guide 4 6 Settings and Operation 9 7 Safety Information 14 8 Maintenance Warranty 17 9 General...

Page 3: ...fortable installing the product You can also contact TYPE S at 866 294 9244 to speak to one of our installation specialists if you have any specific questions regarding the Wireless Backup Camera BEFO...

Page 4: ......

Page 5: ......

Page 6: ...1 Remove the backing tape on the Dash Mount and attach it to the dashboard Place the suction cup of the Windshield Mount on top of the Dash Mount and push the knob counter clockwise to lock in place 2...

Page 7: ...when not in use to avoid draining the vehicle battery 1 Place the Windshield Mount on the windshield and push the knob counter clockwise to lock in place 2 Attach Dash Monitor to the Windshield Mount...

Page 8: ...era view to back up 2 Secure the Wireless Backup Camera and license plate with screws back onto the rear of your vehicle Blue LED light 4 Power on the Monitor with the 12V 24V adapter You can see the...

Page 9: ...from the back of the Wireless Backup Camera 3 Install the license plate onto the Wireless Backup Camera with the Mounting Screws Nuts 4 Secure the Wireless Backup Camera with the license plate back on...

Page 10: ......

Page 11: ......

Page 12: ...ing on Dash Monitor pair the Camera with the following steps 1 Press and hold the Power Button under the camera for 6 seconds or until the LED flashes Blue continuously The camera will be turned on an...

Page 13: ...und then the display will show Pair Fail In this case cut off power and reboot the Dash Monitor If you keep receiving the Pair Fail message after several attempts please call our technical support to...

Page 14: ...ns out the parking view will automatically switch to stand by mode MOTION DETECTION Tap to choose motion detection range Motion detection range can help you adjust the detection distance between you a...

Page 15: ...ode Blue LED light flashes quickly for 1 minute or until pairing success is complete Low Battery Power Off Camera will power off when the battery is used up Red LED light flashes to indicate low batte...

Page 16: ...manual contains important safety and operating instructions of car charger for Model BT530033 2 Before using the product read all instructions and cautionary markings 3 Do not expose car charger to ra...

Page 17: ...tch or backdoor is completely and securely closed when backing up If the back of the vehicle is hit the position and mounting angle of the Wireless Backup Camera may change When washing the vehicle wi...

Page 18: ...cleaner diluted with water and then wipe with a dry cloth Will work up to 33 feet ALWAYS engage Parking Emergency Hand Brakes of the vehicle when testing the system SAFETY AROUND AND BEHIND OTHER VEH...

Page 19: ...manship for 1 year from the date of original purchase Where permitted by law TYPE S s liability shall be limited to that set forth in this limited express warranty This limited express warranty shall...

Page 20: ...d of time SHOULD YOU HAVE ANY QUESTIONS ABOUT SERVICE RECEIVED OR IF YOU WOULD LIKE ASSISTANCE IN OBTAINING SERVICE PLEASE CALL TOLL FREE 1 866 294 9244 DURING REGULAR BUSINESS HOURS MONDAY THROUGH FR...

Page 21: ...irrors to confirm rearward clearance and that your vehicle can back up safely TYPE S and or its affiliates are not responsible for a user s intended or actual use of the Wireless Backup Camera In no e...

Page 22: ...ions or change to this equipment Such modifications or change could void the user s authority to operate the equipment NOTE This equipment has been tested and found to comply with the limits for Class...

Page 23: ...s RF exposure guidelines this equipment should be installed and operated with a minimum distance of 20cm between the radiator and your body CAN ICES 3 B NMB 3 B Wireless Backup Camera With Extended Ba...

Page 24: ...22 A Horizon Brands Company 2975 Red Hill Ave Ste 100 Costa Mesa CA 92626 1 866 294 9244 info typesauto com 2020 TYPE S All rights reserved www typesauto com ML 530033_V1...

Reviews: