- 14 -
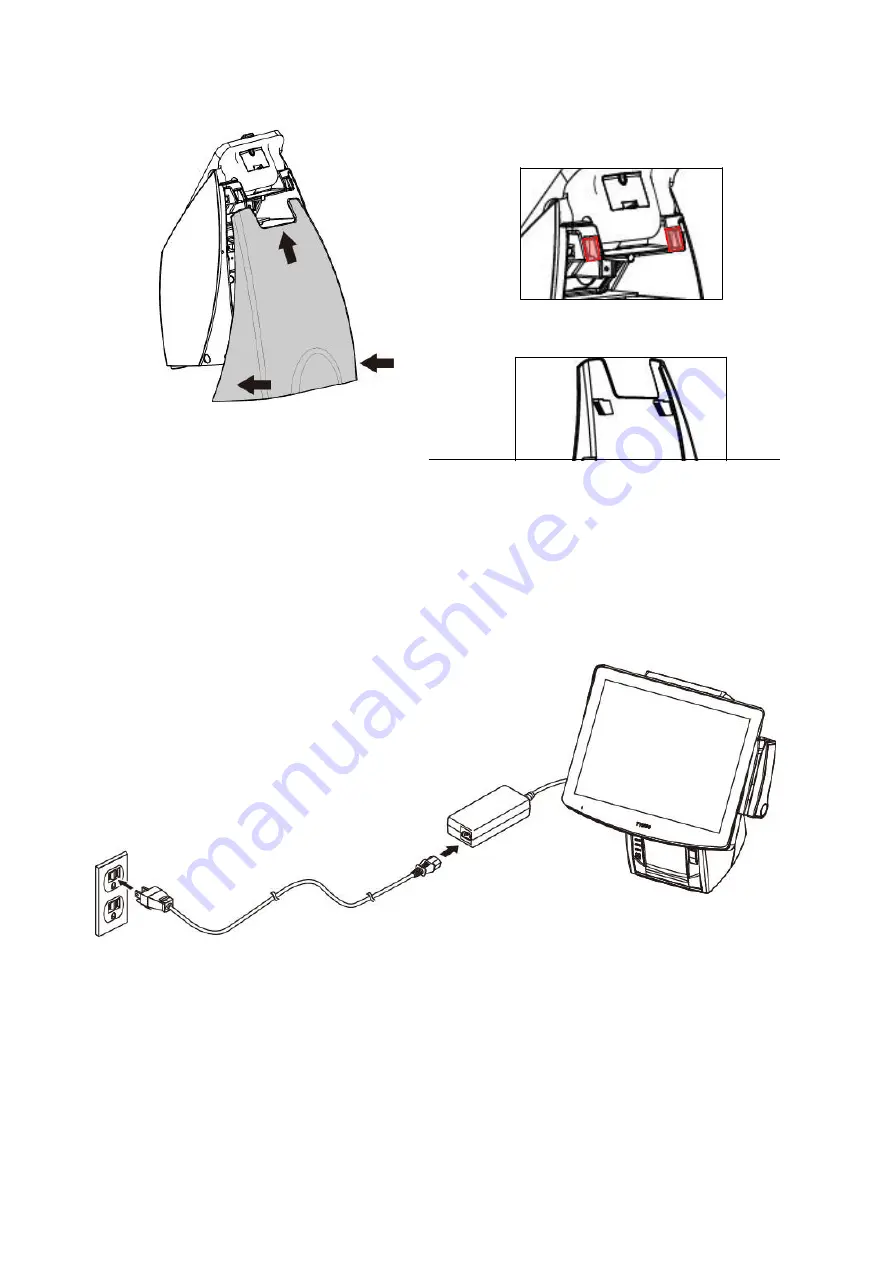
Power Adaptor
Electrical
Power Outlet
AC Power Cord
Push and pull up to re-install the
Magnetic Lock Rear Cover
h.
Arrange the cables and re-install the
Magnetic Lock Rear Cover.
Securing Slots of the Rear Cover
Hooks inside the Rear Cover
Note:
Make sure the two hooks inside the
Rear Cover are in position of the
securing slots of the base.
i.
Plug the AC power cord to the AC adapter and power source
(for example: electrical outlet).
j.
Turn on the switch of the Printer Unit and the other pre-installed peripherals.
k.
Turn on the POS System.
Summary of Contents for POP-650-i
Page 4: ......
Page 8: ......
Page 13: ...5 Dimensions Front View Left View Rear View Right View...
Page 58: ...50 Serial Port 3 to Serial Port 6 Configurations Port 3 Port 4...
Page 60: ...52 3 2 9 Network Stack This section configures settings relevant to the network stack...
Page 65: ...57 3 3 Chipset This field is used to configure the functions of relevant chipset...
Page 70: ...62 3 3 2 System Agent SA Configuration...
Page 73: ...65 Memory Configuration This field displays the memory configuration...
Page 79: ...71...
Page 83: ...75 b Setup is now installing the driver c Setup completed Click Exit to close the program...
Page 90: ...82 c Click Finish to finish the installation...
Page 130: ...122 7 5 5 Jumper Location and Settings...
Page 131: ...123 7 5 6 Jumper Settings...
Page 132: ...124...
Page 133: ...125 20161225...


