78
Design
■
Features
■
Performance
BI
•
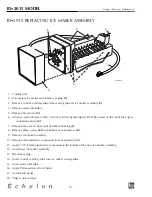
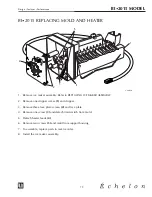
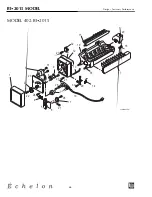
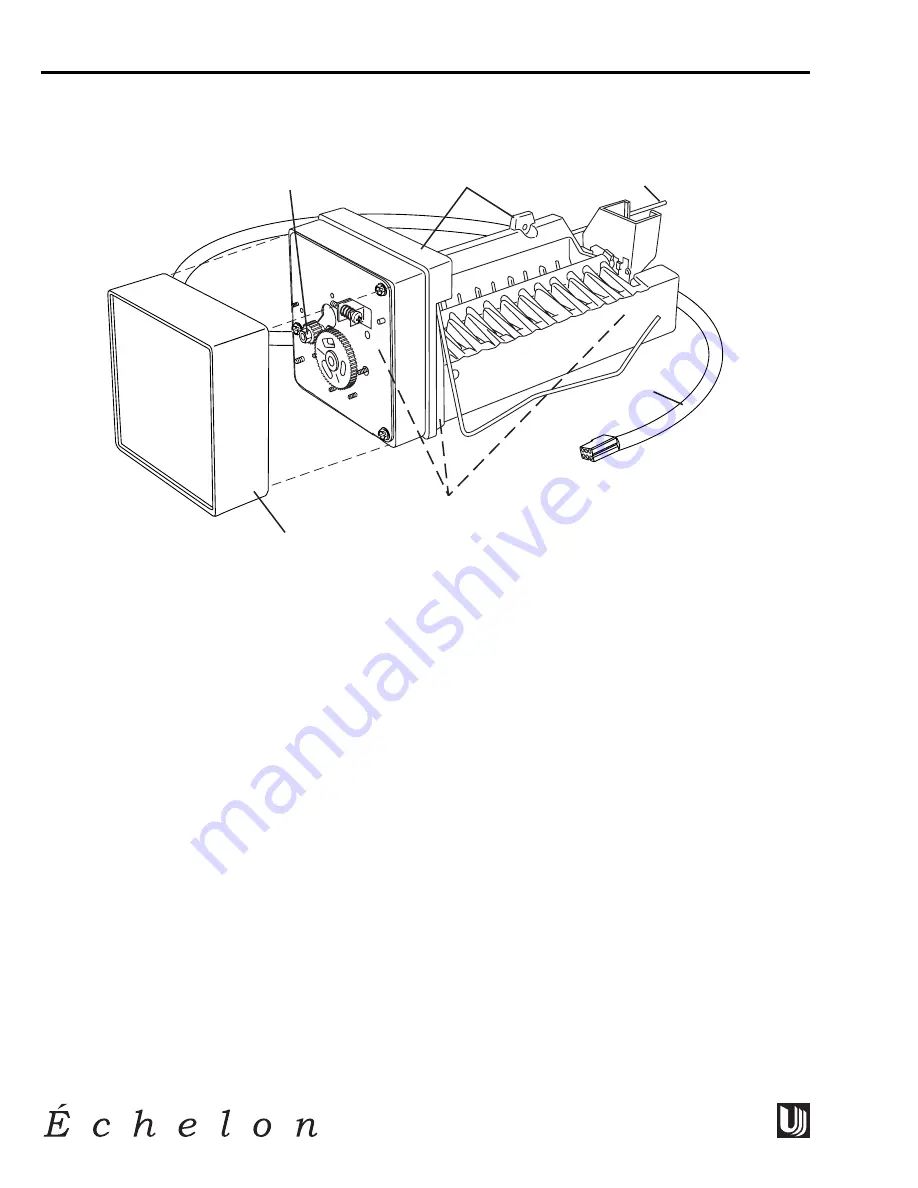
2015 REPLACING ICE MAKER ASSEMBLY
1. Unplug unit.
2. Disconnect ice maker wire harness at plug
(1)
.
3. Remove control capillary tube from sensing tube on ice maker assembly (
2)
.
4. Remove water inlet tube.
5. Remove front cover
(3)
.
6. Advance ejector blade to the 3 o’clock position by turning the 5/16" hex head on the small brass gear
counterclockwise
(4)
.
7. Remove two screws from wall of freezer housing
(5)
.
8. Remove three screws
(6)
from bottom of evaporator shelf.
9. Remove ice maker assembly.
10. Remove old alumilastic compound from evaporator shelf.
11. Apply 1/4" of fresh alumilastic compound to the bottom of the new ice maker assembly.
12. Install new ice maker assembly.
13. Reconnect plug.
14. Insert control capillary tube into ice maker sensing tube.
15. Insert water inlet tube.
16. Apply Permagum to all exit holes.
17. Install back panel.
18. Plug in unit and test.
1
2
5
4
6
3
U-LINE1001A
BI
•
2015 MODEL
Summary of Contents for Echelon CO2075FF
Page 17: ...NOTES SCREENING CALLS 16 Design Features Performance...
Page 32: ...NOTES CO2075FF 2075RF U CO29FF MODELS 31 Design Features Performance...
Page 49: ...48 Design Features Performance NOTES CO2075FF 2075RF U CO29FF MODELS...
Page 59: ...58 Design Features Performance NOTES 2075R 2015R MODELS...
Page 69: ...68 Design Features Performance NOTES 2075WC 2015WC MODELS...
Page 84: ...83 Design Features Performance NOTES BI 2015 MODEL...
Page 89: ...88 Design Features Performance NOTES BI 2015 MODEL...
Page 115: ...114 Design Features Performance NOTES CLR2060 MODEL...
Page 117: ...116 Design Features Performance...

