PAGE 3 OF 6
1114 IH-4729
LINEARITY CALIBRATION
1. Linearity calibration uses 3 calibration points. The
first calibration point is established with no weight
on the scale. The second calibration point is
established at approximately half capacity. The
third calibration point is established at capacity. The
linearity calibration points are fixed and cannot be
altered by the user during the calibration procedure.
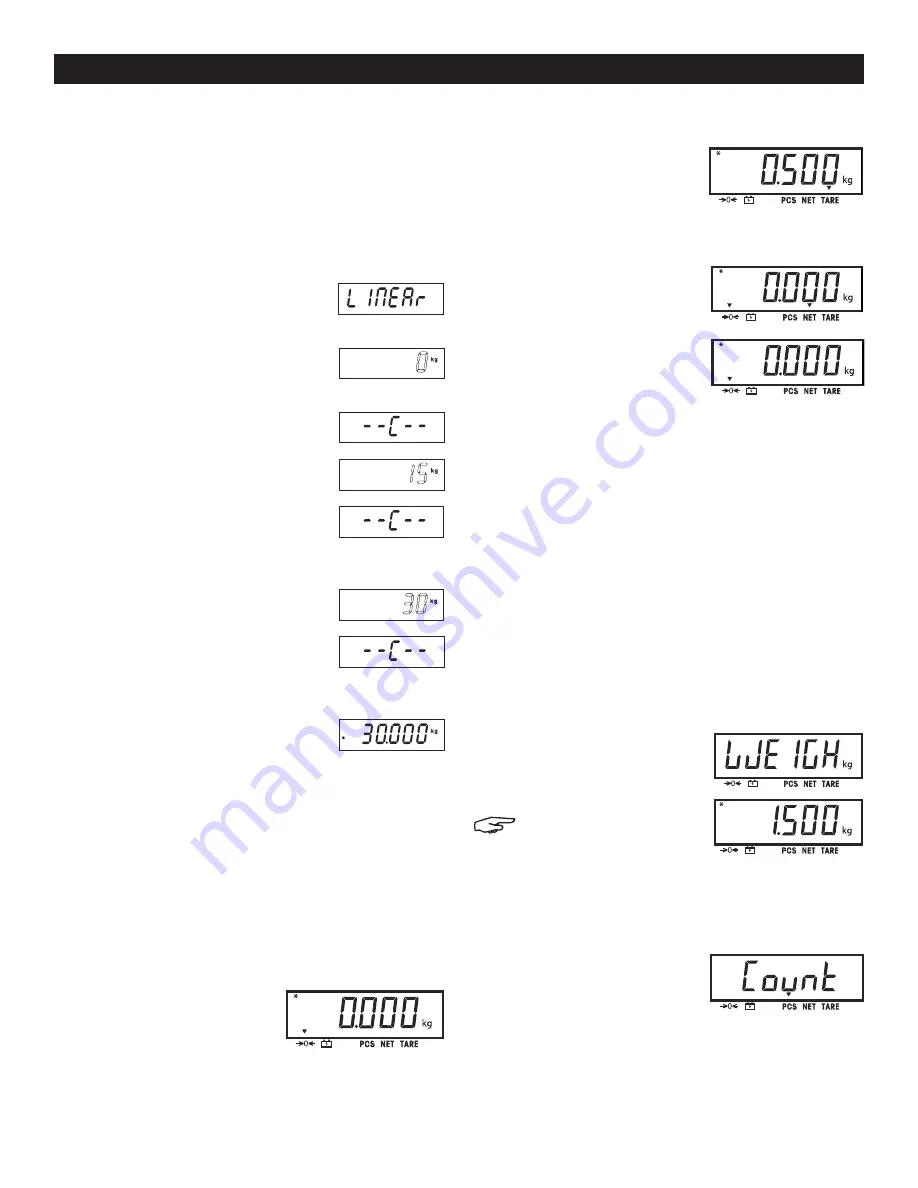
2. When L INEAr is displayed, press the
YES
button to access the linearity
calibration menu item.
3. The display flashes 0. With no
weight on the scale, press the
YES
button to establish the zero point.
4. The display shows --C-- while the
zero point is established.
5. The display flashes the mid
calibration point.
6. Place the specified weight on the
scale and press the
YES
button.
The display shows --C-- while the
mid point is established.
7. The display flashes the
full calibration point.
8. Place the specified weight on the
scale and press the
YES
button.
The display shows --C-- while the
full point is established.
9. If linearity calibration was
successful, the scale exits to
the active weighing mode and
displays the actual weight value.
ZERO OPERATION
Zero can be set under the following conditions:
• Automatically at Power On (initial zero).
• Semi-automatically (manually) by pressing the
ON/ZERO OFF
button.
• Semi-automatically by sending the Zero command
(Z or alternate zero command).
Press the
ON/ZERO OFF
button
to zero the weight display. The
scale must be stable to accept
zero operation.
MANUAL TARE
1. When weighing an item that
must be held in a container,
taring stores the container
weight in memory. Place
empty container on the scale (example 0.5 kg) and
press the
TARE
button. Display will show net weight.
2. To clear the tare value,
empty the scale and press
the
TARE
button. The display
will show gross weight.
CHANGING UNITS OF MEASURE
Press and hold the
PRINT UNITS
button until the desired
measuring unit appears.
PRINTING DATA
1. Printing the displayed data to a printer or sending
data to a computer requires the communication
parameters are set in the Print Menu.
2. Press the
PRINT UNITS
button to send the displayed
data to the communication port.
APPLICATION MODES
Only modes enabled in the mode menu are displayed.
WEIGHING
1. Place item to be weighed
on the scale. The illustration
indicates a sample of
1.5 kg, gross weight.
NOTE: To return to the
Weighing mode from
the Parts Counting
mode, press and hold the
MODE button until
WEIGH is displayed.
PARTS COUNTING
1. Use this mode to count
parts of uniform weight.
The Indicator determines
the quantity based on the
average weight of a single part. All parts must be
uniform in weight for accurate measurements.
2. To enter the Parts Counting mode, press and hold
the
MODE
button until Count is displayed.
OPERATION CONTINUED


