background image

PAGE 1 OF 9 

0321 IH-5168

1-800-295-5510

uline.com

POLE/WALL MOUNT 

RECEPTACLE

H-5168, H-5169

H-5170, H-6101

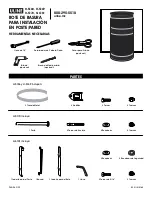
1/2" Wrench

Drill 

(optional)

Tin Snips (optional)

PARTS

TOOLS NEEDED

Flat Head Screwdriver

Masonry Drill Bit 

(optional)

Anchor Bolt x 4 

Included with H-5168 and H-5169:

Included with H-5170:

Included with H-6101:

Nut x 2

Nut x 4

Washer x 4

Washer x 2

Lock Washer x 2

Key x 1

5/16" Bolt x 2

Nut x 2

Buckle x 4

Metal Strap x 2

Bolt x 2

Para Español, vea páginas 4-6.

Pour le français, consulter les pages 7-9.

Pole x 1 

Spline x 1

Body Bracket x 1

Pole Bracket x 1

Summary of Contents for H-5168

Page 1: ...ead Screwdriver Masonry Drill Bit optional Anchor Bolt x 4 Included with H 5168 and H 5169 Included with H 5170 Included with H 6101 Nut x 2 Nut x 4 Washer x 4 Washer x 2 Lock Washer x 2 Key x 1 5 16 Bolt x 2 Nut x 2 Buckle x 4 Metal Strap x 2 Bolt x 2 Para Español vea páginas 4 6 Pour le français consulter les pages 7 9 Pole x 1 Spline x 1 Body Bracket x 1 Pole Bracket x 1 ...

Page 2: ...p the straps around the pole and connect the buckles using the bolt and nut Use the screwdriver and wrench to tighten the bolt See Figure 3 H 5170 SURFACE POLE MOUNTING Use this method to mount the receptacles to the H 5170 Surface Mount Pole 1 Determine position for the pole Pre drill four holes into surface See Figure 4 2 Install four anchor bolts into the holes and mount pole onto the bolts Sec...

Page 3: ...spline to receptacle insert 5 16 bolts with washers through spline and body bracket Apply lock washers and nuts inside receptacle and tighten 3 Attach pole bracket to wall pole with bolts or screws not included using pre drilled holes in bracket 4 Attach spline back into pole bracket to secure to wall pole Insert key in hole on top of bracket Press key down and rotate counterclockwise to lock Key ...

Page 4: ...opcional PARTES HERRAMIENTAS NECESARIAS Desarmador de Cabeza Plana Broca de Mampostería opcional 4 Pernos de Anclaje H 5168 y H 5169 incluyen H 5170 incluye H 6101 incluye 2 Tuercas 4 Tuercas 4 Rondanas 2 Rondanas 2 Rondanas de Seguridad 1 Llave 2 Pernos de 5 16 2 Tuercas 4 Hebillas 2 Tiras de Metal 2 Pernos 1 Poste 1 Banda 1 Soporte para el Bote 1 Soporte para el Poste ...

Page 5: ...te Vea Diagrama 2 4 Envuelva las tiras alrededor del poste y conecte las hebillas usando el perno y la tuerca Use el desarmador y la llave para apretar el perno Vea Diagrama 3 INSTALACIÓN EN POSTE H 5170 Use este método para instalar el bote de basura al Poste para Instalación en Superficie H 5170 1 Defina el lugar para instalar el poste Taladre cuatro orificios en la superficie Vea Diagrama 4 2 C...

Page 6: ...asura coloque los pernos de 5 16 con rondanas a través de la banda y del soporte para el bote Coloque por dentro del bote las rondanas de seguridad y tuercas y ajuste 3 Fije el soporte para el poste a la pared poste con pernos o tornillos no incluidos usando los orificios ya taladrados 4 Coloque la banda nuevamente para fijar a la pared poste Inserte la llave en el orificio de la parte superior de...

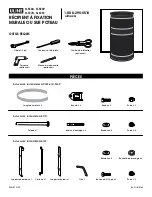
Page 7: ...S REQUIS Tournevis à tête plate Mèche à maçonnerie optionnel Boulon d ancrage x 4 Inclus avec les modèles H 5168 et H 5169 Inclus avec le modèle H 5170 Inclus avec le modèle H 6101 Écrou x 2 Écrou x 4 Rondelle x 4 Rondelle x 2 Rondelle de blocage x 2 Clé x 1 Boulon de 5 16 po x 2 Écrou x 2 Boucle x 4 Sangle en métal x 2 Boulon x 2 Poteau x 1 Clavette x 1 Support principal x 1 Support de poteau x 1...

Page 8: ... Voir Figure 2 4 Enroulez les sangles autour du poteau et reliez les boucles ensemble en utilisant le boulon et l écrou Serrez le boulon à l aide du tournevis et de la clé Voir Figure 3 MONTAGE SUR UN POTEAU FIXÉ À UNE SURFACE H 5170 Utilisez cette méthode pour fixer le récipient sur le poteau de montage pour surface H 5170 1 Déterminez l emplacement du poteau Prépercez quatre trous dans la surfac...

Page 9: ...avec les rondelles à travers la clavette et le support principal Fixez les rondelles de blocage et les écrous de l intérieur du récipient et vissez 3 Fixez le support du poteau au mur poteau à l aide des boulons ou des vis non inclus dans les trous prépercés se trouvant sur le support 4 Replacez la clavette dans le support de poteau afin de la fixer au mur poteau Insérez la clé dans le trou situé ...

Reviews: