background image

PAGE 2 OF 9 

0321 IH-5168

EXISTING POLE MOUNTING

Use this method to mount the receptacle to an existing 

pole up to 12" in diameter using the provided parts.

1.  Using tin snips, cut metal straps 4" longer than the 

circumference of the pole.

2.  Insert the metal straps through the slots on the 

mounting bracket attached to the receptacle.  

(See Figure 1)

3.  Insert straps through buckles and bend back excess 

strap, leaving just enough space to connect the 

buckles using the bolt and nut when wrapped 

around the pole. (See Figure 2)

4.  Wrap the straps around the pole and connect the 

buckles using the bolt and nut. Use the screwdriver 

and wrench to tighten the bolt. (See Figure 3)

H-5170 SURFACE POLE MOUNTING

Use this method to mount the receptacles to the H-5170 

Surface Mount Pole.

1.  Determine position for the pole. Pre-drill four holes 

into surface. (See Figure 4)

2.  Install four anchor bolts into the holes and mount 

pole onto the bolts. Secure with washers and nuts. 

(See Figure 5) 

3.  Use the strapping kit included with the receptacle 

(See Existing Pole Mounting) to attach the receptacle 

to the pole or use nuts and bolts (not included) to 

attach the receptacle through the pre-drilled holes. 

(See Figure 6)

MOUNTING

Figure 1

Figure 2

Figure 3

Figure 5

Figure 4

Figure 6

Summary of Contents for H-5168

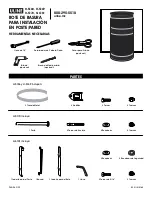
Page 1: ...ead Screwdriver Masonry Drill Bit optional Anchor Bolt x 4 Included with H 5168 and H 5169 Included with H 5170 Included with H 6101 Nut x 2 Nut x 4 Washer x 4 Washer x 2 Lock Washer x 2 Key x 1 5 16 Bolt x 2 Nut x 2 Buckle x 4 Metal Strap x 2 Bolt x 2 Para Español vea páginas 4 6 Pour le français consulter les pages 7 9 Pole x 1 Spline x 1 Body Bracket x 1 Pole Bracket x 1 ...

Page 2: ...p the straps around the pole and connect the buckles using the bolt and nut Use the screwdriver and wrench to tighten the bolt See Figure 3 H 5170 SURFACE POLE MOUNTING Use this method to mount the receptacles to the H 5170 Surface Mount Pole 1 Determine position for the pole Pre drill four holes into surface See Figure 4 2 Install four anchor bolts into the holes and mount pole onto the bolts Sec...

Page 3: ...spline to receptacle insert 5 16 bolts with washers through spline and body bracket Apply lock washers and nuts inside receptacle and tighten 3 Attach pole bracket to wall pole with bolts or screws not included using pre drilled holes in bracket 4 Attach spline back into pole bracket to secure to wall pole Insert key in hole on top of bracket Press key down and rotate counterclockwise to lock Key ...

Page 4: ...opcional PARTES HERRAMIENTAS NECESARIAS Desarmador de Cabeza Plana Broca de Mampostería opcional 4 Pernos de Anclaje H 5168 y H 5169 incluyen H 5170 incluye H 6101 incluye 2 Tuercas 4 Tuercas 4 Rondanas 2 Rondanas 2 Rondanas de Seguridad 1 Llave 2 Pernos de 5 16 2 Tuercas 4 Hebillas 2 Tiras de Metal 2 Pernos 1 Poste 1 Banda 1 Soporte para el Bote 1 Soporte para el Poste ...

Page 5: ...te Vea Diagrama 2 4 Envuelva las tiras alrededor del poste y conecte las hebillas usando el perno y la tuerca Use el desarmador y la llave para apretar el perno Vea Diagrama 3 INSTALACIÓN EN POSTE H 5170 Use este método para instalar el bote de basura al Poste para Instalación en Superficie H 5170 1 Defina el lugar para instalar el poste Taladre cuatro orificios en la superficie Vea Diagrama 4 2 C...

Page 6: ...asura coloque los pernos de 5 16 con rondanas a través de la banda y del soporte para el bote Coloque por dentro del bote las rondanas de seguridad y tuercas y ajuste 3 Fije el soporte para el poste a la pared poste con pernos o tornillos no incluidos usando los orificios ya taladrados 4 Coloque la banda nuevamente para fijar a la pared poste Inserte la llave en el orificio de la parte superior de...

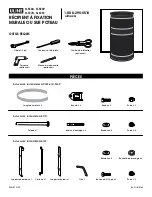
Page 7: ...S REQUIS Tournevis à tête plate Mèche à maçonnerie optionnel Boulon d ancrage x 4 Inclus avec les modèles H 5168 et H 5169 Inclus avec le modèle H 5170 Inclus avec le modèle H 6101 Écrou x 2 Écrou x 4 Rondelle x 4 Rondelle x 2 Rondelle de blocage x 2 Clé x 1 Boulon de 5 16 po x 2 Écrou x 2 Boucle x 4 Sangle en métal x 2 Boulon x 2 Poteau x 1 Clavette x 1 Support principal x 1 Support de poteau x 1...

Page 8: ... Voir Figure 2 4 Enroulez les sangles autour du poteau et reliez les boucles ensemble en utilisant le boulon et l écrou Serrez le boulon à l aide du tournevis et de la clé Voir Figure 3 MONTAGE SUR UN POTEAU FIXÉ À UNE SURFACE H 5170 Utilisez cette méthode pour fixer le récipient sur le poteau de montage pour surface H 5170 1 Déterminez l emplacement du poteau Prépercez quatre trous dans la surfac...

Page 9: ...avec les rondelles à travers la clavette et le support principal Fixez les rondelles de blocage et les écrous de l intérieur du récipient et vissez 3 Fixez le support du poteau au mur poteau à l aide des boulons ou des vis non inclus dans les trous prépercés se trouvant sur le support 4 Replacez la clavette dans le support de poteau afin de la fixer au mur poteau Insérez la clé dans le trou situé ...

Reviews: