


PAGE 2 OF 12
0322 IH-9932
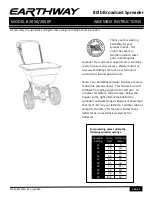
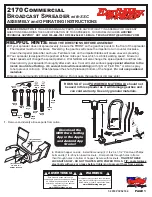
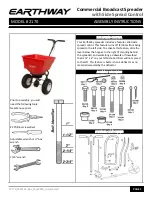
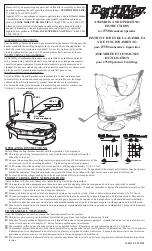
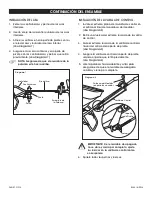
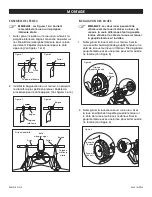
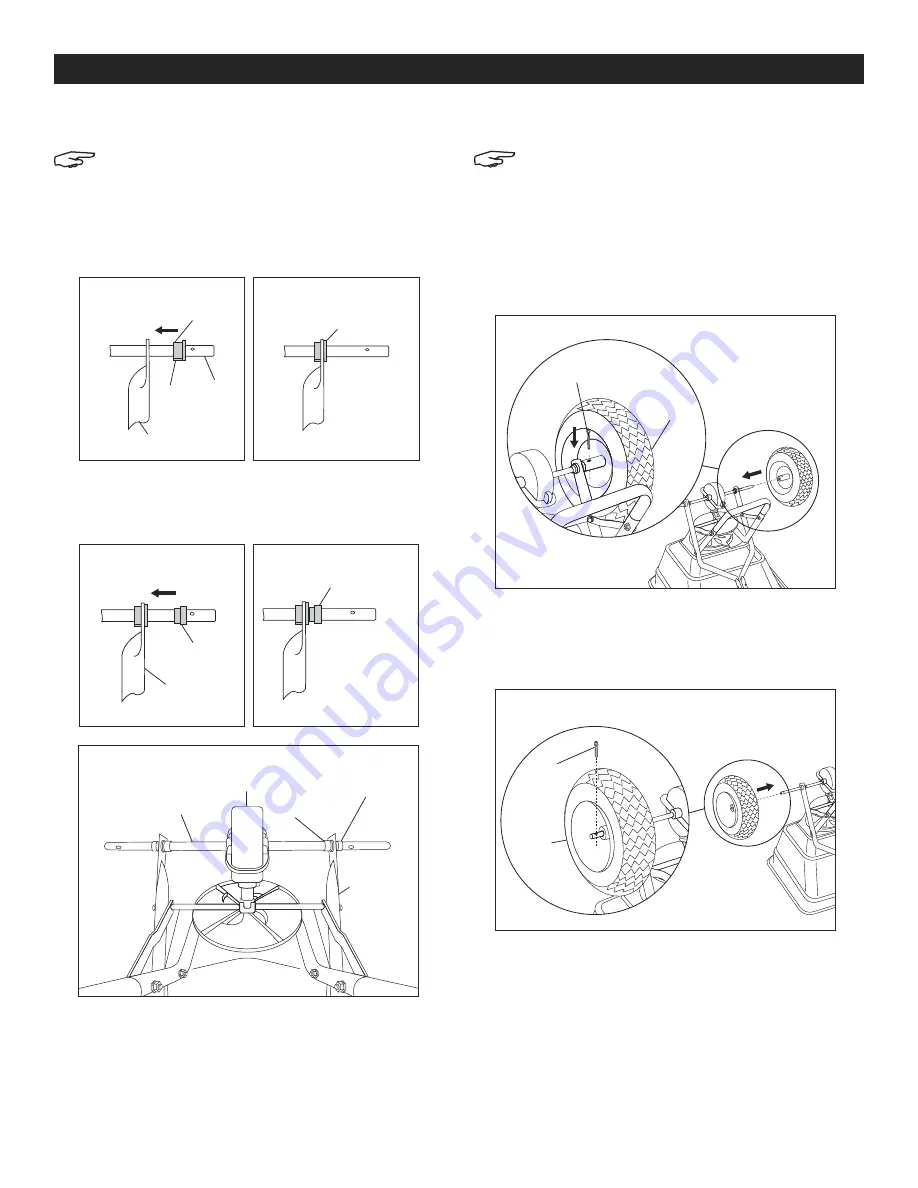
AXLE ASSEMBLY
NOTE: Figures 1-4 show axle assembly on
lower right handle.
1. Slide Bearing onto the axle and through the lower
handle. Align notch on bearing and flat side of lower
handle for proper fit. Repeat for opposite side.
(See Figures 1-2)
2. Install axle bushing onto the axle, placing the
smaller end first. Repeat for opposite side.
(See Figures 3-4)
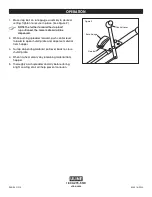
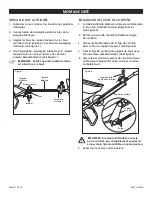
WHEEL INSTALLATION
NOTE: Either wheel can be used as drive or
coast wheel, the only difference being which
cotter pin is used and which side of the wheel
the cotter pin is installed on.
1. Slide drive wheel onto axle. Secure by attaching
large cotter pin on the inward facing side of the
wheel. Bend large cotter pin with pliers to prevent
pin from falling out. (See Figure 5)
2. Slide coast wheel onto axle. Secure by attaching
small cotter pin on the outward facing side of the
wheel. Bend cotter pin with pliers to prevent from
falling out. (See Figure 6)
Figure 3
Bushing
Lower
Handle
Figure 4
Bushing
Figure 1
Axle
Bearing
Lower Handle
Figure 2
Bearing
Assembled Axle
Bearing
Bushing
Axle
Gearbox
Figure 5
Drive
Wheel
Large
Cotter Pin
Figure 6
Coast
Wheel
Small
Cotter Pin
ASSEMBLY
Lower Right
Handle
Notch