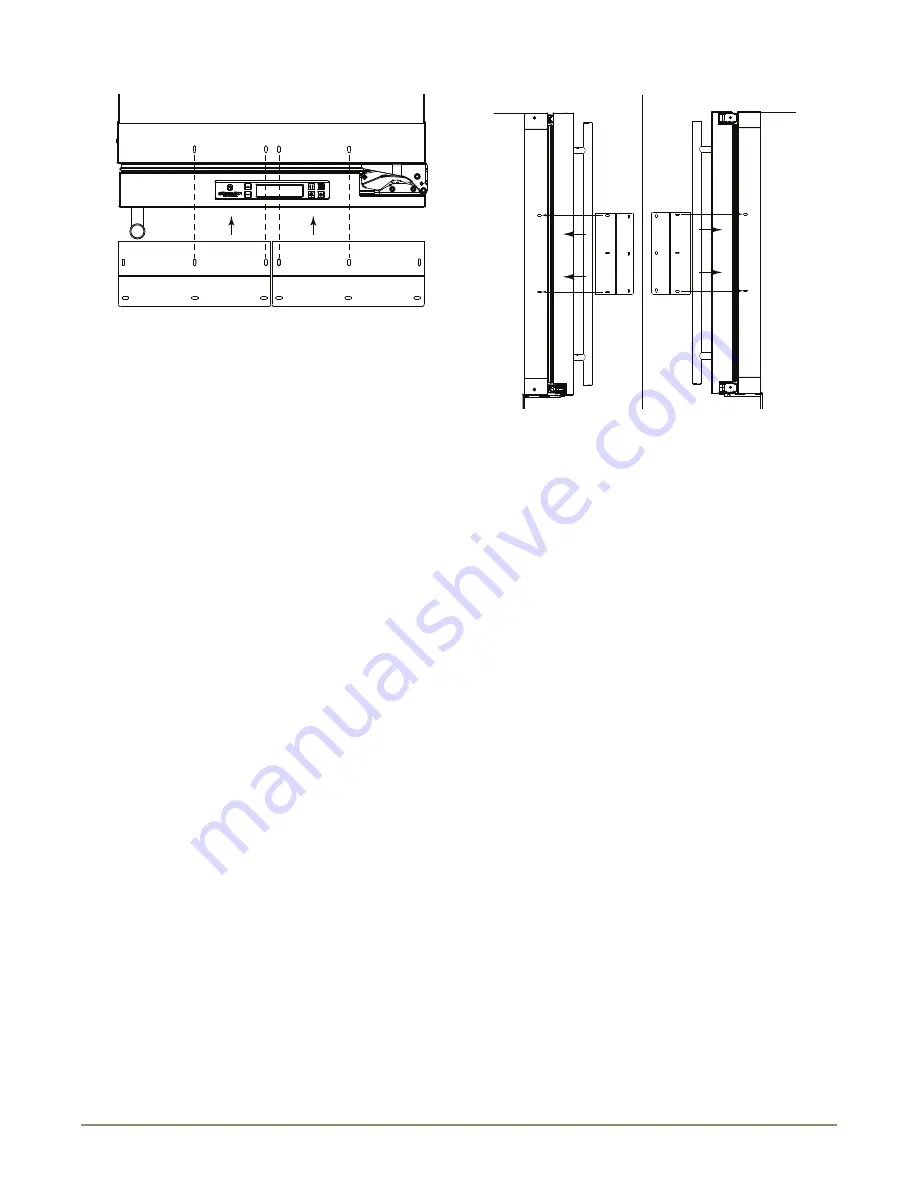
U-Line 3000 Series Anti-tip Bracket Installation
12
3018/3024 Top Mount
Top mount configurations work well with fully secured wood or
laminate counter tops.
1. Align the brackets on top of your unit as shown below. Both
brackets must be used to ensure a secure mount.
2. Using 4 of the supplied 10 #8 5/8" screws, install 2 screws into
each plate using a #2 Phillips head screwdriver.
3. Completely slide the unit into its position in the cabinet. Be
certain unit height is properly adjusted. (See Leveling
Information on pg.
4. Open both doors completely. Make certain doors clear
surrounding cabinetry.
5. Using a 3/32" drill bit, drill 6 pilot holes, 3 for each bracket, 5/8"
deep into bottom of counter top. Use the Anti-tip brackets as a
template.
The 6 remaining cabinet side mounting screws will be installed
later in this guide.
3018/3024 Side Mount
Side mount configurations work well if you have a granite counter
top or do not wish to mount the brackets to the underside of your
counter top.
1. Align each bracket to the side mounting holes on your model
as shown below.
2. Using 4 of the supplied 10 #8 5/8" screws, install 2 screws into
each Anti-tip bracket, mounting the bracket to your unit.
3. Completely slide the unit into its position in the opening. Be
certain unit height is properly adjusted. (See Leveling
Information on pg.
4. Open door completely to gain access to the Anti-tip brackets.
Make certain door clears surrounding cabinetry.
5. Using a 3/32" drill bit, drill 6 pilot holes, 3 for each bracket, 5/8"
deep into cabinetry frame using the anti-tip bracket as a
template.
The 6 remaining cabinet side mounting screws will be installed later
in this guide.
Left View Of Cabinet
Right View Of Cabinet


