background image

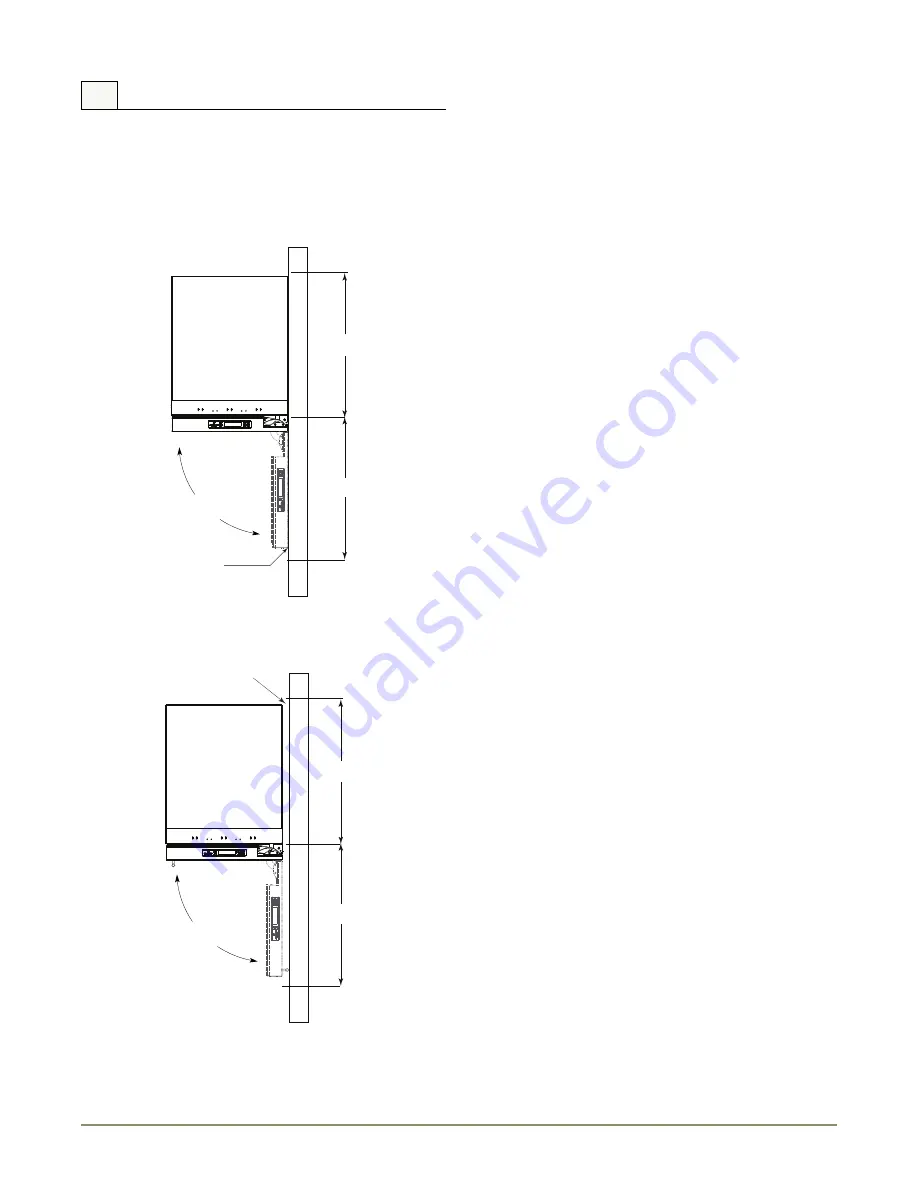
U-Line Door Swing Dimensions

5

Units have a zero clearance for the door to open 90°. Overlay 
models will need additional space for any knobs or pulls installed 
on the overlay panel / frame. Stainless Steel models require 2" 
door clearance to accommodate the handle if installed next to a 
wall.

6 Door Swing Dimensions

Wall

Wall

90°

Door Swing

90°

Door Swing

Space Required

For any Knobs or Pulls

2" Min

20 3/4"

20 3/4"

20 1/4"

20 1/8"

Overlay

Stainless

Other Site Requirements

Side-By-Side Installation

Cut-out width for a side-by-side installation is the total of the 
widths listed under Cut-Out Dimensions in each unit’s Installation 
Guide. 

No trim kit is required. However, a 1/4-inch of space needs to be 
maintained between the units to ensure unobstructed door swing.

Units must operate from separate, properly grounded electrical 
receptacles placed according to each unit’s electrical specifications 
requirements.

Power Supply

The unit requires a grounded and polarized 115 VAC, 60 Hz, 15A 
circuit (normal household current). See Electrical Specifications

.

Environmental Requirements

The units are designed to operate between 50°F (10°C) and 100°F 
(37°C). High ambient temperatures (100°F [37°C] or higher) may 
reduce the unit’s ability to reach low temperatures.

For best performance, keep the unit out of direct sunlight and away 
from heat generating equipment.

In climates where high humidity and dew points are present, 
condensation may appear on outside surfaces. This is considered 
normal. The condensation will evaporate when the humidity drops.

Summary of Contents for U-3018WCOL-00

Page 1: ...VS 01 U 3036BVWCOL 00 U 3036BVWCS 00 U 3036BVWCS 13 U 3018RGLOL 00 U 3018RGLOL 01 U 3018RGLS 00 U 3018RGLS 01 U 3018RGLS 13 U 3018RGLS 15 U 3024RGLOL 00 U 3024RGLOL 01 U 3024RGLS 00 U 3024RGLS 01 U 30...

Page 2: ...Series 4 Door Swing Dimensions Other Site Requirements 5 Side By Side Installation 5 Power Supply 5 Environmental Requirements 5 3000 Series Doors Door Alignment and Adjustment 6 3000 Series Overlays...

Page 3: ...en may not easily climb inside WARNING SHOCK HAZARD Electrical Grounding Required Never attempt to repair or perform maintenance on the unit until the electricity has been disconnected Never remove th...

Page 4: ...S 00 U 3024BEVS 00 U 3036WCWCS 13 U 3024BEVS 01 U 3036RRS 00 U 3024RGLOL 00 U 3036RROL 00 U 3024RGLOL 01 Exterior Cleaning IMPORTANT IMPORTANT Stainless door panels handles and frames can discolor whe...

Page 5: ...unded and polarized 115 VAC 60 Hz 15A power supply normal household current An individual properly grounded branch circuit or circuit breaker is recommended GFCI ground fault circuit interrupter is us...

Page 6: ...33 11 16 To 34 11 16 35 7 16 23 7 16 3 5 8 To 4 5 8 Stainless Steel Overlay Door 33 11 16 To 34 11 16 35 7 16 23 7 16 3 5 8 To 4 5 8 Stainless Steel Solid Door 35 7 16 33 11 16 To 34 11 16 22 11 16 4...

Page 7: ...r a 1 4 inch of space needs to be maintained between the units to ensure unobstructed door swing Units must operate from separate properly grounded electrical receptacles placed according to each unit...

Page 8: ...pecial attention to the Cable Arm Make sure not to over extend or damage it during door alignment Stainless Models Removing Wrap 1 Open door completely 2 Remove the two wrap screws from the bottom of...

Page 9: ...lled Appliance will need up to 34 1 2 to the under side of the counter to leave room for leveling adjustments 1 Cut the panels to the dimensions listed in the appropriate diagram below 2 Optional Stai...

Page 10: ...working with the door that houses the display make certain the display cable remains securely seated in the inner door channel see below BACK SURFACE MUST HAVE AMPLE FLAT SURFACE TO MOUNT OVERLAY PAN...

Page 11: ...g at the corners re install the gasket into the gasket channel in the frame Make sure the gasket is fully seated This may take some force 13 If installing an additional overlay on a 36 unit repeat ste...

Page 12: ...2 A Dimension A may vary from a minimum of 3 1 4 to a maximum 4 1 4 depending on toe kick height Measure toe kick height and cut overlay to same dimension Recommended Overlay Grille Thickness is 1 4 A...

Page 13: ...ompletely Make certain doors clear surrounding cabinetry 5 Using a 3 32 drill bit drill 6 pilot holes 3 for each bracket 5 8 deep into bottom of counter top Use the Anti tip brackets as a template The...

Page 14: ...ning cabinet side mounting screws will be installed later in this guide 3018 3024 Side Mount Side mount configurations work well if you have a granite counter top or do not wish to mount the brackets...

Page 15: ...any necessary adjustments The unit s top surface should be approximately 1 8 below the countertop 4 Install the 6 cabinet mounting screws for the Anti tip bracket 5 Remove the tape from the glass she...

Page 16: ...odels Combo Models a Refrigerator Freezer Refrigerators Drawers and Beverage Centers The U Line brand offers products in the 1000 Series 2000 Series and the Modular 3000 Series The 1000 Series offers...

Reviews: