22
u-line.com
General Information
Door Alignment and Adjustment
Align and adjust the door if it is not level, or is not sealing properly. If
the door is not sealed the unit may not cool properly, or excessive
frost or condensation may form in the interior.
NOTICE
Properly aligned, the door’s gasket should be firmly in
contact with the cabinet all around the door (no gaps) and
fully seated in gasket pocket. Carefully examine the door’s
gasket to assure that it is firmly in contact with the cabinet.
Also make sure the door gasket is not pinched on the hinge
side of the door.
NOTICE
Do not attempt to use the door to raise or pivot your unit.
This would put excessive stress on the hinge system.
• Pay special attention to the Cable Arm. Make sure not to
over extend or damage it during door alignment.
Overlay Models (Removing Overlay)
1. Open door completely.
2. Remove gasket.
3. Remove six screws seated in gasket pocket.
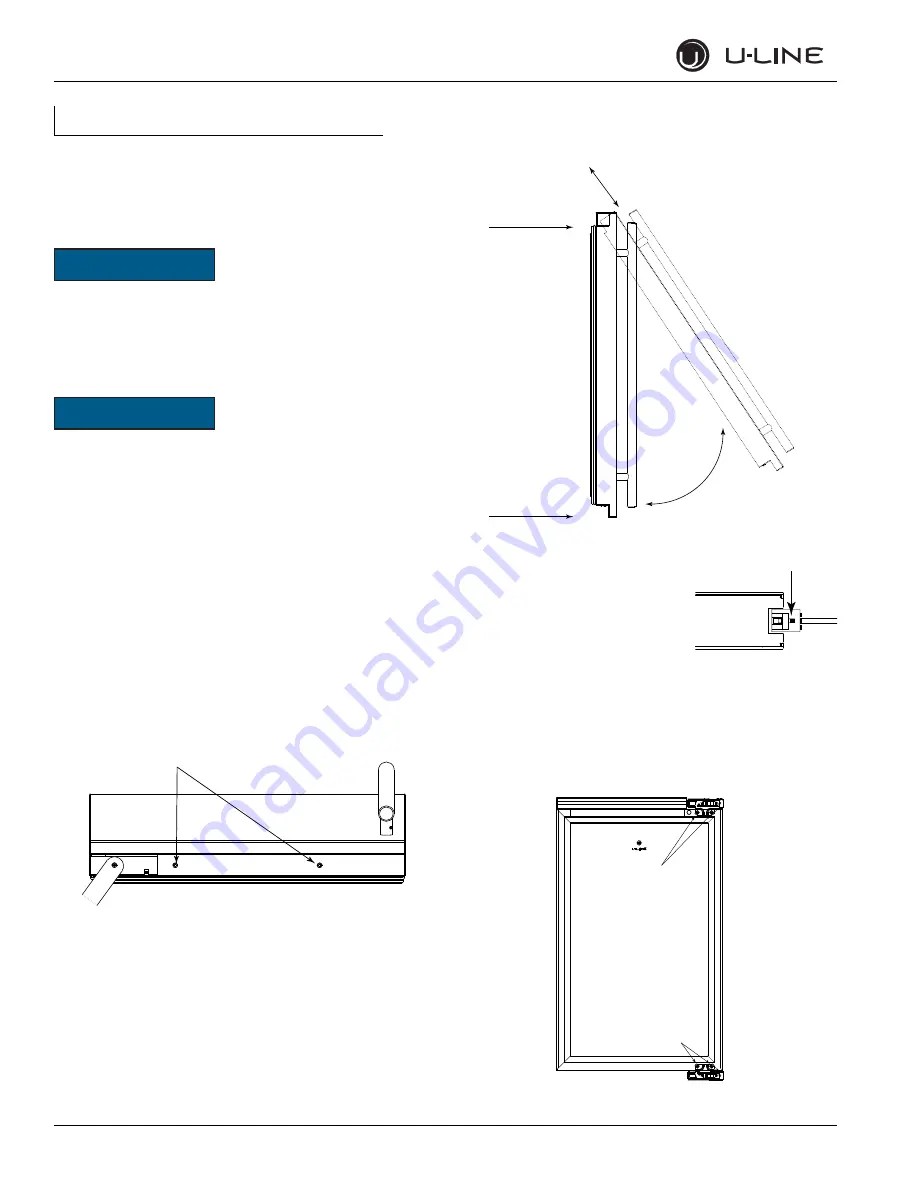
Stainless Models (Removing Wrap)
1. Open door completely.
2. Remove the two wrap screws from the bottom of the stainless
steel door wrap.
3. Gently pull bottom of wrap away from door.
4. The wrap hinges on top of the door. Carefully pull wrap away and
then up
. See below.
5. If door being adjusted houses the
display unit, remove cable from display
by pressing in the release tab on the
cable connector.
Alignment and Adjustment
1. Using a T-25 Torx Bit, loosen each
pair of Torx head screws on both the upper and lower hinge
plate.
2. Square and align door as necessary.
3. Tighten Torx head screws on hinge.
4. If necessary re-connect display and re-install stainless steel wrap.
3000 Series Doors
Wrap Screws
Cable Arm
Step 1
Step 2
Door Top
Door Bottom
Press Tab Down
T-25 Torx Screw
T-25 Torx Screw


