background image

Quality

This exercise product has been designed and 
manufactured to comply with the latest (BS EN 957)
British and European Safety Standards.

Questions

Queries

Customer Support

Guarantee

General Information

Should you encounter any difficulty with the assembly,
operation or use of your exercise product or if you
think that you may have parts missing, please DO NOT
return it to your retailer but contact us first for help and
advice, asking for CUSTOMER SUPPORT, by any of the
following means.

Tel:- 01535 637711 or 
Fax:- 01535 637722 or 
Email:- support@benysports.co.uk 
Website: www.benysports.co.uk

CUSTOMER SUPPORT is open from 9.00am to 5.00pm
from Monday to Friday

Beny Sports Co. UK Ltd.
Unit 8, Riparian Way,
The Crossings, Cross Hills,
  West Yorkshire 
BD20 7BW

If you do have any queries, please ensure that you have
the following information ready for our Customer Support
Staff:

YOUR NAME
YOUR ADDRESS
YOUR PHONE NUMBER
PRODUCT MAKE OR BRAND
PRODUCT MODEL
PRODUCT SERIAL NUMBER
DATE OF PURCHASE
NAME OF RETAILER
PART NUMBERS REQUIRED

Beny Sports Co. UK Ltd.

 guarantee's its product range for 

DOMESTIC USE ONLY

 for a period of 

1 YEAR

 from the 

original certified date of purchase. During this period we 
have the right to: - 

a). Provide parts for the purchaser to effect repair.
b). Repair the product, returned to our warehouse 
(at the purchaser's cost).  
c). Replace the product if it is deemed (by us) to be 
economical to do so.

This guarantee does not cover wear and tear on 
upholstery or consumables.

This guarantee does not cover abuse, defects caused by 
storage or use outside those intended.

If you need to advise us of a defect with your product and 
in order for us to service any requirement for replacement 
parts or repairs, we will ask for proof of purchase. Failure 
to do so will result in any claim for replacement parts or 
repairs being refused.

This guarantee, (both given and implied) applies to the 
original purchaser only, is not transferable and will be 
invalidated if used outside of the above criteria.

This guarantee is valid only in the United Kingdom and Eire.

This does not affect your statutory rights as a consumer.

Tel:- 01535 637711 or 
Fax:- 01535 637722 or 
Email:- support@benysports.co.uk 
Website: www.benysports.co.uk

CUSTOMER SUPPORT is open from 9.00am to
5.00pm from Monday to Friday

Beny Sports Co. UK Ltd.
Unit 8, Riparian Way,
The Crossings, Cross Hills,
West Yorkshire 
BD20 7BW

3

Summary of Contents for MOTIVE FITNESS Multi-Gym SMART

Page 1: ...Multi Gym SMART J62216 xx Assembly User Manual Aufbau Benutzerhandbuch ...

Page 2: ...on Page Content Inhalt General Information 3 Before You Start 4 Safety 5 Exercise Information 6 Assembly 19 Kapitel Seite Allgemeines 11 Bevor Sie Beginnen 12 Sicherheit 13 Trainingsinformation 14 Aufbau 21 ...

Page 3: ...DOMESTIC USE ONLY for a period of 1 YEAR from the original certified date of purchase During this period we have the right to a Provide parts for the purchaser to effect repair b Repair the product returned to our warehouse at the purchaser s cost c Replace the product if it is deemed by us to be economical to do so This guarantee does not cover wear and tear on upholstery or consumables This guar...

Page 4: ...ay be used to fasten the flaps as these may cause injury Be sure to open the carton the right way up as this will be the easiest and safest way to remove all the components Unpack the Components Carefully unpack each component checking against the parts list that you have all the necessary parts to complete the assembly of your product Please note that some of the parts may be pre fitted to major ...

Page 5: ...u are in any doubt do not use your product but contact CUSTOMER SUPPORT by any of the means listed on the opposite page Before use always ensure that your product is positioned on a solid flat surface If necessary use a rubber mat underneath to reduce the possibility of slipping in use Always wear appropriate clothing and footwear such as training shoes when exercising Do not wear loose clothing t...

Page 6: ...y your heart With regular exercise your cardiovascular system will become stronger and more efficient Your recovery rate i e the time taken for your heart to reach its normal resting level will also decrease Initially you may only be able to exercise for a few minutes each day Do not hesitate to breathe through your mouth should you need more oxygen Use the talk test If you cannot carry on a conve...

Page 7: ...ou need to be able to take your pulse If you do not have a pulse monitor either from the product you are using or a proprietary independent unit you will need to locate the pulse in your carotid artery This is situated in the side of the neck and can be felt by using the index and middle fingers Simply count the number of beats you feel in 10 seconds and then multiply by six to get your pulse rate...

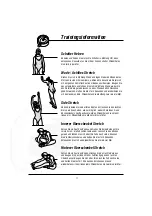
Page 8: ...d to the left for one count feeling a slight pull on the right side of your neck Lastly drop your head to your chest for one count Repeat 2 to 3 times Toe Touch Slowly bend forward from your waist letting your back and shoulders relax as you lower your trunk Gently stretch down as far as is comfortable and hold for 10 seconds USERS AGE Years 20 24 25 29 30 34 35 39 40 44 45 49 50 54 55 59 60 and o...

Page 9: ...retch Open both arms to the side and gently lift them above your head Reach your right arm as high as you can for one count gently stretching the muscles of the stomach and lower back Repeat the action with your left arm Repeat 3 4 times Inner Thigh Stretch Sit on the floor and pull your legs toward your groin the soles of your feet together Hold your back straight and lean forward over your feet ...

Page 10: ... 5 10 Minutes Cool Down 5 Minutes Exercise 4 minutes at A Rest 1 minute Exercise 2 minutes at A Exercise slowly 1 minute Exercise 5 minutes at A Rest 1 minute Exercise 3 minutes at A Exercise slowly 2 minutes Exercise 6 minutes at A Rest 1 minute Exercise 4 minutes at A Exercise slowly 3 minutes Exercise 5 minutes at A Exercise 3 minutes at B Exercise 2 minutes at A Exercise slowly 1 minute Exerci...

Page 11: ...ger zurückgesandte Produkt zu reparieren auf Kosten des Kunden c das Produkt zu ersetzen falls wirtschaftlich Diese Garantie schließt Abnutzung der Polster und Verschleißteile aus Diese Garantie gilt nicht für Defekte die durch fehlerhafte Behandlung oder Verstauung oder durch Nutzung außerhalb des empfohlenen Nutzungsorts entstandenen sind Sollten Sie uns über einen Defekt an Ihrem Gerät informie...

Page 12: ...arfe Klammern die zur Befestigung der Klappen benutzt wurden Versichern Sie sich dass der Karton auf der richtigen Seite steht da die Teile so am leichtesten entnommen werden können Auspacken der Teile Packen Sie vorsichtig jede Komponente aus und kontrollieren Sie auf der Teileliste ob alle notwendigen Einzelteile vorhanden sind Bitte beachten Sie dass manche Einzelteile schon zu Gruppen zusammen...

Page 13: ...siven Reinigungsmittel Sollten Sie Zweifel haben benutzen Sie Ihr Reinigungsmittel nicht sondern kontaktieren Sie unseren Kundenservice Vergewissern Sie sich dass das Gerät auf einer stabilen flachen Oberfläche steht bevor Sie es benutzen Falls nötig benutzen Sie eine Gummimatte um Rutschgefahr zu mindern Tragen Sie immer geeignete Kleidung und Schuhwerk wie Sportschuhe wenn Sie trainieren Tragen ...

Page 14: ...rd Ihr Herz Kreislaufsystem stärker und effizienter Ihre Erholungsgeschwindigkeit z B die Zeit die Sie brauchen um den Ruhepuls wieder zu erreichen wird ebenfalls geringer Anfangs werden Sie vielleicht nur dazu in der Lage sein ein paar Minuten täglich zu trainieren Zögern Sie nicht durch den Mund zu atmen sollten Sie mehr Sauerstoff benötigen Benutzen Sie den Redetest Können Sie keine Unterhaltun...

Page 15: ...messer haben entweder an dem Gerät das Sie verwenden oder ein universelles Gerät müssen Sie Ihren Puls selbst an Ihrer Halsschlagader nehmen Diese befindet sich an der Seite Ihres Halses und Sie können Sie erfühlen indem Sie Ihren Zeige und Mittelfinger benutzen Zählen Sie einfach die Schläge die Sie in 10 Sekunden fühlen und multiplizieren Sie diese mal 6 um Ihren Puls zu errechnen Sie sollten di...

Page 16: ...ig sind Kopfrolle Legen Sie den Kopf langsam nach rechts so dass Sie eine leichte Dehnung an der linken Halsseite spüren Als nächstes legen Sie den Kopf nach hinten das Kinn streckend Danach legen Sie den Kopf nach links so dass Sie eine leichte Dehnung auf der rechten Halsseite verspüren Zuletzt legen Sie den Kopf nach vorne auf die Brust Wiederholen Sie dies zwei bis drei Mal Zehen berühren Beug...

Page 17: ...Arme über Ihren Kopf und strecken Sie den rechten Arm so weit nach oben wie nur möglich wodurch die Bauch und Rückenmuskeln sanft gestreckt werden Wiederholen Sie mit dem linken Arm Wiederholen Sie alles drei bis vier Mal Innerer Oberschenkel Stretch Setzen Sie sich auf den Boden und ziehen Sie beide Beine an Ihre Leiste heran die Fußsohlen zueinander Lassen Sie den Rücken gerade und lehnen Sie si...

Page 18: ...uhen 2 Minuten in Zielzone A trainieren 1 Minute langsam trainieren 5 Minuten in Zielzone A trainieren 1 Minute Ausruhen 3 Minuten in Zielzone A trainieren 2 Minute langsam trainieren 6 Minuten in Zielzone A trainieren 1 Minute Ausruhen 4 Minuten in Zielzone A trainieren 3 Minute langsam trainieren 5 Minuten in Zielzone A trainieren 3 Minuten in Zielzone B trainieren 2 Minuten in Zielzone A traini...

Page 19: ...m 19 Arm Foam Roller Qty 2 Item 20 Hand Grip Qty 8 Item 24 Rectangle Cap 25x50mm Qty 2 Item 26 Square Cap 20x40mm Qty 2 Item 27 Square Foot End Cap Qty 2 Item 28 Square Cap 23H Qty 1 Item 29 25mm Round Plug Qty 4 Item 30 Bumper Qty 1 Item 21 Pec Handlebar End Cap 38x26mm Qty 2 Item 16 Pec Swivel Bracket Qty 2 Item 13 Pad Bar Qty 2 Item 15 Weight Guide Tube Qty 2 Item 14 Handle Bar Qty 2 Item 11 Pr...

Page 20: ...Bar Qty 1 Item 58 Oil Bushing big Qty 4 Item 59 Pulley Bushing Short Qty 4 Item 60 Carabiner Qty 4 Item 61 Lat Bar Qty 1 Item 62 Double Pulley Bracket Qty 1 Item 63 Reverse Pulley Bracket Qty 1 Item 64 Washer Qty 1 Item 65 Pulley Qty 14 Item 66 M10 x 45mm Hex Bolt Qty 13 Item 67 Plastic Cover Qty 2 Item 68 Crown Weight Washer Qty 1 Item 69 Chain Short Qty 1 Item 70 Chain Long Qty 1 Item 71 Weight ...

Page 21: ...k Artikel 20 Handgriff 8 Stk Artikel 24 25 x 50mm Endkappe 2 Stk Artikel 26 20 x 40mm Endkappe 2 Stk Artikel 27 Standfuß Endkappe 2 Stk Artikel 28 Endkappe 23H 1 Stk Artikel 29 25mm Runde Endkappe 4 Stk Artikel 30 Stopper 1 Stk Artikel 21 38 x 26mm Verbindungsstück 2 Stk Artikel 16 Führungsrollen halterung 2 Stk Artikel 13 Schaumstoffstange 2 Stk Artikel 15 Gewichte Führungsstange 2 Stk Artikel 14...

Page 22: ...1 Stk Artikel 58 Buchse groß 4 Stk Artikel 59 Führungsrollen buchse kurz 4 Stk Artikel 60 Karabiner 4 Stk Artikel 61 Lat Stange 1 Stk Artikel 62 Führungsrollen halterung U förmig 1 Stk Artikel 63 Führungsrollen halterung 1 Stk Artikel 64 Unterlegscheibe 1 Stk Artikel 65 Führungsrolle 14 Stk Artikel 66 M10 x 45mm Sechskantbolzen 13 Stk Artikel 67 Plastikabdeckung 2 Stk Artikel 68 Plastikscheibe 1 S...

Page 23: ... 41 Slide the Lower Cover Bracket 80 onto the Weight Guide Tubes 15 using 2 x M8 x 15mm Hex Bolts 49 1 Stecken Sie 2 x Standfuß Endkappen 27 auf die hintere Stütze 2 Entfernen Sie die vorinstallierten 2 x M10 x 20mm Sechskantbolzen 45 und 2 x M10 Unterlegscheiben 40 von den Gewichte Führungsstangen 15 Befestigen Sie die Gewichte Führungsstangen 15 an der hinteren Stütze 2 mit 2 x M10 x 20mm Sechsk...

Page 24: ...Assembly Aufbau 80 49 1 10 40 41 41 66 46 40 40 2 27 45 15 24 ...

Page 25: ...ector Shaft 17 so the Crown Weight Collar 34 fits into the recess on the underside of the Crown Weight 53 Insert the Weight Selector Pin 75 into one of the Weight Selector Shaft holes below the Crown Weight so the pin rests on the top Weight Plate Lay the Crown Weight Washer 68 on top of the Crown Weight 53 2 Schieben Sie zuerst die beiden Gummi Stopper 33 und danach die 9 Gewichtsblöcke auf die G...

Page 26: ...Assembly Aufbau 33 2 54 75 17 34 52 53 15 68 26 ...

Page 27: ...0 x 65mm Hex Bolts 46 2 x M10 Flat Washers 40 and 2 x M10 Nylon Lock Nuts 41 Befestigen Sie die Stütz Säule 3 am Hauptrahmen 1 mit 2 x M10 x 65m Sechskantbolzen 46 4 x M10 Unterlegscheiben 40 und 2 x M10 Nylonmuttern 41 Schieben Sie die obere Halterung 79 auf die Gewichte Führungsstangen 15 und befestigen Sie diese nur locker mit 2 x M8 x 15mm Sechskantbolzen 49 Entfernen Sie die vorinstallierten ...

Page 28: ...Assembly Aufbau 79 49 40 45 40 41 46 4 46 16 40 41 15 3 41 40 40 46 1 16 4 79 49 15 46 40 41 28 ...

Page 29: ...n Brustpresse Rahmen 5 am Lat Rahmen 4 mit 2 x kleinen Buchsen 77 1 x M12 x 120mm Sechskantbolzen 50 2 x M12 Unterlegscheiben 42 und 1 x M12 Nylonmutter 43 Befestigen Sie die beiden Butterfly Arme 6 7 am Brustpresse Rahmen 5 mit 4 x großen Buchsen 58 2 x M12 Unterlegscheiben 42 und 2 x M12 Nylonmuttern 43 Schieben Sie jeweils eine Butterfly Schaumstoffrolle 19 auf die Butterfly Arme 6 7 Entfernen ...

Page 30: ...Assembly Aufbau 20 21 45 40 6 5 14 19 42 43 43 42 50 31 43 58 42 7 64 55 51 44 56 77 4 3 19 45 40 21 14 20 58 30 ...

Page 31: ...d height using the Spring Locking Knob 39 Befestigen Sie die Rückenlehne 36 an der Stütz Säule 3 mit 2 x M8 x 60mm Sechskantbolzen 48 und 2 x M8 Unterlegscheiben 44 Befestigen Sie die Beinstrecker Säule 9 am Hauptrahmen 1 mit 1 x M10 x 65mm Sechskantbolzen 46 2 x M10 Unterlegscheiben 40 und 1 x M10 Nylonmutter 41 Befestigen Sie die Bank Stütze 8 an der Stütz Säule 3 sowie der Beinstrecker Säule 9 ...

Page 32: ...Assembly Aufbau 1 3 18 13 8 9 11 12 18 36 37 38 40 44 40 41 44 44 44 46 46 47 40 48 48 49 49 41 40 13 39 32 ...

Page 33: ...le 73 a Attach both ends of Pec Cable 73 over the hooks on the Left and Right Pec Arms 6 7 Now fit 2 x Plastic Covers 67 over the ends of both hooks b Install No 6 8 Pulleys 65 into both Pec Swivel Brackets 16 with the Pec Cable 73 behind and over the pulleys and secure using 2 x M10 x 45mm Hex Bolts 66 4 x M10 Washers 40 and 2 x M10 Nylon Lock Nuts 41 c Install No7 Pulley 65 over the Pec Cable 73...

Page 34: ... sowie 2 x kurze Führungsrollenbuchsen 59 am Beinstrecker 12 mit 1 x M10 x 60mm Sechskantbolzen 47 2 x M10 Unterlegscheiben 40 und 1 x M10 Nylonmutter 41 c BefestigenSieFührungsrolleNr 10 65 sowie2xkurzeFührungsrollenbuchsen 59 Unterlegscheiben 40 und an der Beinstrecker Säule 9 mit 1 x M10 x 60mm Sechskantbolzen 47 2 x M10 1 x M10 Nylonmutter 41 d Befestigen Sie Führungsrolle Nr 11 65 sowie 2 x l...

Page 35: ...12 No Nr 6 8 71 68 17 73 6 67 57 74 72 70 60 73 71 72 71 72 72 65 41 40 46 78 72 65 41 40 59 47 65 72 4140 59 47 40 71 66 65 41 66 65 65 71 41 40 66 72 62 41 66 40 65 41 40 66 65 1 51 44 56 69 60 1 65 41 40 66 65 41 40 66 40 65 41 63 72 41 73 40 16 66 65 71 4 65 41 40 40 66 No Nr 1 4 41 3 40 4 3 60 12 9 35 ...

Page 36: ...Assembly Aufbau 71 73 72 9 10 11 13 12 7 2 1 6 8 14 4 3 5 36 ...

Page 37: ...ook the bottom Weight Cover Support Weight onto the Lower Cover Bracket 80 Now Undo the 2 x M8 x 15mm Hex Bolts 49 on the Upper Cover Bracket 79 allowing this to move down slightly now hook the upper Weight Cover Support Weight Cover to the Upper Cover Bracket 79 Do the same for the other side and now lift the Upper Cover Bracket 79 upwards so the Weight Cover becomes tight 7 Befestigen Sie jeweil...

Page 38: ...Assembly Aufbau 80 79 4 81 81 82 82 82 82 49 15 82 81 79 81 38 ...

Page 39: ... 21 20 21 22 23 26 23 22 25 25 25 24 22 27 27 28 29 29 30 31 32 33 34 35 36 37 38 39 40 40 40 41 42 43 42 43 43 42 44 41 40 40 40 41 44 44 40 44 41 16 44 56 40 41 41 40 41 40 45 46 46 45 41 46 46 46 66 47 40 48 48 49 49 50 46 51 52 53 54 75 60 61 60 70 57 64 77 58 58 45 40 14 20 45 20 40 68 76 Exploded drawing Explosionszeichnung 39 ...

Page 40: ...arian Way The Crossings Cross Hills West Yorkshire BD20 7BW Website www benysports co uk Copyright BSCL APRIL 2017 Beny Sports Germany GmbH KUNDENDIENST Erreichbar Montag bis Freitag von 9 00 bis 15 00 Uhr Tel 0911 975978 0 E mail service benysports de Fax 0911 975978 1 Klingenhofstr 51 D 90411 Nürnberg Website www benysports de Copyright BSCL 2017 Printed APRIL 2017 ...

Reviews: