background image

22

CREATING A LABEL

1. Place the disc onto the CD catch with its printing surface facing

up. Do not place the printing surface facing downward as it will
damage the disc.

2. On the Windows  desktop, double-click the 

 icon and

the main application window will appear.

Alternatively, you can also run the  application by clicking the
Start button followed by Programs. Next, click the
CD/DVD Printer application and select the CD/DVD
Printer
 from the list.

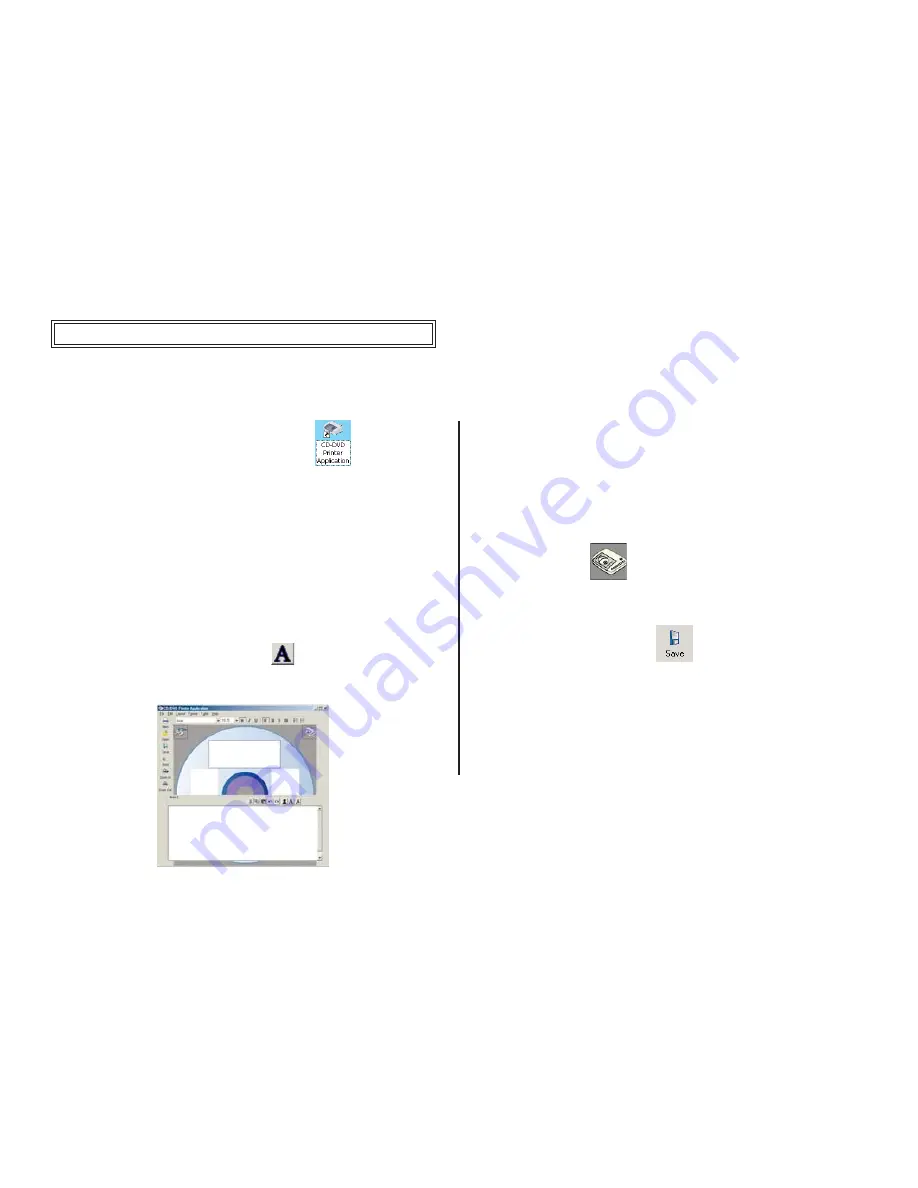
3. Click on any label boxes to create text.

4. Click on the “Formatted Text Edit”  

  icon

5. A window  “Area”  will appear

6. Configure the layout setting. Make the selection by clicking the

respective pattern icon on the top of the editing window.

7. Select  a font

•  Select the font type, size, style and text alignment in the
    editing window.
•  Edit  the content
•  Click on other label boxes to continue with their editing or
    outside these boxes to exit.

8. Print  a label

• Click the print 

 icon.

• The printing display dialog box appears.
• Click OK. This will start the printing operation.

9. Save a label by clicking the 

 icon. The printing job is saved

in your Windows My Document folder.

10. To quit  the CD/DVD Printer application.

•  Go to File tab.
• On the drop down menu, click Exit.
•  A dialog box  will appear. Click Yes to exit  the application.

Summary of Contents for CDP78

Page 1: ......

Page 2: ...aceisSMOOTHANDCLEAN U Print assumesnoliabilityforanylossorcorruptionofdatastoredasa resultofusingthisproduct BesuretoreadtheSAFETYINSTRUCTIONS asstatedinthisuser s manualashandlingitimproperlymightcausedamagetotheprinteror causephysicalharmtotheusers MicrosoftandWindowsareregisteredtrademarksof MicrosoftCorporation Theinformationcontainedinthismanualissubjecttochange withoutnotice U Printshallnotb...

Page 3: ...TER 8 21 GettingStarted MinimumSystemRequirement InstallingApplicationSoftware InstallingUSBDriver UninstallingApplicationSoftware MakingConnections LoadingtheRibbonCartridge ReplacingtheRibbonCartridge USINGTHEPRINTER 21 24 LoadingaPrintableDisc RemovingaPrintedDisc CreatingALabel ImportingImages CreatingCurvyText MAINTAININGTHEPRINTER 24 26 PreventativeMaintenance TroubleShooting ErrorMessages T...

Page 4: ...W Dimensions of Printer WxDxH 9 25 X 7 48 X 2 76 235mmx190mmx70mm Weight of Printer 2 2lbs 1 Kg Operating Temperature 50 to 95 F 10 to 35 C Storage Temperature 68 to 140 F 20 to 60 C RIBBON CARTRIDGES The CD DVD Printer includes one Ribbon Cartridge for monochromeprinting Ribbon Cartridge 27 91 ft 8 5m Black Red Yellow Blue PRODUCTSPECIFICATIONS INTRODUCINGYOURCD DVDPRINTER What s in your printer ...

Page 5: ...nsthoroughlybeforeusingtheCD DVDPrinter Danger Pleasehandlethedeviceaccordingtofollowingsafetyinstructions asotherwiseitmaycausefireorelectricshock whichcouldresult inthepossibilityofdeathorseriouspersonalinjury Donottouchthepowercord USBcableorACadapter whenyourhandsarewet Donotallowanyliquidstogetintotheproduct Donotusetheprinterifitstartstoemitsmokeorstrangeodor Donotabusethepowercord AC adapte...

Page 6: ...rwheninuse Donotplaceanyobjectson topoftheprinter Donotplacetheprinteronunstablesurfaces Donottouchtheprinterheadormetallicpartsnearbyafter useastheymaybehot Donotuseelectricalitemsthatarenotsuppliedwiththeprinter General Features of the CD DVD Printer Access Door Figure 1 AccessDoor Forloadingandremovingthediscandribbon cartridge RefertoFigure1 Power Button Access Door PresspowerswitchtoON tobere...

Page 7: ... ConnectthesuppliedUSBcabletotheUSBport RefertoFigure3 forconnectiontoyourPC PRINTINGFUNCTIONS TheCD DVD Printerprovidesprintinginupto4sectionalareasto createaCD DVDlabel Top right bottomandleftareaseachcoveredat900 intervals Easy to useselectionofareas toedit SupportscreationofTextandGraphicsLabels Originaltextlabels Curvedtextlabels Resizableimages Text Curved Text Graphic Print Area ...

Page 8: ...nter sapplicationsoftwareisdesignedtooperatein thefollowingenvironments MicrosoftWindows98SecondEdition MicrosoftWindowsMillenniumEdition WindowsME MicrosoftWindows2000 Professional MicrosoftWindowsXP HomeorProfessional Minimumcolordisplayof256colors highcolordisplayisrecommended Minimumresolutionof800x600 higherresolutionisrecommended Hardware Requirements MinimumrequirementsofPentium90MHz 32MBRA...

Page 9: ...vethe Microsoft NETFrameworkinstalledonyourPC 4 Installthe CD DVDApplication Note DependingonyourPCconfiguration thedisplayscreen maynotbethesameasshownonthepicturebelow 1 TheInstallShieldWizardwillguideyouthroughtheprogramsetup 2 InstallShield willsearchfortheMicrosoft NETFramework If itisnotfound theMicrosoft NETFrameworkLicenseAgreement willappear Note ReadallthetermsandconditionsoftheLicenseAg...

Page 10: ...VDApplicationon your PC 3 Thisstartsinstallation 4 Adisplayscreenwillappeartoletyouknowwhentheinstallation iscomplete Click OK TheMicrosoft NetFrameworkapplicationisnowinstalled 7 Ifyouwanttheapplicationtobeinstalledinafolderotherthan specified ClickChangeandinputthedirectory Click Next ...

Page 11: ...izardwillinstalltheCD DVDPrinter ApplicationtothePC Note Duetostability theinstallwizardmayaskforasystem rebootbeforetheCD DVDPrinterApplicationisinstalled Ifsetupdoesn tcontinueafterareboot justre run theset up Theinstallationwillcontinuefromtheplace itwasinterrupted ...

Page 12: ...andinstallthe CSQ200 Driverfile 1 TheseinstructionsareforMicrosoftWindows98Second Edition and Millennium Edition Note DependingonyourPCconfiguration thedisplayscreen maynotbethesameasshownonthepicturebelow 4 Click Specify a location ClickBrowse Itwilllocatethedriverfrom CD ROM Drivers win98ME Click OK Click Next 2 Click Next 3 Highlighttheicon Searchforthebestdriverforyourdevice Click Next ...

Page 13: ...13 5 TheWindowsdriverwillsearchfortheCSQ200driver Click Next 6 Thisstartstheinstallation Click Finish ...

Page 14: ...indows2000 Professional Note DependingonyourPCconfiguration thedisplayscreen maynotbethesameasshownonthepicturebelow 2 Click Next ThiscausestheFoundNewHardwareWizardtoappear 3 Highlighttheicon Searchforasuitabledriverformydevice Click Next ...

Page 15: ...indowsdriverwillsearchfortheCSQ200driver Click Next 6 Thisstartstheinstallation Click Finish 4 Click Specify a location Click Next ClickBrowse Itwilllocatethedriverfrom CD ROM Drivers win2kXP Click OK Click Next ...

Page 16: ...isplayscreen maynotbethesameasshownonthepicturebelow 2 Highlighttheicon Installfromalistorspecificlocation Click Next 3 Click Search for the best in these locations Click Include this location in the search Click Browse 4 ItwilllocatethedriverfromCD ROM Drivers win2kXP Click OK Click Next ...

Page 17: ...17 6 Click ContinueAnyway Thisstartstheinstallation 7 ClickFinish 5 TheWindowsdriverwillsearchfortheCSQ200driver Click Next ...

Page 18: ...Application inthelistofinstalledsoftware 4 ClicktheRemovebutton Oncethefiledeleteconfirmation dialogueboxappears clickYestobeginthe uninstallationprocess 5 Onceitiscompleted clickClose toexit MAKINGCONNECTIONS TheapplicationsoftwarefortheCD DVDPrintermustbeinstalled onyourPCbeforeconnectingthepowersupply 1 ConnectthepowercordtotheACadapter 2 ConnectACadaptertotheprinter sACadapterterminal plug the...

Page 19: ...atedfor thevoltagespecifiedonthesuppliedACadapter ConnecttheUSBcabledirectlytotheUSBportofthePC ConnectingthroughahuborchainingthroughanotherUSBdevice maycausetheprintertomalfunction LOADINGTHERIBBONCARTRIDGE 1 Tightentheribbonintheribboncartridgebyturningthehub usinganobjectwithsharpend Theprinterwillmalfunction if the ribbon is slack Cartridge 2 StarttheCD DVDprinterapplication 3 Click the Chang...

Page 20: ...essdoor 1 StarttheCD DVDPrinterApplication 2 Click the Change Cartridge icon on the window applicationtomovethecartridgeholdertothe changecartridge position or cancel toexit 3 Opentheprinteraccessdoor 4 Pullouttheribboncartridgefromitsposition Takecarethatthecartridgedoesnotmove griptheribbon cartridgeonbothsideswithyourfingers andpullitout 5 Replacewithanotherribboncartridgebypressingitagainst th...

Page 21: ...asitmay leadtodamage USINGTHEPRINTER CD DVD CATCH Figure 4 CD DVD CD DVD CATCH press and release Figure 5 Loading a Printable Disc 1 Opentheprinteraccessdoor 2 PlaceblankprintablediscfirmlyontotheCD DVDcatch RefertoFigure4 3 Closetheprinteraccessdoor Removing a Printed Disc 1 Opentheprinteraccessdoor 2 PressdownthecenteroftheCD DVDcatchtoreleasedisc RefertoFigure5 3 Closetheprinteraccessdoor ...

Page 22: ...FormattedText Edit icon 5 Awindow Area willappear 6 Configurethelayoutsetting Maketheselectionbyclickingthe respectivepatternicononthetopoftheeditingwindow 7 Select afont Selectthefonttype size styleandtextalignmentinthe editingwindow Edit thecontent Clickonotherlabelboxestocontinuewiththeireditingor outsidetheseboxestoexit 8 Print alabel Clicktheprint icon Theprintingdisplaydialogboxappears Click...

Page 23: ...t mode icon 3 Awindow Area willappear 4 Clickonthe Insert Change image icon 5 Awindow ImageAttributes willappear ImagePosition and Scaling canbeadjustedunderhere IMPORTINGIMAGES 6 Clickonthe LoadImage Thefiledialogboxwillappear selectthedirectoryandthefilethatyouwant toinsert 7 ClickOK 8 Theimagewillbeimportedtothelabelbox ...

Page 24: ...lothmoistenedwithcleanwater Donotusealcohol thinner orothervolatileagentsontheexteriorsurfacesasitcan damagethecasing Figure 6 Print head beneath carriage bar CREATINGCURVYTEXT 1 Clickonanylabelboxtoimportthecurvytext 2 Clickonthe CurvedText icon 3 Awindow Area willappear 4 Clickonthe EnterText icon 5 Awindow EditText willappear Awideselectionof FontText isavailable 6 Click DistanceFromCentre toad...

Page 25: ...SeeFigure7 Figure 7 3 TheCarriagewillmovetothecleaningposition UnplugthePower Cable and the USB Cable before cleaning the Print Head ClickOk 4 Useacottonbudstickmoistenedwithalcoholtocleantheprint head Youcanalsouseacommerciallyavailablecassettetape recorderheadcleaningkittocleantheprinthead Insertthetipof thecottonbudstickandslideitlightlybackandfroalongthearea shownintheFigure8 5 Plugthe2cablesb...

Page 26: ...per adjusttheprintingdesity 3 If the disc print surface is not suitable changethediscmedia Thermalprintablemediais recommended Theribboncartridgehasrunout Replacethecartridgeaccordingto loadingprocedure UnplugbothUSBandPoweradapter cablefromtheprinter Reconnect USBandPoweradaptercableto printer Removethecartridgefromtheprinter androlltheribbonwithasharpended objectatthehubofcartridgeuntilit is tig...

Page 27: ... ribbon cartridge in the printer The ribbon is finished Not enough ribbon for the next printing Loadaribboncartridgeintheprinter andtryagain Followtheprocedure underthesectionon loadingthe ribboncartridge Unloadtheribboncartridgeandloada newone Followtheprocedureunder thesectionon Replacingtheribbon cartridge Replacetheribboncartridgebefore proceedingonwiththenextprintjob ...

Reviews: