5
5
Main Objective:
Preparing the top for glue up. Glue top and allow 2 hours of clamping time
and prepare all small parts for assembly.
Step One-Preparing the Top
The top is pre-braced and you will begin by marking and cutting bracing and
then thinning out the bracing on the ends to fit into the kerfed lining on the
sides of the guitar.
Note:
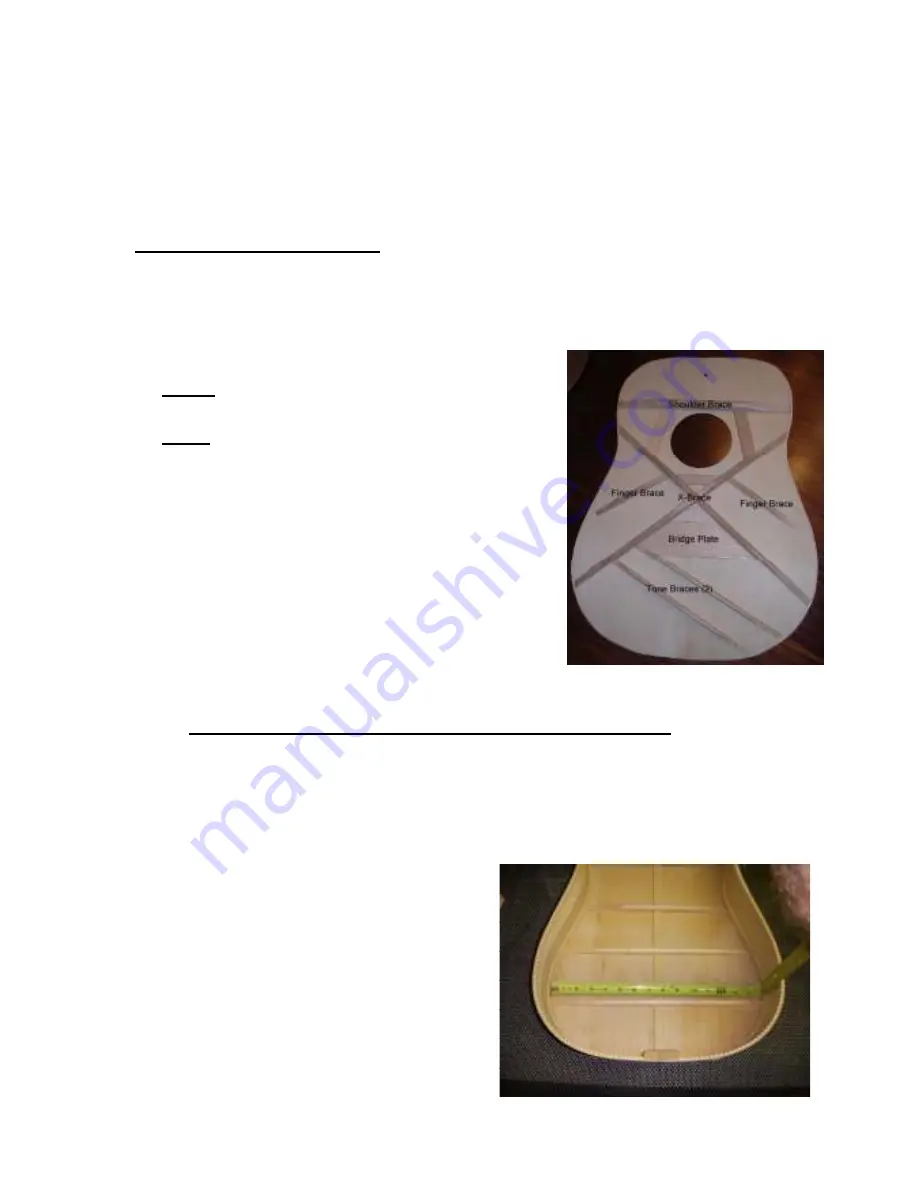
Identifying the braces. See picture.
Note:
The bracing on the top consists of the
Shoulder Brace, an X-Brace, 2 Tone Bars and
2 small Finger Braces as well as a Bridge
Plate.
It is important to note that the only braces that
touch the lining are the shoulder brace and X-
braces. All the others are scalloped flush to
the back of the top and cut short of the sides.
1)
HEADS-UP-Remove the shipping stretcher at this time.
The
stretcher is the wooden piece running through the length of the guitar
connecting the end block to the neck block. This is used for shipping
purposes only and to make a simple stretching jig (next step).
2)
Using a flexible tape measure, measure the distance between the
kerfed lining on the back at the widest part of the guitar.
3)
Using the wooden shipping
stretcher, take the previous
measurement and add ¼” (equal to
the kerfed lining on both sides).
4)
Cut the stretcher to that length.
a.
This length should be pretty
close to 15 ¼”. It’s always
easier to cut it a bit longer
and then have to shorten it.
b.
Slightly round both ends.


