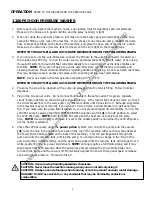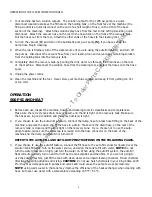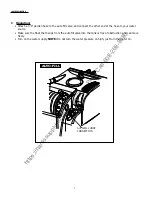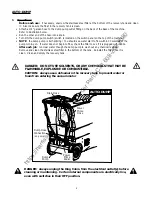
1200 PSI HIGH PRESSURE WASHER
1 Before each use, inspect the machine, hoses, and cleaning tools for cleanliness and completeness.
Make sure the hoses are in good condition and the spray nozzle(s) is tight.
2. When not using the auto-dump feature, just make sure the brass cap is screwed tightly on the hose
connector
fi tting on the rear of the machine. If you choose to use the auto-dump, connect the dump
hose to brass hose fi tting on the back of the machine, and place the open end of the hose in a drain.
Make sure the drain hose (recovery tank) is closed, and the lid is tight on the recovery tank.
REFER TO THE AUTO-FILL AND AUTO-DUMP INSTRUCTIONS ON THE FOLLOWING PAGES.
3. If you choose to use the auto-fi ll feature, connect the fi ll hose to the auto-fi ll connector (located over
the solution tank fi ll hole). Turn on the water source, and allow the tank to fi ll with water. When using
the
auto-fi ll system, the auto-fi ll fl oat will automatically turn on and turn off as the tank empties and
then
fi lls. NOTE: If you are not going to use the auto-fi ll system, just fi ll the tank with water and
cleaning chemical. Follow chemical directions regarding dilution and mixing. Do not use harsh chemicals;
they may damage seals in pumps and valves, and cause the pump to wear prematurely.
NOTE: Never use water with a temperature exceeding 130 °F / 54 °C.
REFER TO THE AUTO-FILL AND AUTO-DUMP INSTRUCTIONS ON THE FOLLOWING PAGES.
4. Pre-spray the area to be cleaned, with a pump-up sprayer, while the tank is fi lling. Follow chemical
directions.
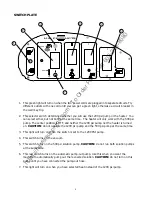
5. Plug in the two power cords. Do not connect both cords to the same outlet. The green, ‘separate
circuit’ locator light (1) on the switch plate should light up. If the locator light does not come on, check
the circuit breaker box in the wall, and/or try different outlets until it does turn on. Although all systems
in the machine may work correctly if you are not on two circuits, a circuit breaker in a wall panel may
trip. If you make sure the green light is turned on, you will prevent tripped circuit breakers. Turn on the
1200 PSI pump by placing the HIGH PRESSURE/HEAT selection switch (2) in the UP position, to select
the 1200 PSI Pump. NOTE: both the 1200 PSI pump and the heat can not operate at the same
time. NOTE: this switch (2) is off when it is set to the middle position and neither the 1200 PSI pump
nor the heater is selected.
6. Prime the 1200 psi pump using the ‘power prime’ system: turn on both the pump and the vacuum
(3), cover the hole in the vacuum hose barb on the top of the machine with your hand, then depress
the Power Prime Pedal (located on the back of the machine). This will pull trapped air through the
pump and into the recovery tank, priming the pump. You should notice a change in the ‘tone’ of the
pump (smoother, with less rattle), and the water being pulled into the recovery tank will change from a
white,
sputtering
fl ow to a clear, solid stream. NOTE: priming requires a full Holding tank, and it may
take between 20 to 90 seconds. Once the pump has primed, release the Power Prime Pedal, and
turn both the pump and the vacuum off. Momentarily depress the Power Prime pedal again to release
any built-up back pressure. Proceed to Step 9.
OPERATION
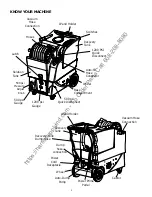
REFER TO THE DIAGRAMS ON THE PREVIOUS PAGE
CAUTION: Use care when handling hazardous chemicals.
CAUTION: Never leave the machine running when you are not actively using it.
CAUTION: Always use a defoamer when foaming occurs to prevent vacuum motor damage.
DANGER: Do NOT use solvents, or any chemicals that may be fl ammable, explosive or
combustible.
5
https://harrissupplyind.com - To Order Parts Call 608-268-8080


