O P E R AT I O N
9
WARNING:
Beware that after releasing the trigger, the blade will continue
spinning for several seconds. Keep a firm hold on the handle grips and
maintain control of the machine until the blade completely stops.
6.6
This machine is intended to be used with a vacuum with 200cfm
or more at all times. There is no instance where this machine should be
used without a vacuum or with water.
6.7
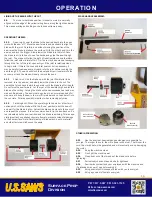
The accurate way: Lay the saw on its side in the same position
you would to change the blade. Using depth lock handle loosen so that the
blade and tool slide freely in adjustment slots. Lower the blade until it is
approximately where you want it. Measure with a tape measure or ruler to
confirm the depth you want. Then lock the adjustment lever.
6.8
The quick way: With the saw “off”, lower the blade on a flat
surface lifting the front wheels off the ground. The distance between the
bottom of the wheel and the ground will be the approximate depth of cut
+/- 1/8”.
WARNING:
It is important to verify the depth of cut immediately after start-
ing, and periodically during the job. If you are cutting deeper than you
panned, you will use a lot more joint fill material than you had intended.
Surface Prep
Division
P: 877-817- 6687 F: 813-621-7125
Visit us at www.ussaws.com
sales@ussaws.com
SETTING THE BLADE DEPTH
6.1
Follow all pre-operating instructions in section 5.0.
6.2
The machine should be unplugged from electricity before start-
ing this operation.
WARNING:
Never attempt to start the motor with the diamond blade
inserted in a joint or previous cut. The blade will turn as soon as the MC-
45 is started. This could damage the blade or cause the MC-45 to jump
backwards.
WARNING:
If the blade you are using has a “5/8-7/8” knockout (brass
bushing), remove it so that the arbor of the blade is set at 7/8”
6.3
Ensure the proper direction of the blade being used. This ma-
chine rotates the blade in an up-cut rotation which is counterclockwise.
6.4
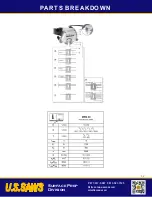
Insert the shank of the Blade nut through the spacers and blade
and thread onto the shaft of the grinder and tighten the nut with moderate
force. Over tightening will cause problems when it’s time to change the
blade.
WARNING:
Do not twist the blade in the cut. Never attempt to cut any
pattern or follow any joint that is not a straight line. Do not force the blade
forward. These actions could damage the blade and MC-45 unit.
6.5
The tool is equipped with a 1” port and is supplied with a 2”
expansion cuff for most 2” hoses. The hose is meant to have a snug fit
to prevent it from falling off during normal operation. *Cold weather will
make the hose more difficult to slip over the vacuum port.
6.0 OPERATIONS
VACUUM HOSE ATTACHMENT:


