background image


-  - - - - - - - - - - - - - - - - - - - - - - - - - - - -  

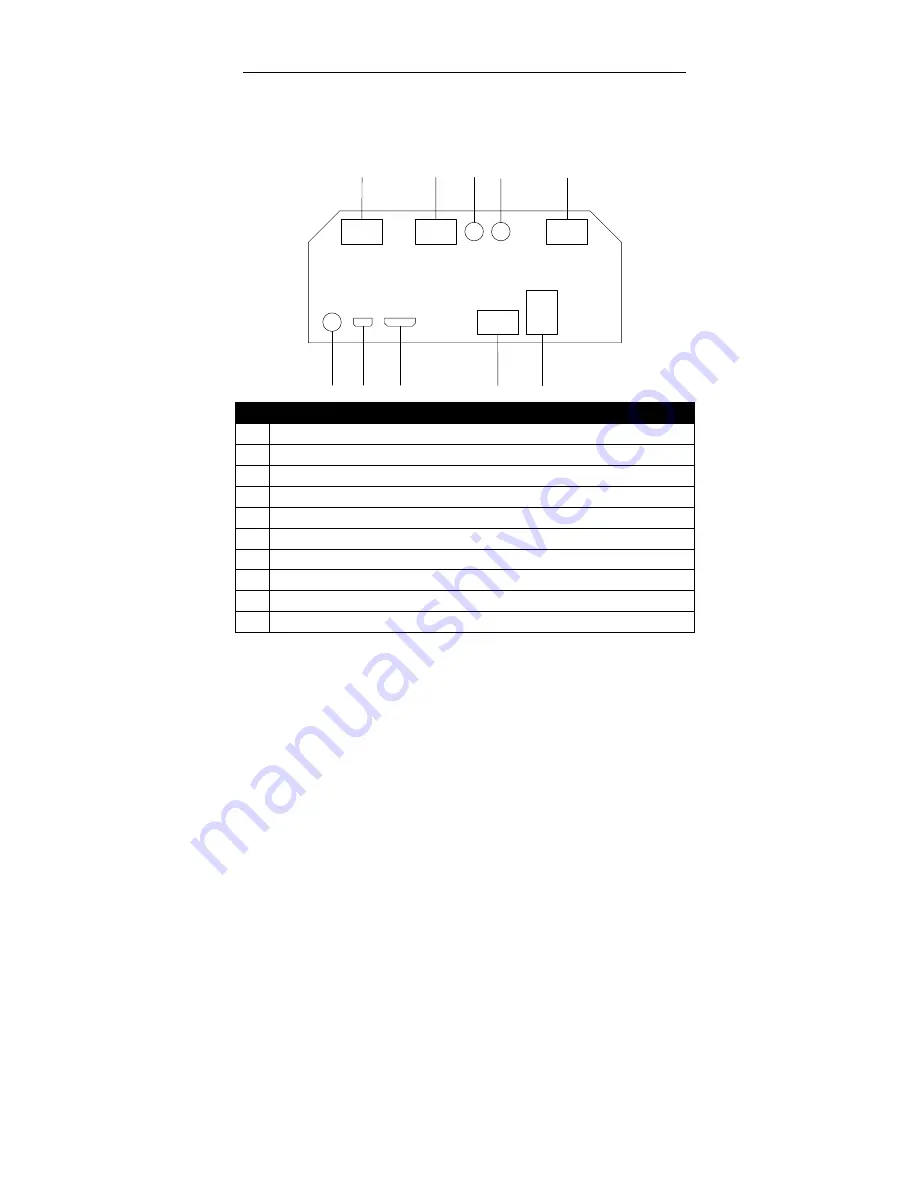
底部视图

                                                                                      Rear view 


1

2

3

4

5

6

7

8

9

10


说明/

DESCRIPTION


串口3(连接密码键盘)/com3(connect PIN pad)


钱箱口/


Cash Drawer1 Port


12V DC 输出/12V DC out 

24V DC 输入/24V DC input 

串口1连接密码键盘/com1(connect PIN pad)


音频口/Audio port 

USB OTG (接U盘)/USB OTG(connect U disk) 

HDMI


网口/RJ-45 LAN port 

10  USB 接口(接鼠标,键盘)/USB(connect mouse & keyboard) 


Summary of Contents for MB3000

Page 1: ...多功能商用终端 用户手册 MB3000 User Manual ...

Page 2: ...乐 业等不同业态的理想选择 The MB3000 is all in one touch terminal with its built in thermal printer and customer display There are two kinds hardware platform X86 and ARM running Android and windows system It is ideally suited to the most diverse range of markets in retail and hospitality 检查清单 Packaging list 打开包装后 请仔细检查内容 如果项目不全或受损 请联系经销商 After unpack the carton please check if the following items are include...

Page 3: ... view 说明 DESCRIPTION 1 刷卡器 选配 Magnetic Card Reader Optional 2 打印机开盖器 Printer Open Button 3 进纸按键 Paper Feed Button 4 打印机电源指示灯 Printer Power LED 5 打印机错误指示灯 Printer Error LED 6 打印机前盖 Printer Cover 7 液晶屏幕 触摸屏 9 7inch TFT LCD and Touch screen ...

Page 4: ...ction usually do not use this switch 说明 DESCRIPTION 1 24V电源开关 24V Power Switch 2 iButton 选配 Optional 3 主机开关 Power Switch 4 电源指示灯 Power LED 5 硬盘指示灯 Hard Disk LED 6 前 置 USB 口 连 接 鼠 标 键 盘 Front USB connect mouse keyboard 7 线仓盖 Cable Cover 8 客户显示器 Customer Display ...

Page 5: ... 连接密码键盘 com3 connect PIN pad 2 钱箱口 Cash Drawer1 Port 3 12V DC 输出 12V DC out 4 24V DC 输入 24V DC input 5 串口1连接密码键盘 com1 connect PIN pad 6 音频口 Audio port 7 USB OTG 接U盘 USB OTG connect U disk 8 HDMI 9 网口 RJ 45 LAN port 10 USB 接口 接鼠标 键盘 USB connect mouse keyboard ...

Page 6: ...d then turn on the right host power 拆卸硬盘 Dismantle HDD 1 双手按住线仓盖两侧标示处 向后抽出 拆下线仓盖后 露出硬盘托架 Press the position of both sides as marked in picture pull the cap back and take it down to show the hard disk bracket 2 按下硬盘托架上的卡扣 拔出硬盘托架 完成硬盘的拆卸 Press the button on the hard disk bracket pull the bracket out and get the hard disk ...

Page 7: ...攻螺丝 固定刷卡器 Fix the MSR with 2 supplied ST2 5 8 screws 打印纸安装 Install the Printer paper 1 将纸轴插入纸卷 Put paper roller into scroll 2 打开打印机开盖器 将纸卷 放入打印机 Press the printer open button and then put the scroll into printer 3 双手扶住机身并用大拇指 按下打印机前盖 用力推紧 Hold the machine and press hard the enclosure of printer with thumbs to stuff it up 打印机自检 Printer self test ...

Page 8: ...POSPrinter 选项卡后开始打印机测试 点击 Port Settings 后 可以进行接口设置 点击 Exit 或者关闭窗口退出程序 Click Open Devices then do the 6 tests as list 1 Click CashDrawer to test the cash drawer 2 Click IButton to test the IButton 3 Click Line Display to test the customer display 4 Click MSR to test the magnetic card reader 6 Click POSPrinter to test the printer 7 Click Port Settings you can set up to interface 8 Click Exit or clos...

Page 9: ...heck if the cable of the MSR Check if the serial port is set to COM6 打印机故障灯闪烁 Printer error light blinks 检查是否有打印纸 打印纸是否卡住不动 打印 机外壳是否按紧 Check if there is paper or if paper gets stuck or not Check the printer cover is tight enclosure 液晶屏显示不清晰 Display is not clear 设置屏幕分辨率为 1024 768 Setup the resolutions to 1024 768 无法连接网络 Unable to connect to the network 确保网线没有问题 检查网线插头安装正确 Make sure the cable all ri...

Page 10: ... 有阅读使用手册的情况下拆开机器 NOTE Please consult your supplier or service provider first if problem can t be solved Please don t dismantle the machine without related guide ...

Page 11: ...l interference in a residential installation This equipment generates uses and can radiate radio frequency energy and if not installed and used in accordance with the instructions may cause harmful interference to radio communications However there is no guarantee that interference will not occur in a particular installation If this equipment does cause harmful interference to radio or television ...

Reviews: